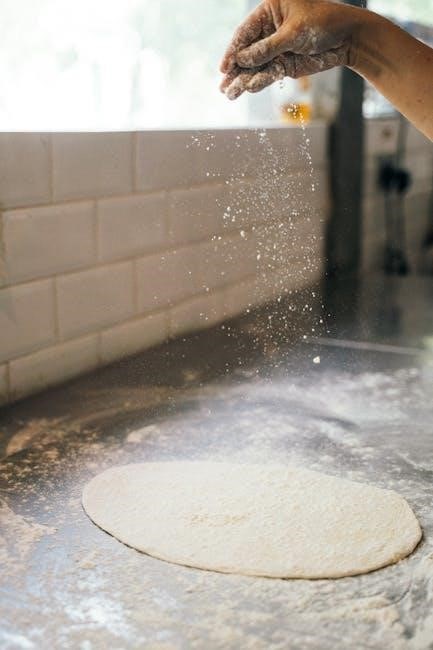
marcy exercise bike instruction manual

Marcy exercise bikes are trusted fitness equipment offering durability and ease of use․ With models like ME-708, NS-1201R, and NS-908R, they cater to various fitness needs, providing adjustable resistance, heart rate monitoring, and computer consoles for tracking progress․ Ideal for home workouts, Marcy bikes suit both beginners and advanced users, ensuring effective cardio sessions․

1․1 Overview of Marcy Exercise Bikes

Marcy exercise bikes are designed for home use, offering a combination of durability, comfort, and versatility․ Available in upright and recumbent models, they feature adjustable resistance, heart rate monitoring, and computer consoles for tracking progress․ With a focus on user-friendly design, Marcy bikes provide effective cardio workouts, catering to both beginners and advanced users․ Their compact build and affordable pricing make them a popular choice for personal fitness routines․

1․2 Importance of Reading the Manual

Reading the manual is crucial for safe and effective use of your Marcy exercise bike․ It provides essential information on assembly, operation, and maintenance, ensuring proper setup and functionality․ The manual highlights safety precautions, warranty details, and troubleshooting tips, helping you avoid potential issues․ By following the guidelines, you can maximize the bike’s features, maintain performance, and extend its lifespan, ensuring a safe and productive workout experience․

Safety Information

Ensure safety by following precautions: warm up before use, inspect the bike for damage, and avoid operation if malfunctioning․ Always read warnings and follow guidelines for proper use and maintenance to prevent injuries and extend equipment lifespan․

2․1 Pre-Exercise Precautions

Before using your Marcy exercise bike, ensure the machine is in proper working condition․ Always read the safety warnings and instructions provided in the manual․ Perform a thorough warm-up to prevent muscle strain․ Check for loose parts and ensure all adjustments are secure․ Avoid wearing loose clothing that could get caught in moving parts․ Consult a healthcare professional if you have any medical conditions․ Never operate the bike if it is malfunctioning․

2․2 Safety Guidelines During Use

Always follow safety guidelines while using your Marcy exercise bike․ Ensure the bike is on a level surface and keep loose clothing tied back․ Maintain proper posture to avoid injury and monitor your heart rate, especially if you have medical conditions․ Avoid overexertion and stay hydrated․ Keep children and pets away while exercising․ If dizziness or discomfort occurs, stop immediately and rest; Never operate the bike if it malfunctions․

2․3 Warning Labels and Symbols

Warning labels and symbols on Marcy exercise bikes are crucial for safe use․ They indicate potential hazards, proper assembly steps, and usage guidelines․ Symbols may include warnings for moving parts, electrical components, and weight limits․ Always read and follow these labels to avoid accidents․ They guide users on correct operation and maintenance, ensuring the bike functions safely and efficiently․ Adhering to these warnings helps prevent injuries and prolongs the bike’s lifespan․

Product Overview

Marcy exercise bikes are known for their sturdy construction and user-friendly consoles․ Available in upright and recumbent models, they offer adjustable resistance and heart rate monitoring for effective workouts․ Designed for home use, these bikes are durable, easy to assemble, and provide a comfortable exercise experience for all fitness levels․

3․1 Key Features of Marcy Exercise Bikes

Marcy exercise bikes feature adjustable resistance levels, heart rate monitoring, and LCD displays for tracking speed, distance, and calories․ They come in upright and recumbent models, offering durability, ease of assembly, and comfort․ The bikes are equipped with sturdy frames, ergonomic seating, and transportation wheels for easy mobility․ These features make Marcy exercise bikes ideal for home workouts, catering to both beginners and fitness enthusiasts with a focus on convenience and performance․

3․2 Different Models Available

Marcy offers a variety of exercise bike models, including the ME-709 recumbent bike and ME-708 upright bike․ Each model features unique designs, such as magnetic resistance and heart rate sensors․ The ME-709 is known for its regenerating magnetic system, while the ME-708 provides adjustable tension for customizable workouts․ These diverse options allow users to choose the bike that best fits their fitness goals and preferences, ensuring a tailored exercise experience․

Assembly Instructions

Assembly involves unboxing, inventorying parts, and following step-by-step guides․ Tools like Allen keys and wrenches are essential․ Carefully attach frames, seats, and handlebars, ensuring all bolts are secure․ Refer to the manual for specific instructions to avoid errors and ensure safety․

4․1 Unboxing and Inventory

Begin by carefully unboxing the Marcy exercise bike and inspecting for damage․ Organize all components, including the main frame, pedals, seat, handlebars, and hardware․ Cross-reference each part with the manual’s inventory list to ensure nothing is missing․ Pay attention to labeled items like Allen screws, bolts, and washers․ This step ensures a smooth assembly process and helps identify any potential issues early on․

4․2 Tools and Equipment Needed

To assemble your Marcy exercise bike, gather the necessary tools and equipment․ Typically required items include Allen wrenches (3mm and 6mm), a socket wrench or adjustable wrench, screwdrivers (Phillips and flathead), and bolts and nuts as specified in the manual․ Additional tools like lubricants or cleaning cloths may also be useful․ Ensure all tools are readily available to streamline the assembly process and prevent delays․

4․3 Step-by-Step Assembly Guide

Begin by attaching the front stabilizer to the main frame using Allen screws, curved washers, and domed nuts․ Next, connect the middle extension hand pulse wire to the rear extension and secure the support tube with the quick-release knob․ Attach the seat support tube to the sliding frame, then secure the back cushion and rear handlebar․ Connect pulse wires to the computer and ensure all bolts are tightened properly for stability and safety․

4․4 Tips for Challenging Assembly Parts

When assembling complex parts like the front stabilizer or seat support tube, use tools carefully to avoid stripping screws․ Handle pulse wires gently to prevent damage․ Tighten bolts gradually to ensure stability․ If struggling with alignment, refer to the exploded diagram․ For persistent issues, consult the manual or contact support․ Double-check all connections before use to ensure safety and functionality․

Operating the Exercise Bike

Start with a warm-up, then use the computer console to set goals and track progress․ Adjust resistance levels for intensity and monitor speed, distance, and calories burned․

5․1 Starting Your First Workout

Begin by reading the manual to understand bike features․ Warm up with light stretching to prevent injury․ Adjust the bike to fit your height and comfort․ Start with low resistance to ease into your routine․ Use the computer console to set time, distance, or calorie goals․ Monitor your progress and gradually increase intensity․ Cool down with gentle pedaling and stretching to avoid muscle strain․ Stay hydrated throughout your session․

5․2 Using the Computer Console

The computer console on your Marcy exercise bike offers essential functions to track your workout․ Press the “Mode” button to cycle through options like time, speed, distance, calories, and pulse․ Use “Set” to customize goals and “Reset” to clear data․ The auto-scan feature displays metrics every 4 seconds․ Ensure batteries are installed for optimal performance․ Adjust the console angle for visibility and start tracking your progress efficiently․

5․3 Adjusting Resistance Levels

Adjust resistance levels on your Marcy exercise bike using the tension control knob․ Turn clockwise to increase resistance for a more challenging workout or counterclockwise to decrease it․ The magnetic resistance system ensures smooth and quiet operation․ Start with a lower setting and gradually increase as your fitness improves․ Proper resistance adjustment helps optimize your workout, targeting specific fitness goals effectively․

5․4 Monitoring Your Progress

The computer console on your Marcy exercise bike tracks time, distance, speed, calories burned, and pulse․ Use the MODE button to select functions, and SET to customize values․ The SCAN mode cycles through metrics every 4 seconds, providing a comprehensive view of your workout․ Regularly monitoring these stats helps you stay motivated and adjust your routine to achieve fitness goals effectively․

Maintenance and Care

Regularly clean the bike, lubricate moving parts, and check for wear․ Proper maintenance ensures smooth operation and extends the lifespan of your Marcy exercise bike․

6․1 Regular Cleaning Schedule

Regular cleaning is essential to maintain your Marcy exercise bike’s performance․ Wipe down the frame, handles, and seat after each use with a damp cloth․ Use mild detergent for stubborn stains but avoid harsh chemicals․ Clean the console and buttons gently to prevent damage․ Check and clean the flywheel and pedals monthly to ensure smooth operation․ A consistent cleaning routine prevents dust buildup and extends the bike’s lifespan;

6․2 Lubrication of Moving Parts

Regular lubrication of moving parts is crucial for smooth operation․ Apply silicone-based spray to the flywheel, pedals, and any other mechanical joints every 3-6 months․ Wipe off excess lubricant with a clean cloth to avoid residue buildup․ Avoid using household oils, as they may attract dust․ Proper lubrication reduces friction, prevents wear, and ensures quiet, efficient performance․ Always refer to the manual for specific lubrication points and recommendations․

6․3 Checking and Replacing Wear Parts

Inspect pedals, belts, and bolts regularly for wear․ Replace worn pedals or belts to prevent malfunctions․ Tighten loose bolts and screws to ensure stability․ Lubricate moving parts as needed․ If a part is damaged, refer to the manual for replacement instructions․ Use genuine Marcy replacement parts for optimal performance․ Regular checks help maintain safety and extend the bike’s lifespan․ Always follow manufacturer guidelines for part replacement and maintenance․

Troubleshooting Common Issues

Identify symptoms like console malfunctions or mechanical issues․ Check connections and tighten parts․ Consult the manual for error codes and solutions․ Regular maintenance prevents breakdowns․

7․1 Computer Console Problems

Common console issues include blank screens, inaccurate readings, or unresponsive buttons․ Check battery connections and ensure proper installation․ Resetting the console by disconnecting power for 30 seconds often resolves issues․ Verify sensor wires are securely connected, especially pulse and speed sensors․ If problems persist, refer to the manual or contact support for assistance or potential part replacement․

7․2 Mechanical Issues and Solutions

Common mechanical issues include loose parts, squeaking, or uneven pedal motion․ Tighten all bolts and screws regularly․ Lubricate moving parts like the flywheel and pedals․ For brake issues, adjust the tension or replace worn pads․ Check the belt or chain for proper alignment and tension․ If problems persist, refer to the manual for specific adjustments or contact customer support for repair assistance․

7․3 Understanding Error Codes

Error codes on Marcy exercise bikes indicate specific issues․ Codes like “E1” or “E2” often relate to console malfunctions or sensor problems․ Refer to the manual for code meanings, as solutions vary․ Common fixes include resetting the console, checking sensor connections, or recalibrating components․ If issues persist, contact customer support for further assistance or repair options․

Additional Information

Marcy exercise bikes come with warranties, disposal guidelines, and online resources․ Refer to the manual for support options and sustainability tips to ensure longevity and proper usage․

8․1 Warranty and Support

Marcy exercise bikes are backed by a limited warranty covering defects in workmanship and materials․ The warranty typically lasts for one year and is valid for home use only․ Registration may be required to activate coverage․ For support, users can access online resources, FAQs, and contact customer service․ Refer to the manual or manufacturer’s website for specific terms and conditions․ Warranty details vary by model and region․

8․2 Proper Disposal of Packaging

Dispose of packaging responsibly by recycling materials like cardboard, plastic, and paper․ Follow local recycling guidelines to minimize environmental impact․ Ensure all packaging waste is taken to public recycling centers․ Proper disposal helps reduce landfill waste and supports eco-friendly practices․ Refer to the warranty section for additional guidance on sustainable disposal methods․ Always check local regulations for specific instructions․

8․3 Accessing Online Resources

Access online resources for Marcy exercise bikes through official websites and platforms like ManualsLib or Pure-Tec Fitness․ Download PDF manuals, assembly guides, and troubleshooting tips․ Visit Marcy’s support page for FAQs, user guides, and software updates․ Utilize the Marcy app for tracking workouts and custom routines․ Online forums and community groups also offer valuable insights and user experiences to enhance your fitness journey with Marcy equipment․

conair clothing steamer instructions

Conair Clothing Steamer is a versatile, portable solution for effortlessly removing wrinkles from various fabrics․ Its compact design and advanced features make it perfect for quick touch-ups at home or on the go․

Overview of the Conair Clothing Steamer

The Conair Clothing Steamer is a sleek, user-friendly appliance designed to simplify fabric care․ It features a powerful steam generator, a compact design, and multiple attachments for versatile use․ The steamer is lightweight, making it easy to maneuver and store․ It includes a pant clip system for smoothing trousers and a cushion brush for delicate fabrics․ With its advanced steam technology, it effectively removes wrinkles without scorching, making it suitable for a wide range of fabrics, from silk to cotton․ The steamer also comes with a water reservoir that uses distilled water for optimal performance․ Its ergonomic handle and intuitive controls ensure a comfortable and efficient steaming experience․ Perfect for home use or travel, the Conair Clothing Steamer offers a convenient alternative to traditional ironing․

Benefits of Using a Clothing Steamer

Using a clothing steamer offers numerous advantages over traditional ironing․ It gently removes wrinkles without scorching or damaging fabrics, making it ideal for delicate materials like silk and wool․ Steamers are also faster, requiring less time and effort compared to ironing․ They are portable and easy to use, perfect for quick touch-ups at home or while traveling․ Additionally, steamers freshen fabrics by removing odors and allergens, leaving clothes smelling clean․ They are also eco-friendly, using less energy than irons․ The Conair Clothing Steamer, with its advanced features, ensures efficient and safe fabric care, making it a practical addition to any wardrobe maintenance routine․ Its versatility and effectiveness make it a preferred choice for maintaining a polished and professional appearance effortlessly․

Preparing the Steamer for Use

Filling the reservoir with distilled water and plugging in the steamer are essential first steps․ Ensure all parts are securely attached and the area is clear for safe operation; Always follow safety guidelines․

Filling the Water Reservoir with Distilled Water

Fill the water reservoir with distilled water to prevent mineral buildup and ensure optimal performance․ Avoid using tap or mineral water, as this can lead to scaling and reduce the steamer’s efficiency․ Locate the reservoir, usually at the base of the steamer, and remove it according to the manufacturer’s instructions․ Carefully pour distilled water into the reservoir up to the recommended level․ Replace the reservoir securely and ensure it is properly aligned to avoid any leaks during operation․ This step is crucial for maintaining the longevity of your Conair Clothing Steamer and ensuring consistent steam output․ Always refer to the user manual for specific guidelines on water levels and reservoir placement․

Plugging in the Steamer and Turning It On

Once the water reservoir is filled, locate a nearby electrical outlet and plug in the steamer․ Ensure the outlet is grounded and suitable for the steamer’s power requirements․ Press the ON/OFF button to activate the device․ You will hear a gentle humming noise as the steamer begins to heat up․ Wait for the indicator light to turn on, signaling that the steamer is ready for use․ Some models may also produce a soft beep or emit steam immediately once preheated․ Allow the steamer to reach the optimal temperature before starting the steaming process․ Always ensure the steamer is placed on a stable, heat-resistant surface while in operation․ If your model has multiple steam settings, you can adjust them using the control buttons provided․ Never leave the steamer unattended while it is turned on․

Operating the Steamer

Operating the Conair Clothing Steamer involves holding it correctly, using steam jets to remove wrinkles, and utilizing the pant clip system for efficient fabric smoothing․

Holding the Steamer Correctly

Holding the steamer correctly ensures safe and effective use․ Always grip the steamer by its handle while steaming or when the unit is hot․ Avoid holding the steamer flush against fabrics; instead, maintain a slight angle to allow steam to flow freely․ Move the steamer slowly, about one inch per second, to evenly distribute heat and remove wrinkles․ Keep the steam jets just above the fabric to prevent scorching․ For stability, hold the garment taut with one hand while operating the steamer with the other․ This technique helps in smoothing wrinkles efficiently without damaging the fabric․ Always direct the steam flow away from your body to avoid accidental burns․ Proper handling ensures optimal performance and prolongs the steamer’s lifespan․

Directing Steam Toward Garments

Directing steam toward garments effectively is key to removing wrinkles․ Hold the steamer at a slight angle and move it slowly, about one inch per second, above the fabric․ Keep the steam jets just above the garment to avoid scorching or damaging delicate materials․ For best results, steam fabrics while they are hanging or laid flat on a heat-resistant surface․ Start from the top of the garment and work downward, ensuring even coverage․ When steaming pants, use the pant clip system to hold the fabric taut, allowing steam to penetrate deeply․ For tricky areas like collars or seams, direct the steam flow precisely to smooth wrinkles․ Always steam from the inside of the garment for delicate or silk fabrics to prevent sheen loss․ This method ensures efficient wrinkle removal while preserving fabric integrity․

Using the Pant Clip System

The Conair Clothing Steamer features a pant clip system designed to simplify steaming trousers and other garments․ Attach the clip to the waistband of your pants to hold them firmly in place․ This allows for easy steaming of both legs simultaneously․ Ensure the fabric is taut within the clip to maintain even steam distribution․ Direct the steam jets downward along the fabric, starting from the top and moving toward the hem․ The clip system prevents wrinkles from reforming and helps achieve a crisp, professional finish․ It is particularly useful for maintaining creases in dress pants or chinos․ For optimal results, steam one leg at a time, adjusting the clip as needed to accommodate different fabric types and sizes․ This feature makes the Conair steamer a versatile tool for both everyday and special-care garments․

Maintenance and Safety Tips

Regularly clean the steamer to prevent mineral buildup․ Always unplug before cleaning and allow it to cool․ Avoid placing on heat-sensitive surfaces and store properly after use․ Ensure all safety precautions are followed to maintain optimal performance and longevity of the device․

Cleaning the Steamer Regularly

Cleaning your Conair Clothing Steamer is essential for maintaining its efficiency and longevity․ Start by unplugging the device and allowing it to cool completely to avoid any accidental burns or damage․ Once cooled, remove any remaining water from the reservoir to prevent mineral buildup․ Use a soft, damp cloth to wipe down the exterior and internal parts, paying attention to the steam head and nozzle where buildup tends to occur․ For tougher mineral deposits, mix equal parts water and white vinegar in the reservoir, let it sit for about 10 minutes, then rinse thoroughly․ Avoid using harsh chemicals or abrasive scrubbers, as they may damage the steamer’s surfaces․ Regular cleaning ensures consistent steam production and prevents clogging․ Always refer to the user manual for specific cleaning recommendations tailored to your model․

Allowing the Steamer to Cool Before Storage

After each use, it’s crucial to allow the Conair Clothing Steamer to cool down completely before storing it․ Turn off the device, unplug it, and let it sit for at least 30 minutes․ This prevents heat damage to the unit or its components․ Never store the steamer while it is still warm, as this can lead to moisture buildup and potential mold growth․ Additionally, ensure the steam head and water reservoir are free from excess water before storing․ If water remains, tilt the steamer gently to drain it completely․ Proper cooling and storage help maintain the steamer’s performance and extend its lifespan․ Always place it on a heat-resistant surface during the cooling process to avoid damaging surfaces․ Regularly checking for any water residue ensures the steamer remains in optimal condition for future use․

Troubleshooting Common Issues

If the steamer stops producing steam, check the water level and ensure it’s properly heated․ Clean the unit regularly to avoid mineral buildup and maintain optimal performance․

What to Do If the Steamer Stops Producing Steam

If the Conair Clothing Steamer stops producing steam, first ensure the water reservoir is filled with distilled water and not empty․ Check that the unit is properly plugged in and turned on․ If steam output continues to be an issue, it may be necessary to clean the steamer․ Mineral buildup from tap water can block the steam vents, so regular descaling is recommended․ Allow the steamer to cool, then use a soft brush or cloth to clean the vents and internal components․ If the problem persists, refer to the user manual or contact Conair customer support for further assistance․ Regular maintenance can help prevent such issues and ensure the steamer operates efficiently․

blackstone instructions

Safety Precautions and Guidelines

Always read the user manual carefully before using your Blackstone griddle. Ensure proper ventilation, avoid overheating, and keep children away. Use oven mitts for handling hot surfaces and suitable utensils to prevent scratching the griddle surface.

1.1 Food Safety Tips for Blackstone Griddles

To ensure safe and enjoyable cooking with your Blackstone griddle, follow these essential food safety tips:

  • Proper Food Handling: Always wash your hands before and after handling food. Use separate utensils and cutting boards for raw meats, poultry, and seafood to prevent cross-contamination.
  • Cooking Temperatures: Use a food thermometer to ensure meats are cooked to safe internal temperatures (e.g., 165°F for poultry, 145°F for beef). This prevents undercooking and foodborne illnesses.
  • Storage and Hygiene: Store perishable foods in sealed containers at appropriate temperatures before and after cooking. Clean the griddle surface thoroughly after each use to avoid bacterial growth.
  • Avoid Cross-Contamination: Keep raw and cooked foods separate on the griddle. Use disposable plates or trays for raw meats to prevent juices from coming into contact with cooked or ready-to-eat foods.
  • Regular Cleaning: After cooking, scrub the griddle with a stiff brush and mild detergent, then rinse thoroughly. Seasoning the griddle regularly also helps maintain a clean, non-stick surface.

By following these guidelines, you can enjoy a safe and satisfying grilling experience with your Blackstone griddle.

1.2 Electric Griddle Safety Measures

Electric griddles require careful handling to ensure safe operation. Always follow these safety measures:

  • Avoid Water Exposure: Never submerge the electric griddle in water or expose electrical components to moisture, as this can cause short circuits or shocks.
  • Use Proper Power Sources: Plug the griddle directly into a grounded electrical outlet. Avoid using extension cords unless necessary, and ensure they are rated for the griddle’s power consumption.
  • Keep Children Away: Maintain a safe distance from children while the griddle is in use, as the surface can reach high temperatures.
  • Prevent Overheating: Monitor the griddle’s temperature settings and avoid leaving it unattended. Overheating can damage the unit or pose a fire hazard.
  • Handle with Care: Use oven mitts or tongs to handle hot surfaces. Never touch the griddle surface with bare hands or metal utensils, as this can cause burns or scratches.
  • Regular Maintenance: Inspect cords and plugs for damage before use. Replace any worn or damaged parts immediately to prevent electrical hazards.

By adhering to these electric griddle safety measures, you can ensure a safe and enjoyable cooking experience with your Blackstone griddle.

Assembly Instructions for Blackstone Models

Follow the user manual for precise assembly steps. Gather tools like Allen wrenches and screwdrivers. Attach legs, side panels, and shelves securely. Ensure all bolts are tightened properly for stability. Refer to the guide for a perfect setup.

2.1 Tools and Parts Required for Assembly

Before starting, ensure you have all necessary tools and parts. Common tools include Allen wrenches, screwdrivers, and pliers. Parts typically include griddle body, cart base, side panels, shelves, and control knobs. Refer to your specific model’s manual for a detailed list to avoid missing any components. Proper assembly requires matching the parts exactly as outlined in the guide. Missing items may delay the process, so double-check your package contents. Additional hardware like bolts, screws, and washers should be included. Organize all parts before beginning to streamline the assembly process. If any items are damaged or missing, contact Blackstone support immediately. Always follow the instructions step-by-step to ensure a secure and functional setup. Taking the time to prepare thoroughly will make assembly smoother and less frustrating. A well-organized approach guarantees your Blackstone model is assembled correctly and safely.

2.2 Step-by-Step Assembly Process

Begin by carefully unpacking all components and verifying the parts against the manual. Start with the griddle body and attach the cart base using the provided bolts. Secure the side panels to the cart base, ensuring alignment. Next, install the rear panel and shelves, tightening all connections firmly. Attach the control knobs to the griddle top, ensuring proper orientation. For models with a hood, align it with the griddle body and secure it with the provided hardware. Double-check all connections for stability. Place the griddle on a level surface to ensure even heating. Finally, test the griddle by turning it on and verifying that all controls function correctly. Always follow the sequence outlined in your specific model’s manual to avoid errors. If unsure, consult the troubleshooting section or contact Blackstone support for assistance. Proper assembly is crucial for safe and efficient operation.

Maintenance and Cleaning

Regularly clean your Blackstone griddle with a scraper and water to remove food residue. Avoid harsh chemicals and abrasive cleaners. Dry thoroughly after cleaning and season periodically to maintain the non-stick surface and prevent rust.

3.1 Proper Cleaning Techniques for Blackstone Griddles

Proper cleaning is essential to maintain your Blackstone griddle’s performance and longevity. After each use, allow the griddle to cool slightly before cleaning. Use a soft sponge or scraper to remove food residue, avoiding abrasive materials that could scratch the surface. For tougher stains, mix baking soda and water to create a paste, and gently scrub the area. Rinse with warm water and dry thoroughly to prevent rust. Avoid using harsh chemicals or dishwashers, as they can damage the griddle’s finish. Regular seasoning is also crucial to maintain the non-stick surface and protect the griddle from rust. After cleaning, apply a thin layer of cooking oil and heat the griddle to ensure the oil is evenly distributed. This process will help maintain the griddle’s condition and ensure optimal cooking results. By following these cleaning and seasoning steps, you can keep your Blackstone griddle in excellent shape for years to come.

3.2 Seasoning and Longevity Tips

Seasoning is vital for maintaining your Blackstone griddle’s performance and extending its lifespan. Before the first use, apply a thin, even layer of cooking oil to the entire surface and heat it at medium-high temperature for 30 minutes. Repeat this process 2-3 times to build a durable non-stick coating. For regular maintenance, clean the griddle thoroughly after each use and reapply a small amount of oil. Avoid using abrasive cleaners or metal scourers, as they can strip away the seasoning. Store your griddle in a dry place to prevent rust and ensure it remains ready for future use. Seasoning not only protects the griddle but also enhances cooking results by preventing food from sticking. By following these tips, you can enjoy a well-performing Blackstone griddle for many years. Regular maintenance and proper care will keep your griddle in excellent condition, ensuring consistent cooking quality and durability.

Troubleshooting Common Issues

Troubleshooting your Blackstone griddle can help resolve common problems and ensure optimal performance. One of the most frequent issues is uneven heating, which can be addressed by ensuring the griddle is preheated properly and that the burner flames are evenly distributed. If rust appears, sand the affected area and reseason the griddle immediately. Food sticking to the surface often results from insufficient seasoning or improper cleaning; reapplying a thin layer of oil and avoiding harsh cleaners can resolve this. For electric griddles, check the power connection and ensure the thermostat is functioning correctly. If the griddle does not heat up, verify that the electrical outlet is working and that no loose connections exist. Regular maintenance, such as cleaning and seasoning, can prevent many of these issues. By addressing problems promptly and following proper care routines, you can extend the lifespan of your Blackstone griddle and maintain its cooking efficiency.

bunk bed assembly instructions pdf

This guide provides step-by-step instructions for assembling bunk beds safely and efficiently. Follow these directions carefully to ensure stability and functionality. Start with proper preparation and tools.

Overview of Bunk Bed Assembly Process

The bunk bed assembly process involves several key steps, starting with unpacking and organizing components. Begin by assembling the lower bunk frame, attaching support slats, and ensuring stability. Next, connect the upper bunk, secure support arms, and install guardrails for safety. Finally, attach the ladder and perform a thorough inspection to ensure all parts are tightly secured. Follow the instructions carefully to achieve a safe and sturdy structure.

Importance of Following Assembly Instructions

Following the provided assembly instructions is crucial for ensuring the bunk bed’s stability and safety. Proper assembly prevents structural issues and potential hazards, especially for children. Misaligned or loose parts can lead to instability and accidents. By adhering to the guidelines, you ensure the bed meets safety standards and lasts longer. Always double-check each step and verify all bolts and screws are securely tightened before use.

Tools and Materials Required for Assembly

The assembly process typically requires basic tools like a screwdriver, Allen wrench, and socket wrench. Ensure all materials, including bolts, screws, and support slats, are accounted for. Refer to the provided hardware list to confirm no parts are missing. Having a second person assist can simplify tasks like lifting and stabilizing components during assembly. Organize tools and parts beforehand to streamline the process efficiently.

Safety Considerations Before Assembly

Always follow safety guidelines to prevent accidents. Ensure the area is clear and stable. Use guardrails and adhere to weight limits for optimal safety and structural integrity.

Guardrail Installation and Safety Precautions

Install guardrails on both long sides of the upper bunk for safety. Ensure the mattress thickness does not exceed 6.3 inches and is at least 5 inches below the guardrail edge. Always follow manufacturer instructions for proper installation. Double-check all bolts and screws for tightness. Keep the area around the bed clear to prevent tripping hazards. Never exceed the recommended weight limit to maintain stability and prevent accidents.

Weight Limits and Mattress Size Recommendations

Ensure the mattress thickness on the upper bunk does not exceed 6.3 inches (160 mm) and is at least 5 inches (127 mm) below the guardrail edge. Adhere to the recommended weight limit to prevent instability. Use a mattress that fits snugly within the frame dimensions for optimal safety. Always refer to the manufacturer’s guidelines for specific weight and size requirements to ensure proper assembly and functionality.

Gathering Tools and Parts

Collect all tools and components before starting. Ensure you have an Allen wrench, screwdriver, and pliers. Verify the presence of frames, support slats, bolts, and screws. Organize everything systematically to avoid delays during assembly.

Unpacking and Organizing All Components

Begin by carefully unpacking all boxes and laying out the components. Check for completeness and inspect for damage. Organize parts by type or label, referencing the instruction manual. Separate frames, slats, bolts, and screws into labeled groups. This step ensures efficiency and prevents delays during assembly. Use the provided inventory list to verify every item is accounted for before proceeding.

Checking for Missing or Damaged Parts

Before starting assembly, thoroughly inspect all components for damage or defects. Cross-reference the inventory list to ensure no parts are missing. Missing or damaged items can delay assembly and compromise safety. If issues are found, contact the manufacturer immediately. This step is crucial to ensure all pieces are in perfect condition for a secure and stable bunk bed setup.

Preparing the Workspace

Clear the assembly area of furniture and obstructions. Lay down protective coverings to prevent damage to floors and surfaces. Ensure good lighting for visibility during assembly.

Clearing the Assembly Area

Before starting, move all furniture and obstructions away from the assembly space. Cover the floor with drop cloths or protective mats to prevent damage. Ensure the area is well-lit and free from distractions. Remove any fragile or breakable items nearby. Clearing the space ensures you have enough room to work comfortably and safely, reducing the risk of accidents or damage during assembly. A clean workspace promotes efficiency and focus.

Protecting the Floor and Surroundings

Lay down protective covers like old sheets, cardboard, or specialized floor mats to shield your floor from tool drops or part scratches. Use foam pads or cloth buffers on any surfaces that may come into contact with the bed frame. Securely tape these protectants in place to prevent shifting during assembly. Protecting your surroundings ensures your home remains undamaged and keeps the workspace clean, minimizing cleanup afterward.

Assembling the Lower Bunk

Attach the side rails to the lower bunk frame, ensuring they are aligned and securely fastened. Install the legs and support slats for stability and strength.

Step-by-Step Instructions for the Lower Bunk Frame

Place the lower bunk frame on a flat surface and attach the side rails to the ends. Secure the legs to the corners, ensuring they are tightly bolted. Next, align the support slats evenly across the frame and fasten them using the provided screws. Double-check that all bolts are tightened firmly for stability. Finally, verify the frame is level before proceeding to the upper bunk assembly.

Attaching Support Slats and Mattress Base

Begin by placing the support slats evenly across the lower bunk frame, ensuring proper alignment with the pre-drilled holes. Secure each slat using the provided screws, tightening firmly to avoid movement. Once all slats are in place, position the mattress base on top, ensuring it fits snugly and aligns with the frame edges. Check that the mattress base is level and stable before placing the mattress. Ensure all connections are tight for optimal support and safety.

Attaching the Upper Bunk

Securely connect the upper bunk to the lower frame using the provided bolts and support arms. Ensure stability by tightening all connections firmly and evenly.

Connecting the Upper Bunk to the Lower Frame

Align the upper bunk frame with the lower frame, ensuring all pre-drilled holes match. Insert bolts through the designated holes and tighten securely. Use a wrench to ensure a snug fit. Double-check alignment and stability before proceeding. Verify that all connections are even and the structure feels sturdy. Avoid over-tightening, which may damage the material. Ensure the upper bunk is level and firmly attached to the lower frame for safety and durability.

Securing Support Arms and Bolts

Attach support arms to the upper bunk frame, aligning them with the lower frame’s mounting points. Insert bolts through the pre-drilled holes and tighten using an Allen wrench or screwdriver. Ensure arms are evenly spaced and firmly secured. Tighten all bolts in a star pattern to maintain balance. Check that the structure feels stable and evenly supported. Avoid over-tightening, which may strip screws. Verify that all connections are snug and the bunk bed remains level for optimal safety.

Adding Guardrails and Ladder

Install guardrails on both long sides of the upper bunk for safety. Assemble the ladder according to instructions and securely attach it to ensure easy, safe access to the upper bunk.

Installing Guardrails for Safety

Guardrails must be installed on both long sides of the upper bunk to ensure safety. Attach them securely to the bed frame, ensuring they cover the full length. The mattress thickness on the upper bunk should not exceed 6.3 inches, with the mattress surface at least 5 inches below the guardrail. Tighten all bolts and screws to prevent any loose parts. Always follow the manufacturer’s instructions for proper installation and safety precautions.

Assembling and Attaching the Ladder

Assemble the ladder by attaching the sides and rungs according to the manufacturer’s instructions. Ensure all bolts and screws are securely tightened. Attach the ladder to the upper bunk frame, making sure it is stable and evenly aligned. Double-check the ladder’s connection points for tightness to prevent any movement or instability during use. Follow safety guidelines to ensure secure access to the upper bunk.

Final Checks and Adjustments

Verify all parts are securely attached and tightened. Ensure the bunk bed is level and stable, making necessary adjustments. Double-check guardrails and ladder stability for safety.

Tightening All Bolts and Screws

After assembling, ensure all bolts and screws are tightened securely. Use an Allen wrench or screwdriver as specified. Double-check all connections, especially for the upper bunk and ladder. Tighten any loose parts firmly to prevent instability. Refer to the instructions for torque specifications. Recheck the entire structure for stability and safety. Ensure no bolts are left loose to avoid potential wobbling or structural weakness.

Ensuring Stability and Levelness

Use a spirit level to verify the bunk bed is perfectly horizontal. Ensure all legs are firmly on the ground and the frame is balanced. Adjust the feet if necessary to compensate for uneven flooring. Check that the upper bunk aligns with the lower frame and that guardrails are secure. Stability is crucial for safety, so double-check all connections and supports before final use.

Troubleshooting Common Issues

Address wobbling by tightening loose bolts and checking for missing parts. Inspect for misaligned frames and adjust as needed. Refer to instructions for solutions.

Resolving Wobbling or Instability

Check all bolts and screws for tightness, especially at connection points. Ensure the bed is on a level surface. Verify weight limits are not exceeded. Inspect mattress thickness to ensure it meets specifications. If instability persists, re-examine frame alignment and reattach any loose parts. Regularly inspect for wear and tear. Follow manufacturer guidelines for additional support if needed. Always refer to the instructions for specific solutions.

Fixing Misaligned or Loose Parts

Begin by tightening all bolts and screws, ensuring they are secure. Check alignment by referring to the assembly guide. If parts are misaligned, carefully disassemble and realign them, ensuring proper fit. Use a rubber mallet to gently tap pieces into place. Reassemble and tighten again. Verify mattress size and ensure it fits correctly. If instability remains, consider consulting additional resources or contacting support for assistance.

Maintenance and Care Tips

Regularly inspect the bunk bed for stability and safety. Tighten any loose bolts or screws periodically. Clean the bed regularly to maintain hygiene and durability.

Cleaning and Inspecting the Bunk Bed

Regularly vacuum and wipe the bunk bed with a damp cloth to remove dust and dirt. Inspect all bolts, screws, and joints for tightness. Check for any signs of wear or damage, such as cracks or loose parts. Ensure guardrails are secure and properly aligned. Replace any worn-out components promptly to maintain safety and stability. Cleaning and inspecting regularly will extend the lifespan of your bunk bed.

Regular Maintenance for Longevity

Perform routine checks on all hardware and tighten any loose screws or bolts. Lubricate moving parts like ladder hinges to ensure smooth operation. Inspect wood and metal components for signs of damage or corrosion. Address any issues promptly to prevent further deterioration. Regular maintenance will help extend the lifespan of your bunk bed and ensure it remains safe and functional for years to come.

Congratulations! You’ve successfully assembled your bunk bed by following the detailed instructions. Proper assembly ensures safety, durability, and functionality. Regular maintenance and inspections will extend its lifespan. Always prioritize weight limits and safety guidelines for optimal performance. Enjoy your sturdy and comfortable bunk bed, perfect for restful nights and creating lasting memories. Thank you for choosing this guide to help you achieve a seamless assembly process.

ninja foodi air fryer instruction manual

The Ninja Foodi Air Fryer is a versatile kitchen appliance that combines air frying with other advanced cooking functions. Designed for convenience and efficiency, it offers healthy cooking alternatives while maintaining crispy textures. With its user-friendly interface and robust features, the Ninja Foodi Air Fryer has become a popular choice for home cooks. This guide will walk you through its features, setup, and usage to help you make the most of your cooking experience.

1.1 Overview of the Ninja Foodi Air Fryer

The Ninja Foodi Air Fryer is a multi-functional appliance that combines air frying, baking, roasting, and dehydrating capabilities. It uses advanced DualZone Technology, allowing simultaneous cooking of two foods with different settings. With its TenderCrisp Technology, it delivers crispy results with minimal oil. Designed for efficiency, it features a digital display, customizable settings, and a spacious non-stick basket. Perfect for healthier, convenient cooking.

1.2 Key Features and Benefits

The Ninja Foodi Air Fryer boasts a range of impressive features, including DualZone Technology for simultaneous cooking, a digital control panel for precision, and TenderCrisp Technology for crispy results. Its large capacity and non-stick basket ensure even cooking and easy cleanup. Health-conscious users will appreciate the minimal oil required, while the versatile functions like dehydrate, roast, and bake offer endless meal possibilities, making it a valuable addition to any kitchen.

Unboxing and Initial Setup

Upon unboxing, ensure all components like the main unit, baskets, and crisper plate are included. Follow safety guidelines and read the manual before first use.

2.1 Unboxing the Ninja Foodi Air Fryer

Carefully unpack the Ninja Foodi Air Fryer, ensuring all components are included, such as the main unit, baskets, crisper plate, and accessories. Check for any damage and verify all items against the manual. Before first use, read the safety guidelines and instructions thoroughly to ensure proper setup and operation. This step ensures a safe and efficient cooking experience.

2.2 Pre-Use Checklist and Safety Precautions

Before using your Ninja Foodi Air Fryer, read the manual thoroughly and ensure all safety precautions are followed. Keep children away during setup and operation. Place the unit on a stable, heat-resistant surface and avoid touching hot parts. Never submerge the main unit in water, and ensure all accessories are properly secured. Adhering to these guidelines ensures safe and efficient cooking.

Understanding the Control Panel

The control panel features intuitive buttons and a digital display, allowing easy navigation through cooking functions and customizable settings for precise temperature and time control during cooking.

3.1 Functions and Buttons Explained

The Ninja Foodi Air Fryer’s control panel includes a power button, temperature control, timer, and function selection buttons. The digital display shows real-time cooking settings, ensuring precise adjustments. Dedicated buttons for air fry, roast, and dehydrate modes streamline operation. The start/stop button allows easy control, while the crisp button enhances browning. Each button is clearly labeled for intuitive use, making it easy to navigate various cooking functions.

3.2 Customizable Settings for Cooking

The Ninja Foodi Air Fryer offers customizable settings for precise control over your cooking. Adjust temperature, timer, and cooking modes to suit your recipe. The digital interface allows you to set specific heat levels and durations, ensuring optimal results. With features like DualZone Technology, you can cook multiple foods at different settings simultaneously. These customizable options empower you to tailor cooking to your preferences, enhancing versatility and ease of use.

Operating Modes and Cooking Functions

The Ninja Foodi Air Fryer offers multiple cooking functions, including air fry, roast, and dehydrate, making it a versatile appliance for various recipes. These modes streamline cooking processes, ensuring crispy results with minimal oil. DualZone Technology allows simultaneous cooking of different foods at varied settings, enhancing efficiency for home cooks and professionals alike.

4.1 Air Fry Mode: How It Works

The Air Fry mode on the Ninja Foodi uses rapid air circulation technology to crisp food evenly. By circulating super-hot air around the food, it removes moisture from the surface, creating a golden-brown finish with minimal oil. This mode is ideal for achieving fried-like results without the need for deep frying. Simply place your food in the basket, set the temperature and timer, and let the Ninja Foodi do the rest.

4.2 DualZone Technology: Cooking Multiple Foods Simultaneously

DualZone Technology allows you to cook two different foods at once with independent temperature controls. Each basket can be set to different settings, ensuring both dishes are cooked to perfection simultaneously. This feature is perfect for preparing complete meals efficiently, saving time and effort. The technology ensures even cooking and prevents flavors from mixing, making it ideal for busy households.

Safety Guidelines and Precautions

Always follow safety guidelines to ensure safe operation. Keep children away during cooking and cleaning. Avoid touching hot surfaces and use oven mitts. Read the manual thoroughly before first use to prevent accidents and ensure proper maintenance. Regular cleaning is essential to maintain performance and safety.

5;1 General Safety Tips for Using the Air Fryer

Always read the manual before using the Ninja Foodi Air Fryer. Keep children away during operation and cleaning. Avoid touching hot surfaces; use oven mitts when handling. Ensure the air fryer is placed on a heat-resistant surface. Never submerge the unit in water. Regularly clean the air fryer to prevent food residue buildup. Follow recommended cooking times and temperatures to avoid overheating.

5;2 Child Safety and Maintenance Warnings

Children should not operate or clean the Ninja Foodi Air Fryer without adult supervision. Maintenance tasks, such as cleaning, should not be performed by children. Keep the air fryer and its accessories out of reach of minors. Ensure the unit is cool before cleaning. Store all parts securely to avoid accidents. Regularly inspect for damage and ensure proper usage to maintain safety and longevity.

Cleaning and Maintenance

Regular cleaning and proper maintenance are essential for the longevity of your Ninja Foodi Air Fryer. Always unplug the unit before cleaning and avoid using abrasive materials.

6.1 Step-by-Step Cleaning Process

To clean your Ninja Foodi Air Fryer, start by unplugging it. Wipe the exterior with a damp cloth and mild detergent. Remove the crisper plate and basket, washing them with warm soapy water. Use a soft brush to scrub any food residue. Rinse thoroughly and dry. Regular cleaning prevents food buildup and ensures optimal performance. Always avoid abrasive cleaners to maintain the non-stick coating.

6.2 Regular Maintenance for Longevity

Regular maintenance ensures your Ninja Foodi Air Fryer performs optimally. After each use, clean the basket and pan thoroughly. Dry all parts to prevent rust. Avoid using metal utensils or abrasive cleaners, as they can damage the non-stick coating. Periodically, soak the basket in warm soapy water to remove stubborn residue. Always store the air fryer in a dry place to maintain its longevity and functionality.

Cooking Techniques and Recipes

Master essential cooking techniques for perfect results with your Ninja Foodi Air Fryer. Explore popular recipes, from crispy fries to tender chicken, tailored for beginners and beyond.

7.1 Essential Cooking Tips for Perfect Results

For perfect results with your Ninja Foodi Air Fryer, preheat the unit before cooking. Pat food dry to enhance crispiness and lightly spray with oil for even browning. Avoid overcrowding the basket for consistent cooking. Use the crisper plate for optimal airflow and adjust temperatures and times based on food type. These tips ensure delicious, restaurant-quality dishes every time.

7.2 Popular Recipes for Beginners

Start with simple recipes like crispy chicken wings, golden fries, or tender shrimp. Try air-fried vegetables such as broccoli or cauliflower for a healthy snack. Chicken breast with frozen onion rings is another easy option. These dishes are perfect for beginners, offering delicious results with minimal effort. Experiment with seasonings to enhance flavors and explore more complex recipes as you gain confidence.

Troubleshooting Common Issues

Address common issues like uneven cooking or the air fryer not turning on by checking power connections and ensuring proper preheating. Consult the FAQ section for solutions.

8.1 FAQs and Solutions

Frequently asked questions include issues like the air fryer not turning on or uneven cooking. Solutions often involve checking power connections, ensuring proper preheating, and cleaning the crisper plate. For more complex problems, resetting the device or consulting the manual is recommended. Always refer to the troubleshooting section for detailed guidance.

8.2 Resetting the Air Fryer

To reset the Ninja Foodi Air Fryer, unplug it from the power source and wait for 30 seconds. This allows any residual power to discharge. Plug it back in and ensure the device is turned off. Press and hold the power button for 10 seconds to complete the reset. This process resolves many operational issues. Always consult the manual for model-specific reset instructions.

Accessories and Replacement Parts

The Ninja Foodi Air Fryer offers various accessories like crisper trays, baskets, and recipe books. Genuine replacement parts are available on the official Ninja website.

9.1 Recommended Accessories for Enhanced Cooking

Enhance your Ninja Foodi Air Fryer experience with essential accessories. A crisper plate is crucial for achieving that perfect golden-brown finish on your dishes.
Additional non-stick baskets and trays are ideal for cooking multiple meals or larger portions.
Recipe books and cooking charts can inspire new meal ideas.
These accessories are designed to optimize performance and versatility.

9.2 Where to Find Genuine Replacement Parts

To ensure authenticity and quality, purchase replacement parts from the official Ninja Kitchen website or authorized retailers. These sources guarantee genuine products designed for your specific model. For assistance, contact Ninja customer support directly. Avoid third-party sellers to maintain warranty validity and performance. Always verify the seller’s authenticity to ensure compatibility and safety.

Warranty and Customer Support

Ninja Foodi Air Fryer comes with a limited warranty covering defects in materials and workmanship. For inquiries or claims, contact Ninja Customer Support via their official website or phone.

10.1 Understanding Your Warranty Coverage

The Ninja Foodi Air Fryer is backed by a limited warranty that covers defects in materials and workmanship. The warranty period varies by region, typically ranging from 1 to 5 years. Registration is recommended to activate and validate your coverage. Damages due to misuse or normal wear and tear are not covered. For detailed terms and conditions, refer to the official Ninja website or the provided warranty document.

10.2 Contacting Ninja Customer Service

For inquiries or assistance, visit the official Ninja Kitchen website and navigate to the support section. You can contact their customer service team via email at support@ninjaKitchen.com or by phone at 1-877-646-5288. Ensure you have your product model number (e.g., AF300 or AF400UK) ready for efficient service. For troubleshooting or warranty-related questions, refer to the provided manual or visit the support page for detailed guidance.

Advanced Features and Customization

The Ninja Foodi Air Fryer offers advanced features like a digital screen for precision cooking and customizable settings. Users can adjust cooking times, temperatures, and functions to suit their preferences. The TenderCrisp technology ensures crispy results, while programmable functions like Dehydrate and Broil expand cooking possibilities. These features allow for personalized cooking experiences.

11.1 Using the Digital Screen for Precision Cooking

The digital screen on the Ninja Foodi Air Fryer allows for precise control over cooking functions, temperatures, and timers. Users can easily navigate through preset settings or customize their own. The screen provides real-time feedback, ensuring accurate adjustments. For DualZone models, it also enables synchronized or independent control of both baskets. This feature enhances cooking efficiency and offers a seamless user experience.

11.2 Customizing Cooking Times and Temperatures

The Ninja Foodi Air Fryer allows users to customize cooking times and temperatures, ensuring optimal results for various foods. By using the digital screen, you can adjust settings to suit delicate items or tougher textures. This feature provides flexibility and precision, enabling you to achieve your desired outcomes efficiently. Customization enhances cooking control, making it ideal for a wide range of recipes and preferences.

Health Benefits of Air Frying

Air frying significantly reduces oil consumption compared to traditional frying, making it a healthier option. It also helps retain essential nutrients in food, promoting better health outcomes.

12.1 Reducing Oil Consumption

The Ninja Foodi Air Fryer uses little to no oil, making it a healthier alternative to deep frying. By circulating hot air, it achieves crispy results without excessive fat, reducing calorie intake significantly. This method is ideal for those seeking to lower their dietary oil consumption while enjoying flavorful meals. It promotes a healthier lifestyle effortlessly.

12.2 Retaining Nutrients in Food

The Ninja Foodi Air Fryer helps retain nutrients by using minimal oil and lower temperatures. Air frying preserves vitamins and minerals that are often lost in traditional deep-frying. The precise temperature control and shorter cooking times ensure that your food stays nutritious while remaining crispy and flavorful. This makes it a healthier choice for maintaining dietary health and flavor.

The Ninja Foodi Air Fryer is a game-changer for healthy, versatile cooking. Experiment with new recipes, explore its features, and enjoy delicious meals with minimal effort and maximum flavor.

13.1 Maximizing Your Ninja Foodi Air Fryer Experience

To maximize your Ninja Foodi Air Fryer experience, explore its versatile cooking modes and customize settings for precise results. Regularly clean and maintain the appliance to ensure longevity. Experiment with new recipes and techniques to unlock its full potential, ensuring every meal is a culinary success. This approach will help you make the most of your air fryer.

13.2 Encouragement to Experiment and Explore

Don’t hesitate to explore the full potential of your Ninja Foodi Air Fryer by trying new recipes and cooking techniques. Experiment with different flavors, ingredients, and settings to discover your favorite dishes. Whether you’re a beginner or an experienced cook, the air fryer’s versatility encourages creativity, helping you craft delicious, healthy meals effortlessly. Keep exploring and enjoy the culinary journey!

bodyguardian mini plus instructions

The BodyGuardian Mini Plus is a remote cardiac monitoring system designed for continuous‚ near real-time tracking of heart activity. It offers a waterproof‚ user-friendly design with options for vertical or horizontal placement on the chest. The device supports up to 30 days of monitoring and provides detailed insights for healthcare providers. It is equipped with adhesive options like Bridge or Strip for secure placement and requires proper skin preparation for optimal performance. Electrodes can be replaced as needed‚ and the system includes comprehensive resources like manuals and instructional videos for easy setup and use.

1.1 Overview of the Device and Its Purpose

The BodyGuardian Mini Plus is a cutting-edge‚ portable cardiac monitoring system designed to track heart activity remotely. Its primary purpose is to provide continuous‚ near real-time monitoring of a patient’s heart rhythm‚ ensuring early detection of irregularities. The device is lightweight‚ waterproof‚ and designed for comfort‚ making it suitable for daily wear. It supports both vertical and horizontal placement on the chest‚ offering flexibility for different body types. The system is intended for patients requiring long-term cardiac surveillance‚ offering up to 30 days of uninterrupted monitoring. It is supported by comprehensive instructional resources‚ including manuals and videos‚ to guide users through setup and usage.

1.2 Key Features of the BodyGuardian Mini Plus

The BodyGuardian Mini Plus boasts a fully waterproof design‚ safe for showers‚ baths‚ and submersion up to 3 feet. It offers up to 30 days of near real-time monitoring‚ ensuring continuous cardiac surveillance. The device supports both Bridge and Strip adhesive options for secure placement. Proper skin preparation is required for optimal adhesion. It features a rechargeable battery with a charging time of 1.5-2.5 hours. The system is designed for remote monitoring‚ providing detailed insights for healthcare providers and ensuring patient safety and comfort during extended use.

Setting Up the BodyGuardian Mini Plus

Setting up involves unboxing‚ charging (1.5-2.5 hours)‚ and preparing the device according to the patient manual for optimal performance and accurate readings.

2.1 Unboxing and Preparing the Device

Upon unboxing‚ ensure all components are included‚ such as the monitor‚ adhesives (Bridge or Strip)‚ electrodes‚ and the patient manual. Before use‚ charge the device for 1.5-2.5 hours until the indicator shows it is fully powered. Properly prepare the skin where the monitor will be placed‚ removing any hair or lotions to ensure optimal adhesion. Replace electrodes as needed‚ following the instructions provided in the manual or instructional videos. This step ensures accurate readings and comfortable wear for continuous monitoring.

2.2 Charging the Monitor (1.5-2.5 Hours)

Charge the BodyGuardian Mini Plus using the provided USB cable and adapter for 1.5 to 2.5 hours. Ensure the monitor is fully charged‚ as indicated by the charging indicator turning solid. Once charged‚ the device is ready for use. Avoid interrupting the charging process to ensure optimal battery performance. After charging‚ apply new electrodes and attach the monitor to your chest following the instructions provided in the manual or instructional videos. Proper charging is essential for continuous‚ accurate monitoring. Always use the original charging accessories to maintain device functionality and safety.

Placing the BodyGuardian Mini Plus on the Chest

Place the BodyGuardian Mini Plus on your chest‚ either vertically or horizontally‚ ensuring proper adhesion and skin contact for accurate monitoring. Prepare your skin by removing hair if necessary and cleaning the area. Follow the adhesive instructions for secure placement. Once attached‚ the device will begin recording heart activity for remote monitoring. Proper placement is crucial for reliable data collection and comfort during extended use.

3.1 Skin Preparation for Proper Adhesion

Proper skin preparation is essential for secure adhesion of the BodyGuardian Mini Plus. Ensure the area is clean‚ dry‚ and free of oils or lotions. If hair is present‚ gently remove it to allow better contact. Avoid using powders or creams on the skin where the device will be placed. Clean the chest area with an alcohol wipe and let it dry completely before applying the monitor. This ensures optimal adhesion and accurate heart activity monitoring. Proper preparation helps prevent poor skin contact messages and ensures reliable data collection. Follow these steps carefully for best results during your monitoring period.

3.2 Vertical vs. Horizontal Placement Options

The BodyGuardian Mini Plus can be worn either vertically or horizontally on the chest‚ depending on personal comfort and preference. Vertical placement aligns with the natural contour of the chest‚ while horizontal placement may suit broader chest structures. Regardless of orientation‚ ensure the device is centered and firmly attached to clean‚ prepared skin. Proper alignment is crucial for accurate heart readings and to prevent shifting during movement. Choose the option that feels most comfortable and secure for your daily activities‚ ensuring continuous monitoring without disruption.

Using Adhesive Options

The BodyGuardian Mini Plus offers two adhesive options: the Bridge and Strip adhesives. Both ensure secure placement on the chest for reliable heart monitoring. Follow specific instructions for each type to achieve proper adhesion and maintain device functionality. Proper application is essential for accurate readings and uninterrupted monitoring. Refer to the provided guides for detailed steps on using these adhesives effectively.

4.1 Instructions for Using the Bridge Adhesive

To use the Bridge adhesive with the BodyGuardian Mini Plus‚ start by ensuring the skin is clean‚ dry‚ and free of hair for proper adhesion. Peel the backing from the Bridge adhesive and align it with the device’s adhesive area. Press firmly to secure it to your chest‚ following the vertical or horizontal placement guidelines. The Bridge adhesive is designed for extended wear and provides a secure fit. For detailed steps‚ refer to the instruction manual or the accompanying video guide. Proper application ensures accurate monitoring and device functionality.

4.2 Instructions for Using the Strip Adhesive

To use the Strip adhesive‚ ensure the skin is clean‚ dry‚ and free of hair. Peel the backing from the Strip and align it with the BodyGuardian Mini Plus. Press firmly to secure it to your chest‚ either vertically or horizontally. The Strip adhesive is designed for easy repositioning and can be reused for a short period. For best results‚ follow the preparation and placement guidelines outlined in the manual or instructional video. Proper application ensures reliable monitoring and comfort during extended wear.

Replacing ECG Electrodes

Replacing ECG electrodes is a straightforward process. Peel off the old electrodes‚ then align and press the new ones firmly onto your chest. Follow the steps on page 16 for detailed instructions.

5.1 Steps to Replace Electrodes (See Page 16)

To replace the ECG electrodes‚ start by gently peeling off the old ones from your skin. Clean the area with water or alcohol to ensure proper adhesion. Remove the protective backing from the new electrodes and align them with the marks left by the previous ones. Press firmly to secure them in place. Ensure the electrodes are positioned correctly for accurate readings. Refer to page 16 for detailed diagrams and additional guidance to complete the process effectively and maintain continuous monitoring.

Troubleshooting Common Issues

The “Poor Skin Contact” message indicates improper electrode adhesion. Check for hair or dry skin‚ clean the area‚ and reattach the electrodes firmly for better connection.

6.1 Resolving the “Poor Skin Contact” Message

To resolve the “Poor Skin Contact” message‚ ensure the skin is clean‚ dry‚ and free of hair where the electrodes are applied. Gently remove the monitor‚ clean the area with mild soap and water‚ and dry thoroughly. Reattach the electrodes firmly‚ pressing down to secure proper adhesion. If issues persist‚ check for worn-out electrodes and replace them as needed. Proper skin preparation is essential for accurate monitoring and to avoid false alerts.

Waterproof Features and Usage Guidelines

The BodyGuardian Mini Plus is fully waterproof‚ safe for showers‚ baths‚ and submerging up to 3 feet‚ ensuring continuous monitoring in wet environments without compromise.

7.1 Safe Usage in Showers‚ Baths‚ and Submerged Environments

The BodyGuardian Mini Plus is fully waterproof‚ allowing safe use in showers‚ baths‚ and submerged environments up to 3 feet deep; This feature ensures continuous monitoring without interruption‚ even in wet conditions. Proper placement and preparation of the device are essential to maintain functionality underwater. Users can confidently wear the monitor during these activities‚ knowing it will remain operational. Always inspect the device for damage before submerging to ensure optimal performance and safety during use.

Monitoring and Remote Capabilities

The BodyGuardian Mini Plus offers up to 30 days of near real-time monitoring‚ providing continuous and remote tracking of heart activity for extended periods.

8.1 Understanding Up to 30 Days of Near Real-Time Monitoring

The BodyGuardian Mini Plus enables uninterrupted‚ near real-time heart monitoring for up to 30 days. This extended duration ensures comprehensive data collection‚ allowing healthcare providers to detect irregularities and trends over time. The device transmits data continuously‚ providing immediate insights into cardiac activity. Its remote capabilities ensure that patients can be monitored from anywhere‚ enhancing flexibility and reducing the need for frequent in-person check-ups. This feature is particularly beneficial for long-term cardiac conditions requiring ongoing surveillance.

Additional Resources

Access the Patient Instruction Manual and instructional videos for detailed guidance. These resources cover setup‚ usage‚ and troubleshooting‚ ensuring comprehensive support for optimal device operation and understanding.

9.1 Accessing the Patient Instruction Manual

The Patient Instruction Manual for the BodyGuardian Mini Plus is available as a downloadable PDF and is also included in printed form in the device box. This manual provides detailed instructions on how to use‚ set up‚ and troubleshoot the device. It covers topics such as skin preparation‚ electrode placement‚ and monitoring features. Refer to the manual for step-by-step guidance on optimizing your experience with the BodyGuardian Mini Plus.

9.2 Watching Instructional Videos for Setup and Usage

In addition to the printed manual‚ instructional videos are available online to guide patients through the setup and usage of the BodyGuardian Mini Plus. These videos cover topics such as applying the device with Bridge or Strip adhesives‚ replacing electrodes‚ and troubleshooting common issues. They also demonstrate proper skin preparation and placement techniques. Videos are accessible via the official website or through links provided in the patient manual‚ offering visual step-by-step instructions to ensure a smooth and effective monitoring experience.

char broil infrared turkey fryer instruction manual

The Char-Broil Infrared Turkey Fryer offers a revolutionary oil-free cooking experience, perfect for achieving crispy, flavorful results without the hassle of traditional deep frying.

Its patented infrared technology ensures even heat distribution, while its spacious capacity accommodates up to a 16-pound turkey, making it ideal for family gatherings or special occasions.

1.1 Overview of the Appliance and Its Benefits

The Char-Broil Infrared Turkey Fryer is a versatile and efficient cooking appliance designed for oil-free frying, offering a healthier alternative to traditional methods. Its infrared technology ensures even heat distribution, delivering crispy results without the need for oil. This fryer is ideal for cooking turkeys up to 16 pounds, as well as other meats like chicken and roasts. The appliance is user-friendly, with a focus on safety and convenience, making it perfect for both novice and experienced cooks. Its compact design and easy cleanup add to its appeal for home use.

  • Oil-free cooking for a healthier option
  • Even heat distribution for consistent results
  • Large capacity for various meats
  • Easy to use and clean

1.2 Importance of Following the Instruction Manual

Adhering to the Char-Broil Infrared Turkey Fryer manual is crucial for safe and effective operation. It provides detailed assembly steps, safety precautions, and cooking guidelines to ensure optimal performance. Neglecting the instructions may lead to improper assembly, safety hazards, or subpar cooking results. The manual also includes troubleshooting tips and maintenance advice to extend the appliance’s lifespan. By following the guide, users can maximize their cooking experience while minimizing risks. Always refer to the manual before first use and for any operational concerns.

  • Ensures safe and efficient operation
  • Provides clear assembly and cooking instructions
  • Helps troubleshoot common issues
  • Extends appliance longevity

Assembly and Installation

Estimated assembly time is approximately 1 hour. Follow the step-by-step guide to ensure proper setup, including attaching the burner, legs, and other essential components. Tools required include a wrench and screwdriver for secure connections. Proper installation ensures safe and efficient operation of the fryer.

2.1 Unboxing and Inventory of Parts

Begin by carefully unboxing the Char-Broil Infrared Turkey Fryer and laying out all components. The package should include the main fryer body, burner assembly, cooking basket, lid, regulator, and hardware. Verify each item against the manual’s parts list to ensure nothing is missing. Pay attention to smaller pieces like screws and connectors, as they are essential for proper assembly. Organize the parts neatly to avoid losing any during the setup process. Double-checking the inventory ensures a smooth and stress-free assembly experience. Proper organization prevents delays and ensures all components are accounted for before starting. Always refer to the manual for clarity on part identification.

2.2 Step-by-Step Assembly Instructions

Begin by assembling the burner and regulator, ensuring all connections are secure. Attach the burner assembly to the fryer base following the manual’s alignment guide. Next, connect the LP gas line to the regulator, tightening firmly to prevent leaks. Install the cooking basket by aligning its hooks with the fryer’s frame and securing it with the provided hardware. Double-check all connections and ensure the fryer is placed on a stable, heat-resistant surface. Refer to the manual for specific torque settings and safety precautions. Proper assembly is critical for safe and efficient operation.

2.3 Tools and Materials Required for Assembly

To assemble the Char-Broil Infrared Turkey Fryer, you’ll need a few essential tools and materials. Start with a screwdriver for securing bolts and a wrench for tightening gas connections. Gloves are recommended for handling sharp or hot components. Ensure you have the regulator/valve assembly and LP gas line ready for installation. Additionally, a gas leak detector is crucial for safety checks. Optional items like a digital thermometer can enhance your setup. Gather all parts from the box and refer to the manual for a complete list of required tools and materials to ensure a smooth assembly process.

Infrared Cooking Technology

Infrared cooking technology uses radiant heat for even cooking and crispy results without oil, ensuring moisture retention and flavor enhancement in every dish.

3.1 How Infrared Cooking Works

Infrared cooking uses radiant heat emitted by heating elements to cook food evenly without oil. The Char-Broil Infrared Turkey Fryer employs this technology to ensure crispy results and moisture retention. When the burner is ignited, it produces infrared waves that penetrate the food, cooking it thoroughly and quickly. This method avoids the need for oil, making it a healthier alternative to traditional frying while maintaining flavor and texture. The even heat distribution ensures consistent cooking results, making it ideal for turkeys and other meats.

3.2 Benefits of Infrared Technology for Turkey Cooking

Infrared technology offers superior even heat distribution, ensuring a crispy exterior and juicy interior without the need for oil. This method reduces cooking time compared to traditional frying, while maintaining consistent results. The Char-Broil Infrared Turkey Fryer delivers uniform cooking, eliminating hot spots and undercooked areas. It also retains natural flavors and moisture, resulting in a tastier turkey. The oil-free design makes cleanup easier and provides a healthier cooking option, perfect for achieving restaurant-quality results at home.

Capacity and Cooking Options

The Char-Broil Infrared Turkey Fryer can cook a 16-pound turkey, 8-pound roast, or 6-pound pork shoulder, offering versatile cooking options for various meats with consistent results.

4.1 Maximum Capacity for Turkey and Other Meats

The Char-Broil Infrared Turkey Fryer can accommodate a whole turkey up to 16 pounds, ensuring even cooking and crispy results. Beyond turkeys, it can handle an 8-pound roast, a 6-pound pork shoulder, or chicken, making it a versatile option for family meals or special events. The spacious interior allows for uniform heat distribution, ensuring that every piece of meat is cooked to perfection without the need for oil, making it a healthier alternative to traditional frying methods.

4.2 Cooking Time Estimates and Temperature Control

Cooking time varies based on the meat type and size, but a whole turkey typically cooks at 10-15 minutes per pound. The infrared technology ensures even heat distribution, allowing for consistent cooking. Temperature control is straightforward, with adjustable settings to achieve the perfect doneness. Use a food thermometer to monitor internal temperatures, ensuring safety and flavor. This feature-rich design makes cooking efficient and stress-free, delivering delicious results every time while maintaining precise temperature control for optimal cooking outcomes.

Safety Precautions and Operating Instructions

Always turn off the control knob and LP cylinder valve, allowing flames to die down before inspecting or cleaning. Use only LP gas with the supplied regulator/valve assembly for safe operation.

5.1 Essential Safety Tips for First-Time Users

For first-time users, ensure the fryer is placed on a stable, heat-resistant surface away from flammable materials. Always read the manual thoroughly before use. Turn off the control knob and LP cylinder valve, allowing flames to die down completely before inspecting or cleaning. Never leave the fryer unattended while in operation. Use a meat thermometer to monitor internal temperatures safely. Keep children and pets at a safe distance. Ensure proper ventilation to avoid gas buildup. Follow ignition procedures carefully, and avoid using abrasive cleaners that could damage the finish.

5.2 Proper Ignition and Shutdown Procedures

For ignition, press and turn the burner control knob to the flame symbol, then quickly turn the rotary ignitor knob. If ignition doesn’t occur within 5 seconds, turn off and wait before retrying. For shutdown, turn off the control knob and LP cylinder valve, allowing flames to die down completely. After the fryer cools, inspect the burner for blockages like spider webs or rust. Always wait 5 minutes before repeating the lighting procedure to ensure safety and proper functioning of the appliance.

5.3 Monitoring the Cooking Process Safely

Always monitor the cooking process to ensure safe and even cooking. Use the included food thermometer to check internal temperatures, ensuring poultry reaches 165°F. For enhanced accuracy, consider upgrading to a digital thermometer like the Char-Broil Smart Temp. Keep the lid closed during cooking to retain heat and promote even browning. Never leave the fryer unattended while in operation. Regularly inspect the turkey through the lid’s viewing window to avoid overcooking. Proper monitoring ensures a perfectly cooked, safe, and delicious meal every time.

Maintenance and Cleaning

Regular maintenance and cleaning are essential for optimal performance. After each use, clean the fryer with soap and water, and dry thoroughly to prevent rust. Store seasonally in a dry place to maintain longevity and functionality; Always inspect for wear and tear before and after use to ensure safety and efficiency.

6.1 Cleaning the Fryer After Use

Clean the Char-Broil Infrared Turkey Fryer immediately after use for optimal maintenance. Turn off the burner, allow the unit to cool, and disconnect the LP cylinder. Remove all food residues and wipe surfaces with a mild soap solution. Avoid abrasive cleaners or scourers to prevent damage. Rinse thoroughly and dry with a clean towel. Regular cleaning prevents rust and ensures longevity. Always inspect burner ports for blockages and clean them with a small brush if necessary. Proper cleaning ensures safe and efficient performance for future use.

6.2 Seasonal Storage and Maintenance Tips

For seasonal storage, clean the fryer thoroughly and ensure it is dry. Store it in a cool, dry, protected area away from direct sunlight and moisture. Cover the unit to prevent dust accumulation. Regularly inspect burner ports and ensure they are clear of debris. Lubricate movable parts if necessary. Before storing, disconnect the LP cylinder and store it separately. Follow the manual for specific dismantling instructions if needed. Proper storage maintains the fryer’s performance and extends its lifespan. Always ensure the fryer is completely cool before storing to prevent any accidental ignition risks.

Troubleshooting Common Issues

Common issues include ignition problems or uneven cooking. Ensure burner ports are clear of debris and the ignitor is functioning properly. If issues persist, consult the manual.

7.1 Common Problems and Solutions

Common issues with the Char-Broil Infrared Turkey Fryer include ignition problems, where the burner fails to light. Solutions involve checking the ignitor knob and ensuring propane flow. Uneven cooking can occur if the turkey isn’t centered; always use the provided rack. Excess smoke may indicate food debris; clean the burner regularly. For persistent issues, refer to the troubleshooting guide in the manual or contact Char-Broil customer support for assistance.

7.2 When to Contact Customer Support

Contact Char-Broil customer support if you encounter issues beyond basic troubleshooting, such as defective parts, persistent malfunctions, or complex errors. For assistance, visit their official website or refer to the contact information in the manual. Ensure you have your fryer’s model number and a detailed description of the problem ready to expedite support. Their team is available to address warranty claims, repair needs, and provide advanced guidance for optimal performance.

Accessories and Additional Resources

Enhance your cooking experience with recommended accessories like the Char-Broil food thermometer for precise temperature control. Additional manuals and guides are available on the official Char-Broil website.

8.1 Recommended Accessories for Enhanced Cooking

Enhance your Char-Broil Infrared Turkey Fryer experience with essential accessories. A food thermometer ensures precise internal temperature monitoring, while a digital Smart Temp thermometer offers advanced control. Consider a durable cooking basket for easy food handling and a protective cover for storage. These accessories optimize performance and convenience, helping you achieve perfect results every time. Visit the Char-Broil website or authorized retailers to explore these options and elevate your cooking experience.

  • Food Thermometer
  • Smart Temp Digital Thermometer
  • Cooking Basket
  • Protective Cover

For more details, visit: sizzleonthegrill.com

8.2 Where to Find Additional Manuals and Guides

For additional manuals and guides, visit the official Char-Broil website or authorized retailers. The manual is also available on platforms like ManualsLib and Manualzilla. For specific models, refer to the Sizzle on the Grill resource page. Ensure you download the correct version for your Char-Broil Infrared Turkey Fryer model. If you need further assistance, contact Char-Broil customer support directly.

Always verify the source for authenticity and the latest updates.

nj estate tax return instructions

Understanding the Deadline for Filing New Jersey Estate Tax Return

All New Jersey Estate Tax returns must be filed within nine months of the decedent’s death. Late filing may result in penalties and accrued interest.

Taxes due must also be paid within this period to avoid additional charges. The NJ Tax Portal offers electronic filing options for convenience and efficiency.

1.1. Key Deadline: Nine Months from the Date of Death

The deadline for filing a New Jersey Estate Tax Return is nine months from the decedent’s date of death. This period includes both filing the return and paying any tax owed.

Failure to meet this deadline may result in penalties and interest on the unpaid tax. Timely filing is crucial to avoid additional financial obligations for the estate.

1.2. Importance of Timely Filing and Payment

Timely filing and payment are critical to avoid penalties and interest on the estate tax. Late submissions may delay estate administration and incur additional costs.

Meeting the deadline ensures compliance with state tax laws and prevents further financial burdens on the estate. Accurate and prompt filing helps maintain the estate’s integrity and avoids legal complications.

Determining Whether You Need to File a New Jersey Estate Tax Return

Filing requirements depend on the decedent’s residency and the gross estate value. Estates exceeding specific thresholds must file a return with the state.


Non-resident estates with New Jersey-sourced income may also need to file. Always verify the latest state guidelines for accurate compliance.

2.1. Residency Status of the Decedent

The residency status of the decedent plays a crucial role in determining filing requirements. If the decedent was a New Jersey resident at the time of death‚ their estate may be subject to state estate tax. Residency is typically determined by domicile‚ meaning where the individual intended to permanently reside.

Non-resident decedents generally do not owe New Jersey estate tax unless they hold assets with a New Jersey nexus‚ such as real property. Always verify residency status before proceeding with filings.

2.2. Gross Estate and Adjusted Taxable Gifts Threshold

The gross estate includes all assets‚ such as real estate‚ stocks‚ and personal property‚ minus debts and exemptions. Adjusted taxable gifts are gifts made during the decedent’s lifetime that count toward the estate tax. If the gross estate plus adjusted taxable gifts exceeds a certain threshold‚ a New Jersey Estate Tax Return (Form IT-Estate) must be filed. This threshold applies to resident decedents who died on or after January 1‚ 2017.

Understanding the Tax Basis for New Jersey Estate Tax

The tax basis for New Jersey estate tax is generally the fair market value of assets as of the decedent’s death‚ excluding certain exemptions and deductions.

3.1. Gross Estate Calculation

The gross estate includes the fair market value of all assets owned by the decedent at death‚ such as real estate‚ securities‚ and personal property. It also encompasses certain transfers made during the decedent’s lifetime‚ like gifts. The total is reported on Form IT-R or Form 706‚ ensuring all taxable assets are accounted for accurately. This valuation determines the tax basis for estate calculations.

3.2. Adjusted Taxable Gifts and Exclusions

Adjusted taxable gifts include certain lifetime gifts made by the decedent‚ excluding those protected by the annual exclusion or marital deduction. Gifts exceeding the federal gift tax exemption are added to the gross estate. Specific exclusions‚ such as transfers to charitable organizations or qualified spousal transfers‚ are not subject to taxation. These adjustments are calculated using Form 706 and must be accurately reported to determine the taxable estate value.

Filing the New Jersey Estate Tax Return

The estate tax return must include Form IT-Estate‚ along with required documents like the will‚ appraisals‚ and inventory. Electronic filing is available via the NJ Tax Portal for convenience and accuracy.

4.1. Required Forms and Documentation

When filing the New Jersey Estate Tax Return‚ Form IT-Estate is mandatory. Include a copy of the will‚ trusts‚ appraisals‚ and Form 706. Attach only one copy of each document. Ensure checks are stapled to the payment voucher and placed on top. Executors must provide the decedent’s Social Security number and birthdate or the estate’s federal ID number. Necessary forms and instructions are available on the NJ Tax Portal or from the Division of Taxation.

4.2. Step-by-Step Filing Process

Begin by gathering all required documents‚ including Form IT-Estate‚ wills‚ trusts‚ and appraisals. Log in to the NJ Tax Portal or create an account if needed. Fill out the form accurately‚ ensuring all fields are completed. Upload the necessary attachments securely. Review the submission for errors. Once satisfied‚ submit the return electronically. Print or save a confirmation for records. Keep copies of all submitted materials for future reference.

Calculating the New Jersey Estate Tax

Calculate the tax by applying the applicable exclusion amount to the gross estate and adjusted taxable gifts‚ then subtract deductions and credits as permitted by law.

5.1. Applying the Applicable Exclusion Amount

The applicable exclusion amount is subtracted from the gross estate and adjusted taxable gifts to determine the taxable estate. For New Jersey‚ this amount aligns with federal estate tax exemptions. Ensure accurate calculation by referencing the IRS guidelines for the year of the decedent’s death. Proper application of this exclusion helps minimize the taxable estate and potential liabilities. Always verify the most current figures to ensure compliance with state and federal regulations.

5.2. Deductions and Credits Available

Deductions for funeral expenses‚ debts‚ and administrative costs can reduce the taxable estate. Credits‚ such as the inheritance tax credit‚ may also lower the estate tax liability. Proper documentation is essential to claim these deductions and credits accurately. Consulting official New Jersey tax resources ensures compliance with specific regulations and maximizes potential tax savings.

Payment Options and Penalties

Payments can be made via check‚ electronic funds transfer‚ or credit card. Late payments incur interest and penalties‚ emphasizing timely submission to avoid additional fees.

6.1. methods of Payment

Payment options include checks‚ electronic funds transfer‚ or credit card. Checks must be stapled to the payment voucher and made payable to “New Jersey Inheritance and Estate Tax.” Electronic payments offer convenience and immediate confirmation. Ensure timely payment to avoid penalties and interest. The NJ Tax Portal provides detailed guidance on payment methods and required documentation for a smooth process.

6.2. Consequences of Late Payment

Late payment results in interest accruing on unpaid taxes. Penalties may also apply‚ increasing the total amount owed. Failure to meet deadlines can delay processing and lead to further actions. Timely payment ensures compliance and avoids additional charges. The NJ Division of Taxation emphasizes the importance of meeting deadlines to prevent complications and ensure efficient estate settlement.

Electronic Filing and Online Services

New Jersey offers electronic filing through its Tax Portal‚ enabling efficient submission of estate tax returns. This service provides faster processing and secure transactions for taxpayers.

7.1. New Jersey Tax Portal Features

The NJ Tax Portal offers streamlined filing‚ real-time account access‚ and secure payment options. Taxpayers can submit returns‚ track refunds‚ and manage notices online. Enhanced features include electronic payment options and access to prior-year returns‚ making tax management efficient and user-friendly for estates and their representatives.

7.2. Benefits of Electronic Submission

Electronic submission of the NJ Estate Tax return offers convenience‚ accuracy‚ and faster processing. It reduces errors‚ provides immediate confirmation‚ and allows for secure payment options. Taxpayers can also access their accounts and prior filings‚ streamlining the process and ensuring compliance with state tax requirements efficiently.

Inheritance Tax vs. Estate Tax in New Jersey

New Jersey distinguishes between estate and inheritance taxes. The estate tax applies to the deceased’s assets‚ while the inheritance tax is levied on beneficiaries’ shares.

The estate tax is based on the gross estate’s value‚ whereas the inheritance tax considers the beneficiary’s relationship to the decedent and the amount received.

8.1. Understanding the Difference

The estate tax in New Jersey is calculated on the deceased’s total assets before distribution‚ while the inheritance tax applies to the shares beneficiaries receive. The estate tax focuses on the decedent’s wealth‚ whereas the inheritance tax is based on who inherits and how much they receive. This distinction is crucial for accurate tax reporting and compliance with state regulations.

8.2. How They Interrelate

The New Jersey inheritance tax applies to beneficiaries’ shares‚ while the estate tax is based on the decedent’s total assets. Historically‚ the inheritance tax acted as a credit against the estate tax‚ ensuring the estate paid only the higher of the two. However‚ since the estate tax was phased out‚ the inheritance tax now applies independently‚ focusing on the distribution of assets to heirs.

Fiduciary Responsibilities and Gross Income Tax Return

The fiduciary must file Form NJ-1041 if the estate’s gross income exceeds $10‚000‚ ensuring timely reporting of income and compliance with state tax obligations.

9.1. Filing Form NJ-1041

Fiduciaries of estates or trusts must file Form NJ-1041‚ the New Jersey Gross Income Tax Fiduciary Return‚ if the estate’s gross income exceeds $10‚000. This form reports income‚ deductions‚ and credits. It is crucial to ensure accuracy and timeliness to avoid penalties. The form must be submitted annually‚ reflecting the estate’s financial activity for the tax year.

9.2. Income Threshold for Filing

The fiduciary must file Form NJ-1041 if the estate’s gross income exceeds $10‚000. This threshold applies to both resident and non-resident estates. Executors or administrators are responsible for ensuring the return is filed when required. Failure to meet this threshold may result in legal consequences or penalties. Accurate reporting of income and deductions is essential to comply with New Jersey tax regulations.

Amending a Previously Filed Estate Tax Return

To amend a return‚ file Form IT-Estate with corrected information. Include documentation supporting changes. Amendments must be filed promptly to avoid penalties and ensure accurate tax assessment.

10.1. When and How to Amend

An amendment is necessary if errors or omissions are discovered in the originally filed return. Use Form IT-Estate to correct inaccuracies or provide additional information.

Submit the amended return with supporting documentation to the NJ Division of Taxation. Ensure all corrections are clearly marked and properly signed to avoid processing delays or penalties.

10.2. Required Documentation for Amendments

When amending a New Jersey Estate Tax return‚ include a completed Form IT-Estate with corrections highlighted. Attach updated or additional documentation‚ such as appraisals‚ wills‚ or trust agreements‚ to support changes.

Submit detailed explanations for each amendment and ensure all necessary signatures are present. Include a copy of the original return and any relevant IRS forms‚ such as Form 706‚ if applicable.

Special Considerations for Non-Resident Estates

Non-resident estates with income from New Jersey sources must file a fiduciary return. Ensure accurate reporting of all NJ-derived income to avoid penalties or delays.

11.1. Filing Requirements for Non-Resident Estates

Non-resident estates must file a New Jersey Gross Income Tax Fiduciary Return (Form NJ-1041) if they receive income from New Jersey sources. The filing threshold is $10‚000 or more in gross income. Additionally‚ a New Jersey Estate Tax Return may be required if the estate exceeds the taxable threshold‚ ensuring compliance with state tax regulations. Proper documentation and timely submission are essential to avoid penalties and ensure accurate reporting of all New Jersey-derived income.

11.2. Income from New Jersey Sources

Non-resident estates must report income derived from New Jersey sources‚ such as real estate‚ businesses‚ or investments located within the state. Even if the decedent was not a New Jersey resident‚ income from these sources is subject to state tax. Proper documentation and accurate reporting of such income are essential to ensure compliance with New Jersey tax laws and avoid potential penalties or disputes.

Additional Resources and Forms

Visit the New Jersey Tax Portal for essential forms‚ instructions‚ and tutorials. Key resources include Form NJ-1041‚ IT-Estate‚ and the NJ-1040 filing guide. Contact support for assistance.

12.1. Essential Forms and Instructions

Key forms include the NJ-1041 for fiduciary returns‚ IT-R for inheritance tax‚ and Form IT-Estate for estate tax. Download these from the New Jersey Tax Portal‚ along with detailed instructions and guides. Additional resources like Form NJ-1040 for individual returns and federal Form 706 are also available. The portal offers tutorials and step-by-step filing assistance to ensure compliance and accuracy.

12.2. Contact Information for Assistance

For assistance‚ contact the New Jersey Division of Taxation at (609) 292-5033. Visit their office at 50 Barrack Street‚ Trenton‚ NJ 08695. Phone lines are open Monday to Friday‚ 8:30 AM to 4:30 PM EST. Additional support is available through the NJ Tax Portal’s help section‚ offering tutorials and real-time assistance for filing and payment inquiries.

dsi installation instructions com

Discover the essential steps and guidelines for installing DSI products, ensuring optimal performance and safety․ Follow detailed instructions to maximize functionality and longevity of your DSI system․

1․1 Overview of DSI Products

DSI offers innovative solutions for installation, including transducers, display units, and mounting hardware․ Their products, such as the DS400 Series and DSi Raspberry Pi, are designed for seamless integration․ Features include advanced sonar technology, user-friendly interfaces, and durable construction․ Whether for marine or industrial use, DSI products ensure reliability and efficiency, adhering to safety standards and regulations for optimal performance․

1․2 Importance of Proper Installation

Proper installation of DSI products is crucial for ensuring optimal performance, safety, and durability․ Incorrect installation can lead to system failure, electrical issues, or even safety hazards․ Adhering to guidelines ensures compliance with safety standards and maximizes product lifespan․ Always follow detailed instructions to avoid common pitfalls and guarantee reliable operation of your DSI system․

Pre-Installation Preparation

Gather all necessary tools and supplies, ensuring compliance with local regulations and safety guidelines․ Proper planning and preparation are key to a smooth DSI installation process․

2․1 Gathering Necessary Tools and Supplies

Ensure you have all essential tools and supplies before starting the installation․ This includes drills, marine-grade sealant, and specific drill bits․ Tools may not be included, so prepare ahead․ Safety gear and materials like screws and mounting hardware are also required․ Refer to local regulations for any additional supplies needed to comply with standards․ Proper preparation ensures a smooth and efficient installation process․

2․2 Understanding Local Regulations and Safety Guidelines

Before installation, ensure compliance with local and national regulations․ Familiarize yourself with safety standards, particularly for gas, electrical, and fire codes․ Proper ventilation is crucial for safe operation․ Always follow manufacturer guidelines and safety precautions․ Consult local authorities if unsure about specific requirements․ Adhering to these guidelines ensures a secure and compliant installation process․

Mounting Hardware Installation

Ensure secure placement by selecting the right tools and materials․ Use marine-grade sealant to prevent water intrusion․ Follow drilling guidelines for proper hardware anchorage․

3․1 Choosing the Correct Mounting Location

Selecting the right location is crucial for optimal performance․ Ensure the area is dry, avoiding water exposure․ Choose a structurally sound surface to prevent damage․ Consider accessibility for maintenance and avoid obstructing other systems․ Use a level to ensure proper alignment․ Refer to manufacturer guidelines for specific placement recommendations․ Ensure compliance with local building codes and safety standards․ Proper placement enhances durability and functionality of the mounting hardware․

3․2 Drilling and Securing the Mounting Hardware

Begin by marking the mounting location with a pencil, ensuring alignment with manufacturer guidelines․ Drill pilot holes using a 1/8″ or 5/8″ drill bit, depending on hardware requirements․ Apply marine-grade sealant to prevent water intrusion․ Secure hardware with provided screws, tightening firmly but avoiding overtightening․ Double-check alignment and ensure all bolts are snug․ Follow safety guidelines to prevent damage to the surface or surrounding structures․

Electrical Connections

Connect power sources and communication interfaces carefully, ensuring compatibility and safety compliance․ Refer to specific wiring instructions for panel or DIN rail mounting options․

4․1 Connecting Power Sources

When connecting power sources for your DSI system, ensure all components are properly grounded and connected to the correct voltage supply․ Verify polarity to prevent damage․ Use marine-grade sealant for underwater connections to maintain water resistance․ Always follow the manufacturer’s wiring diagram and safety guidelines to avoid electrical hazards․ Double-check connections before powering up to ensure reliability and performance․

4․2 Configuring Communication Interfaces

Configuring communication interfaces for your DSI system involves following step-by-step instructions to ensure seamless connectivity․ Use compatible protocols such as Ethernet or Wi-Fi, depending on the model․ Assign IP addresses and configure network settings as specified in the manual․ Ensure all devices are connected securely and test communication to confirm proper functionality․ Refer to the user manual for specific port configurations and firmware updates to maintain optimal performance․

Transducer Installation

Mount the DSI transducer securely inside the trolling motor housing using the adjustable strap․ Ensure proper alignment and seal any drilled holes with marine-grade sealant for water tightness․

5․1 Placement and Alignment

For optimal performance, place the DSI transducer inside the trolling motor housing․ Use the adjustable strap to secure it firmly, ensuring a snug fit․ Position the transducer below the housing’s edge to avoid cavitation․ Align it with the water flow direction for accurate readings․ Ensure all connections are watertight and seal any drilled holes with marine-grade sealant for a durable installation․

5․2 Securing the Transducer

Tighten the adjustable strap firmly to hold the transducer in place, ensuring no movement during operation․ Avoid over-tightening to prevent damage to the housing․ Double-check all electrical connections for watertight sealing․ Apply marine-grade sealant to any drilled holes to maintain water resistance․ Ensure the transducer is securely fastened to withstand operational stress and environmental conditions, guaranteeing reliable performance and longevity of your DSI system․

Troubleshooting Common Issues

Diagnose connection problems by checking for loose wires or faulty contacts․ Resolve hardware malfunctions by verifying power supply and ensuring proper configuration․ Consult user manuals for detailed troubleshooting guides and contact technical support if issues persist․

6․1 Diagnosing Connection Problems

Identify and resolve connection issues by inspecting wires for damage or corrosion․ Ensure all connectors are securely fastened․ Verify power sources and communication interfaces are correctly configured․ Use diagnostic tools to test signal strength and continuity․ Refer to user manuals for specific troubleshooting steps․ If issues persist, contact technical support for further assistance․ Regular maintenance can prevent recurring problems․

6․2 Resolving Hardware Malfunctions

Address hardware issues by first identifying the source of the malfunction․ Check for loose connections or damaged components․ Replace faulty parts with manufacturer-approved replacements․ Consult the user manual for specific repair procedures․ If the issue persists, contact technical support for advanced troubleshooting․ Regular inspections and maintenance can help prevent future hardware failures․ Ensure all repairs comply with safety standards and guidelines․

Maintenance and Upkeep

Regularly clean and inspect DSI components to ensure optimal performance․ Schedule routine checks and update firmware as needed․ Refer to the user manual for detailed maintenance guidelines․

7․1 Regular Cleaning and Inspection

Regularly clean DSI components to prevent dirt and debris buildup․ Inspect electrical connections and transducers for damage or corrosion․ Use mild cleaning products and avoid abrasive materials․ Check for wear and tear on moving parts․ Ensure all seals are intact to maintain water resistance․ Schedule periodic inspections to identify potential issues early․ Refer to the user manual for specific cleaning guidelines tailored to your DSI model․

7․2 Updating Firmware and Software

Regular firmware and software updates ensure your DSI system operates at peak performance․ Visit the official DSI website to download the latest versions․ Follow the step-by-step instructions provided in the update manual․ Use a compatible computer or device to transfer updates securely․ Backup settings before updating to avoid data loss․ Ensure uninterrupted power during the update process to prevent system corruption․ Verify successful installation by checking the version history in the system settings․ Maintain optimal functionality and security by keeping your DSI system up-to-date with the latest enhancements and bug fixes․ Regular updates also improve compatibility with new hardware and software integrations, ensuring a seamless user experience․ Always refer to the user manual for specific guidance tailored to your DSI model․ Stay informed about new features and improvements through DSI’s official communication channels and technical support resources․

Safety Considerations

Ensure compliance with safety standards to prevent risks․ Avoid environmental hazards and follow proper installation guidelines to guarantee safe operation and long-term reliability of your DSI system․

8․1 Avoiding Environmental Hazards

Ensure proper ventilation to prevent gas buildup and maintain safe operating conditions․ Avoid exposing DSI components to water or extreme temperatures, which can damage the system․ Secure all transducers and sensors to prevent accidental displacement․ Follow local environmental regulations to minimize ecological impact during installation․ Regularly inspect for signs of wear or corrosion to maintain system integrity and performance over time․

Compliance with safety standards is critical for a secure and reliable DSI installation․ Always adhere to local and national regulations, including gas, electrical, and fire codes․ Ensure proper ventilation and avoid exposing components to hazardous conditions․ Reference technical manuals for specific safety protocols and certifications․ Built-in safety features must be activated as per instructions․ Consult local authorities for compliance verification and conduct regular safety checks to maintain adherence to standards․

Additional Resources and Support

8․2 Ensuring Compliance with Safety Standards

Ensure compliance with local and national safety regulations during DSI installation․ Follow all safety protocols, ensure proper ventilation, and avoid exposing components to hazardous conditions․

9․1 Accessing User Manuals and Guides

Access official DSI user manuals and guides online for detailed instructions and troubleshooting tips․ Visit the DSI website or support section to download PDF manuals, installation guides, and technical specifications․ These resources provide step-by-step instructions, diagrams, and expert advice to ensure proper setup and maintenance․ For specific models, refer to the provided links or contact technical support for assistance․

9․2 Contacting Technical Support

For assistance with DSI installation or troubleshooting, contact technical support via phone at 800-446-7659 or fax at 866-509-5099․ Visit www․diggerspecialties․com for more details․ Email inquiries can be sent to dsi@dsigo․com․ Technical support is available to resolve complex issues, provide troubleshooting, and offer guidance on parts replacement or advanced configurations․ Ensure your DSI system functions optimally with expert assistance․

rubbermaid shed 7×7 assembly instructions

Welcome to the Rubbermaid 7×7 shed assembly guide. This durable, low-maintenance shed offers ample storage. Follow this guide for a smooth assembly process and safe installation. Ensure a successful project by adhering to instructions carefully.

1.1 Overview of the Shed and Its Features

The Rubbermaid 7×7 shed is a durable, low-maintenance storage solution. Its 7×7 feet size offers ample space for tools and equipment. Designed with weather-resistant materials, it ensures long-lasting performance. The shed features a sturdy frame and easy-to-follow assembly instructions, making it a reliable choice for outdoor storage needs. Proper anchoring is essential for stability and safety.

1.2 Importance of Following Assembly Instructions

Following the assembly instructions ensures a safe, correct, and efficient setup of your Rubbermaid 7×7 shed. Proper assembly prevents structural issues and safety hazards. Misalignment or missing steps can lead to instability. Adhere to the guide to guarantee a durable and functional storage solution. This helps avoid potential damage and ensures the shed withstands environmental conditions effectively.

Pre-Assembly Preparation

Begin by reviewing the manual and gathering all tools and parts. Ensure the site is clear and level. Organize components for efficient assembly and a smooth process.

2.1 Reviewing the Parts List and Manual

Start by carefully examining the parts list to ensure all components are included, matching each item to its description. Read the manual thoroughly, understanding each step and diagram. This will help identify any potential issues early and streamline the assembly process, ensuring a successful and stress-free experience.

2.2 Ensuring All Components Are Present

Verify the presence of all components by cross-referencing with the parts list. Ensure no items are missing or damaged. Organize parts to avoid confusion during assembly. If any components are missing, contact customer support immediately. A complete set is essential for a smooth and successful assembly process.

2.3 Preparing the Construction Site

Select a flat, dry area for assembly, ensuring it’s clear of debris. Mark the shed’s footprint using chalk or rope to guide placement. Gather all tools and materials nearby for easy access. Ensure proper lighting and a clean workspace to facilitate efficient assembly. Organizing your workspace beforehand will help prevent delays and ensure a smooth process.

Safety Considerations

Always wear safety gear, including gloves and safety glasses. Ensure the site is stable and clear of hazards. Avoid overreaching or standing on unstable surfaces. Work with a partner when lifting heavy components. Follow all safety guidelines in the manual to prevent accidents.

3.1 General Safety Tips for Assembly

Always wear safety glasses and gloves to protect yourself. Ensure the assembly area is clear of obstacles and well-lit. Use proper lifting techniques to avoid injury. Never stand on the shed roof or panels. Keep children and pets away during assembly. Work with a partner when handling heavy components. Follow all safety precautions outlined in the manual.

3.2 Avoiding Common Hazards During Assembly

Be aware of your surroundings to prevent accidents. Avoid standing on shed panels or roofs, as they may not support weight. Keep sharp edges and tools out of reach of children. Ensure panels are securely fastened to prevent shifting during assembly. Properly anchor the shed to avoid structural instability. Always refer to the manual for guidance on handling heavy components safely.

Tools and Materials Needed

Gather essential tools: screwdriver, wrench, pliers, and step stools. Ensure all materials from the kit are present. At least two people are recommended for handling heavy parts;

4.1 Essential Tools for Assembly

The assembly requires basic tools like a screwdriver, wrench, and pliers. Step stools or ladders are necessary for roof access. Ensure all hardware and panels are organized. Safety gear, including gloves and goggles, is recommended. Having all tools ready ensures a smooth and efficient assembly process. Refer to the manual for specific tool requirements.

4.2 Recommended Safety Gear

Essential safety gear includes gloves, safety glasses, and a dust mask. Steel-toe shoes or closed-toe footwear is advised to prevent injuries. A first aid kit should be nearby. These items ensure a safe working environment and proper handling of tools during the assembly process.

Foundation and Site Preparation

A stable base is crucial for your shed. Clear debris, level the ground, and ensure proper drainage to create a solid foundation for assembly.

5.1 Leveling the Ground

Ensure the site is level to prevent structural issues. Clear debris, mark the area, and dig slightly if needed. Use a spirit level and shovel to achieve even ground. Compact the soil firmly for stability. Check the surface with a spirit level to confirm it’s perfectly horizontal before proceeding. A well-leveled base ensures proper assembly and durability.

5.2 Creating a Stable Base for the Shed

For a stable base, lay a foundation of compacted gravel or a concrete slab. Ensure the surface is even and durable. Place the shed’s floor frame or base kit according to instructions. Use appropriate materials like treated lumber or a plastic base for long-term durability. Double-check alignment and levelness before proceeding with assembly.

Wall Assembly

Construct the shed’s frame using the provided hardware. Attach wall panels securely, ensuring proper alignment and squareness. Follow manual steps for a sturdy structure.

6.1 Constructing the Frame

Begin by assembling the frame using the provided hardware. Ensure all corners are square and aligned properly. Use bolts to secure the frame sections tightly. Double-check the frame’s stability before proceeding. Proper frame construction is crucial for the shed’s structural integrity. Follow the manual’s specific instructions for accurate assembly. Ensure the frame is level and firmly grounded.

6.2 Attaching Panels to the Frame

Align the wall panels with the frame, ensuring proper fit. Secure panels using the provided screws. Start from the bottom and work upwards. Verify alignment as you go. Tighten all connections firmly. Double-check for any gaps or misalignments. Ensure panels are snug and evenly spaced. This step ensures the shed’s walls are sturdy and properly integrated with the frame.

Roof Installation

Install the roof by lifting panels onto the frame, aligning with the ridge beam, and securing firmly. Ensure panels are snug and the roof is stable, following instructions carefully.

7.1 Preparing the Roof Panels

Begin by gathering and inspecting all roof panels. Align the arrows on the panels inward to ensure proper fit. Use step stools inside and outside the shed to lift and guide panels into place. Carefully raise each panel, aligning it with the ridge beam, and secure it firmly to the frame for stability.

7.2 Securing the Roof to the Walls

Align the roof panels with the top edges of the walls, ensuring a snug fit. Use the provided screws to attach the panels to the wall frames, tightening firmly but avoiding overtightening. Double-check the alignment and ensure the roof is evenly distributed across the walls for structural stability and a weather-tight seal.

Door Setup and Alignment

Install the door frame accurately, ensuring proper alignment with the shed opening. Attach doors using provided hardware, checking for smooth operation and even spacing before final tightening.

8.1 Installing the Door Frame

Begin by attaching the door frame to the shed’s front wall using the provided screws. Ensure the frame is level and aligned with the pre-drilled holes. Secure it tightly to maintain structural integrity. Double-check the alignment to ensure proper door functionality before proceeding to install the doors themselves.

8.2 Adjusting and Securing the Doors

After installing the doors, adjust them to ensure proper alignment and smooth operation. Tighten all hinges and screws securely. Check that the doors open and close evenly, without touching the frame. Make sure the latch aligns correctly with the door catch for secure closure. Test the doors multiple times to ensure proper functionality and make any necessary adjustments.

Final Inspection and Touch-ups

Inspect all components for proper alignment and security. Check for gaps or misalignments. Ensure all screws and bolts are tightened. Address any issues to ensure structural integrity.

9.1 Checking for Structural Integrity

Ensure all panels, walls, and roof sections are securely attached. Verify proper alignment and stability of the frame. Check for any gaps or uneven surfaces. Confirm that doors open and close smoothly. Inspect the foundation for levelness and stability. Tighten any loose screws or bolts to ensure the shed meets safety standards and withstands environmental conditions.

9.2 Addressing Any Gaps or Misalignments

Inspect the shed for any gaps between panels or misaligned sections. Use shims or adjust panels to fill gaps. Tighten screws or bolts where necessary. Ensure proper alignment of doors and roof. If misalignments persist, refer to the manual for adjustment guidance. Addressing these issues ensures a secure and weather-tight structure.

Anchoring the Shed

Anchoring ensures the shed’s stability and safety. Use anchor kits provided to secure it to the ground, following the manual’s instructions for proper installation and long-term durability.

10.1 Importance of Anchoring

Anchoring your Rubbermaid 7×7 shed is crucial for stability and safety. It prevents movement, protects against wind damage, and ensures the structure remains secure. Proper anchoring also safeguards against shifting due to weather conditions, ensuring long-term durability and reliability. This step is essential for maintaining the shed’s integrity and preventing potential risks associated with an unsecured building.

10.2 Securing the Shed to the Ground

To secure the shed, use anchor kits specifically designed for this purpose. Follow the manual’s instructions to drill into the foundation and attach the anchors. Ensure all straps are tightly fastened to the shed and anchors. This process guarantees the shed remains stable and firmly attached, even in harsh weather conditions, providing long-lasting protection and structural integrity.

Congratulations on completing your Rubbermaid 7×7 shed assembly! Regular maintenance, such as cleaning and inspecting for damage, ensures longevity. Follow manufacturer recommendations for repairs and updates to keep your shed secure and functional for years to come.

11.1 Completing the Assembly Process

Once all components are securely in place, double-check every connection and alignment. Ensure the shed is level and all panels are tightly fastened. Finalize by installing any decorative elements or accessories. Take a moment to review each step to confirm everything is correctly assembled. Your Rubbermaid 7×7 shed is now ready for use, providing durable and reliable storage for years to come.

11.2 Tips for Long-Term Shed Maintenance

Regularly inspect the shed for damage or wear. Clean debris from the roof to prevent water pooling. Lubricate door hinges and tighten any loose screws. Protect the exterior with a UV-resistant coating if needed. Store items neatly to maintain space and prevent pest infestations. Proper care ensures your Rubbermaid shed remains durable and functional for years.