
The 6R140 transmission, commonly used in heavy-duty applications, requires precise rebuilding to maintain performance and durability․ This guide provides a detailed approach to rebuilding it successfully․
Overview of the 6R140 Transmission
The 6R140 transmission is a heavy-duty, six-speed automatic designed for high-performance vehicles like the Ford F-450 Super Duty․ Known for its strength and durability, it handles demanding applications, including towing and hauling․ However, issues like forward clutch failure and excessive wear can arise, requiring a rebuild․ This transmission is complex, featuring advanced torque converter lockup and gear ratios optimized for both power and efficiency․ Proper rebuilding ensures longevity and restores smooth shifting, making it a critical process for maintaining vehicle reliability․
Importance of a Rebuild Manual
A rebuild manual is essential for successfully reconstructing the 6R140 transmission․ It provides detailed, step-by-step instructions to ensure accuracy and safety during the process․ Without a manual, identifying worn parts, understanding torque specifications, and aligning components properly becomes challenging․ It also includes troubleshooting tips and diagnostic techniques, helping to address common issues like forward clutch failure or excessive wear․ A well-structured manual ensures that even complex tasks, such as reassembling the transmission, are completed efficiently, preventing costly mistakes and ensuring optimal performance post-rebuild․

Tools and Equipment Needed for the Rebuild
Specialized tools like a transmission jack and bearing puller are crucial for the rebuild․ Proper workshop setup and safety gear ensure a safe and efficient process․
Specialized Tools Required
A transmission jack and bearing puller are essential for handling heavy components․ A hydraulic press is necessary for removing and installing bearings․ Torque wrenches ensure proper bolt tightening․ Precision measuring tools like a dial indicator help assess wear․ A seal installer prevents damage during reassembly․ Specialized adapters may be needed for specific parts․ Basic hand tools, such as wrenches and screwdrivers, are also required․ Having the right tools ensures safety and accuracy during the rebuild process․ Always refer to the manual for specific tool recommendations․ Proper equipment minimizes risks and ensures a successful rebuild․
Workshop Setup and Safety Precautions
Ensure your workspace is clean, well-lit, and free from hazards․ Wear protective gear, including gloves and safety goggles, to prevent injury․ Use a transmission jack and jack stands for secure lifting and support․ Clear the area of flammable materials and have a fire extinguisher nearby․ Properly secure the transmission on a stable workbench or stand to avoid movement during disassembly․ Keep loose clothing and long hair tied back to prevent entanglement with tools․ Always follow torque specifications and safety guidelines to avoid accidents and ensure a successful rebuild․

Disassembly of the 6R140 Transmission
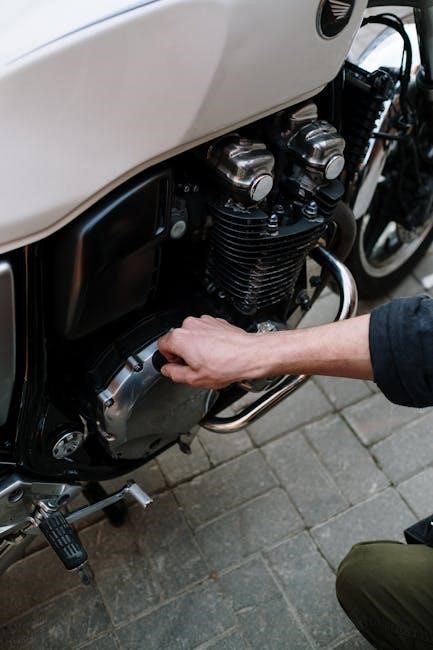
The disassembly begins with removing the transmission pan and filtering debris․ Carefully extract the main components, including the case, gears, and bearings, ensuring proper organization and documentation for reassembly․
Step-by-Step Disassembly Process
The disassembly of the 6R140 transmission begins with removing the transmission pan and draining the fluid․ Next, detach the torque converter and carefully pull the transmission case․ Remove the input shaft and output shaft, followed by the planetary gear set․ Extract the clutch packs and bands, taking note of their positions․ Mark all components for proper reassembly․ Use specialized tools to remove bearings and seals․ Document each step to ensure accuracy during reassembly․ Store components in an organized manner to prevent loss or damage․ Safety precautions, such as using a torque wrench, are essential throughout the process․
Common Challenges During Disassembly
During the disassembly of the 6R140 transmission, common challenges include stuck or seized components, such as bearings or gearsets, which may require specialized tools to remove․ The park pawl mechanism, often responsible for issues like movement in park, can be particularly tricky to disassemble due to its complex engagement system․ Additionally, identifying and marking components accurately is critical to ensure proper reassembly․ Improper handling of sensitive parts, such as clutch packs or seals, can lead to further damage․ Patience and careful planning are essential to overcome these obstacles effectively․

Inspection and Diagnosis of Transmission Components
A thorough inspection ensures accurate diagnosis of worn or damaged parts in the 6R140 transmission, crucial for a successful rebuild․
How to Identify Worn or Damaged Parts
Identifying worn or damaged parts in the 6R140 transmission requires a systematic approach․ Begin with a visual inspection, checking for signs of scoring, excessive wear, or cracks on gears and bearings․ Look for abnormal play in shafts or bushings, and inspect seals for leaks or degradation․ Performance issues, such as slipping or unusual noises, can indicate internal damage․ Use specialized tools like a micrometer to measure gear teeth and bearing surfaces against factory specifications․ Comparing components to new parts helps confirm wear patterns and necessary replacements․ This step ensures a precise and effective rebuild․
Diagnostic Techniques for Proper Assessment
Proper assessment of the 6R140 transmission involves precise diagnostic techniques․ Begin with a pressure test to identify leaks or internal damage․ Measure end play and bearing clearance using specialized tools to detect worn components․ Use a scan tool to retrieve error codes from the transmission control module (TCM), which can indicate specific issues like solenoid failures or clutch pack wear․ Perform a visual inspection of the fluid for contamination or metal shavings․ Finally, bench test critical components like the torque converter and valve body to ensure functionality․ These steps ensure accurate identification of faulty parts․

Cleaning and Preparation for Reassembly
Proper cleaning and preparation are crucial for a successful 6R140 rebuild․ Use solvents to remove grease and grime, and media blast parts for a clean surface․ Inspect all components for remaining debris or damage․ Apply a thin layer of assembly lube to moving parts to prevent friction during initial startup․ Ensure all mating surfaces are clean and free of contaminants before reassembly․ This step guarantees optimal performance and longevity of the transmission․
Proper Cleaning Methods for Transmission Parts
Cleaning transmission parts effectively is essential for a successful rebuild․ Start by soaking components in a solvent bath to dissolve grease and grime․ Use a parts washer or ultrasonic cleaner for thorough degreasing․ For tough deposits, apply a wire brush or media blasting․ Avoid using abrasive materials that might scratch surfaces․ Rinse parts with clean solvent and air dry to prevent water spots․ Ensure all surfaces are spotless before applying assembly lubricant․ Proper cleaning prevents contamination and ensures smooth operation post-rebuild․ This step is critical for the longevity and reliability of the 6R140 transmission․
Surface Preparation for Reassembly
After cleaning, prepare transmission surfaces for reassembly by inspecting for any remaining contaminants or debris․ Use a clean, lint-free cloth to wipe down all parts, ensuring surfaces are smooth and free of scratches․ Apply a thin layer of assembly lubricant to friction surfaces, following the manual’s specifications․ Proper surface preparation prevents premature wear and ensures optimal sealing․ Inspect all mating surfaces for alignment pins or bushings, ensuring they are undamaged and properly seated․ This step is critical for achieving smooth operation and longevity of the 6R140 transmission after rebuild․
Reassembly of the 6R140 Transmission
Reassembly requires meticulous attention to detail, following the manual’s torque specifications and alignment guidelines to ensure proper fitment of all components․ Precision is key․
Reassembly Process and Torque Specifications
The reassembly of the 6R140 transmission begins with carefully installing the main components, ensuring each part is aligned correctly․ Torque specifications are critical; for instance, the main bearing cap bolts should be tightened to approximately 45-50 ft-lbs in a star pattern․ The valve body must be reinstalled with precise torque settings to avoid leakage․ Each step should follow the manual’s sequence to maintain structural integrity and ensure smooth operation․ Adhering to these specifications guarantees optimal performance and longevity of the transmission․
Alignment and Installation of Key Components
Proper alignment of the input shaft, output shaft, and planetary gearset is essential during reassembly․ Use a dial indicator to ensure precise alignment, as misalignment can cause vibrations and premature wear․ Install the torque converter carefully, ensuring it engages correctly with the pump gear․ Key components like the bearing kits and gear sets must be installed in the correct order, following the manual’s instructions․ Always reference the torque specifications for each bolt and use a torque wrench to secure components firmly in place․ Proper alignment ensures smooth operation and prevents major issues down the road․

Testing and Validation Post-Rebuild
After reassembly, perform a series of tests to ensure the transmission operates smoothly․ Check for leaks, proper gear engagement, and smooth shifting under varying loads․
Initial Startup and Leak Testing
After completing the rebuild, perform a thorough inspection of all fluid connections and lines․ Fill the transmission with the recommended fluid level and connect the cooler lines securely․ Start the engine and allow it to idle for a few minutes to circulate the fluid․ Monitor for any signs of leaks around the pan gasket, cooler lines, or tailshaft seal․ Check the transmission control module for any error codes․ Gradually increase the RPM to ensure smooth engagement and proper pressure․ If no leaks or issues are detected, proceed to performance testing․
Performance Testing and Troubleshooting
After initial startup, test the transmission under various conditions to ensure optimal performance․ Check for smooth shifting through all gears, especially under load․ Monitor the transmission temperature and fluid level during operation․ If any issues arise, such as slipping or delayed engagement, refer to the diagnostic trouble codes using a scan tool․ Address any problems promptly, as they may indicate worn or improperly installed components․ Proper troubleshooting ensures reliability and prevents further damage․ Always follow the manufacturer’s guidelines for testing and repair․
Common Mistakes to Avoid During the Rebuild
Avoiding common mistakes is crucial for a successful 6R140 rebuild․ Ensure all components are thoroughly inspected and cleaned․ Properly torque all fasteners and align parts precisely․ Follow the manual strictly to prevent errors․ Neglecting these steps can lead to premature failure and costly repairs․ Attention to detail is key to ensuring optimal transmission performance and longevity․
Typical Errors and Their Consequences
Common mistakes during a 6R140 rebuild include improper torque specifications, misaligned components, and insufficient cleaning of parts․ These errors can lead to reduced transmission performance, increased wear, and even complete failure․ Improperly torqued bolts may cause leaks or internal damage, while misaligned components can result in poor shifting and reduced power delivery․ Inadequate cleaning can introduce contaminants, leading to premature wear on gears and bearings․ Such issues often require costly repairs or even a full rebuild, emphasizing the importance of meticulous attention to detail throughout the process․
Best Practices for a Successful Rebuild
To ensure a successful 6R140 rebuild, adhere to precise torque specifications, use specialized tools, and maintain a clean workspace․ Follow the manual closely to avoid misalignment of critical components․ Regularly inspect and replace worn parts, and apply lubricants as specified․ Proper surface preparation and alignment during reassembly are crucial for smooth operation․ Testing post-rebuild is essential to verify functionality and address any issues promptly․ By following these practices, you can achieve a durable and high-performing transmission, minimizing future repairs and ensuring optimal vehicle performance․
Rebuilding the 6R140 transmission is a complex process requiring attention to detail and adherence to guidelines․ Proper execution ensures reliability and optimal performance, extending the transmission’s lifespan․
The 6R140 rebuild process is complex but rewarding when executed correctly․ It involves detailed disassembly, inspection, and reassembly, ensuring every component meets specifications․ Proper tools and a clean environment are essential․ A recent example from a 2019 F450 Super Duty highlights the importance of addressing issues like movement in park․ Following the manual closely ensures reliability and performance, especially for high-power applications like a 1500hp-rated transmission․ Attention to torque specs and alignment is critical․ A successful rebuild restores functionality, prevents future issues, and extends the transmission’s lifespan․
Importance of Following the Manual
Adhering to the rebuild manual is crucial for ensuring the 6R140 transmission operates safely and efficiently․ Deviating from specified steps or torque values can lead to costly damage or even failure․ Proper alignment and installation of components, as outlined in the manual, are vital for maintaining performance and longevity․ For instance, issues like unexpected movement in park, as seen in a 2019 F450 Super Duty, can be avoided by following precise instructions․ The manual serves as a roadmap to a successful rebuild, safeguarding both the transmission and the vehicle․