manual floor cleaning tool crossword clue

Manual floor cleaning tools are essential for maintaining hygiene and cleanliness in various settings. They include brooms, mops, and carpet sweepers, often featured in crossword clues as simple yet effective solutions.

1.1 Definition and Purpose

Manual floor cleaning tools are non-electric devices used for sweeping, mopping, or dusting floors. Their purpose is to maintain hygiene and cleanliness in homes, offices, and public spaces. These tools are cost-effective, eco-friendly, and often featured in crossword clues as simple yet essential solutions for daily cleaning tasks.

1.2 Importance in Maintenance and Hygiene

Manual floor cleaning tools play a vital role in maintaining cleanliness and hygiene, especially in high-traffic areas. They help remove dirt, dust, and allergens, preventing the spread of germs. Regular use of these tools ensures a safe and healthy environment, making them indispensable for daily maintenance routines and crosswords often highlight their significance.

Common Manual Floor Cleaning Tools

Common manual floor cleaning tools include brooms, mops, and carpet sweepers. These essential items are often featured in crossword clues, highlighting their everyday use and importance.

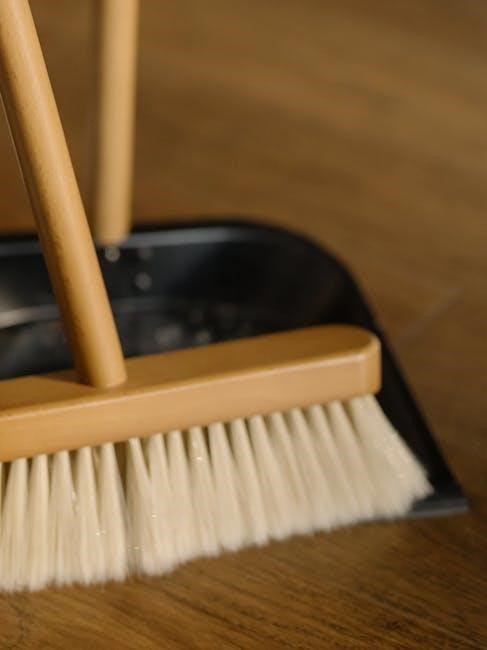
2.1 Broom and Dustpan

The broom and dustpan are classic manual cleaning tools, ideal for sweeping floors. They are often referenced in crossword clues, with “brooms” being a common anagram-based answer. Simple yet effective, they remain essential for quick cleanups, offering an eco-friendly alternative to powered devices. Their versatility and ease of use make them a practical choice for daily maintenance.

2.2 Mop and Bucket

The mop and bucket are versatile manual cleaning tools used for scrubbing and cleaning floors. They consist of a handle attached to a absorbent head, dipped into a bucket of water or cleaning solution. Effective for various floor types, they are often referenced in crossword clues, with “mop” being a common short answer, frequently solved using anagram tools.

2.3 Carpet Sweeper

A carpet sweeper is a manual tool designed to clean carpets by picking up dust, dirt, and debris. It’s often used for quick cleanups and is a popular answer in crossword puzzles, with “CARPETSWEEPER” being a common solution. Its design makes it a unique fit for clues related to floor cleaning, especially when anagrams are involved.

2.4 Feather Duster

A feather duster is a lightweight, manual tool used for dusting surfaces. It’s a common answer to crossword clues related to cleaning, often appearing as “FEATHERDUSTER.” Its portability and effectiveness in reaching tight spaces make it a popular choice for quick cleanups, and its name frequently fits anagram-based puzzles due to its unique word structure.

Crossword Clue Analysis

Manual floor cleaning tool crossword clues often involve anagrams or wordplay, with common answers like “BROOMS” or “FEATHERDUSTER.” These clues test problem-solving skills and knowledge of cleaning tools.

3.1 Possible Answers

Popular answers for “manual floor cleaning tool” crossword clues include BROOMS, MOP, and CARPETSWEEPER. These tools are commonly referenced due to their widespread use and simplicity, making them ideal for crossword puzzles. Their varying word lengths also fit neatly into grid designs, adding to their popularity in clues related to cleaning equipment.

3.2 Word Length and Structure

Manual floor cleaning tool crossword clues often vary in word length, from short answers like MOP (3 letters) to longer ones like CARPETSWEEPER (12 letters); The structure typically aligns with common cleaning tools, making them recognizable and solvable. This range in length allows crossword creators to fit answers seamlessly into grid designs, enhancing both challenge and playability for participants.

3.3 Anagram Possibilities

Anagrams can be useful in solving crossword clues for manual floor cleaning tools. For instance, rearranging letters in BROOMS or CARPETSWEEPER might reveal alternative answers. Tools like Anagrammer can help solvers generate possible anagrams, making it easier to identify correct answers and complete puzzles efficiently. This approach adds a strategic layer to crossword solving, enhancing the problem-solving experience.

Popular Crossword Solutions

Common answers include BROOMS, CARPETSWEEPER, and MOP. These tools are frequently featured in crossword puzzles due to their simplicity and relevance to manual floor cleaning tasks.

4.1 BROOMS

BROOMS are a common solution for manual floor cleaning tool crossword clues. Their simplicity and historical use make them a familiar term in puzzles. Often fitting 6-letter clues, brooms are effective for sweeping and remain a popular choice in crosswords due to their widespread recognition and daily use in maintenance tasks.

4.2 CARPETSWEEPER

CARPETSWEEPER is a popular answer for manual floor cleaning tool crossword clues, especially in longer puzzles requiring 10-12 letter solutions. It refers to a device used for cleaning carpets without electricity, making it a practical and recognizable term. Its structure and anagram possibilities also make it a frequent choice in crossword puzzles.

4.3 MOP

MOP is a common answer for manual floor cleaning tool crossword clues, often fitting into shorter puzzles with 3 letters. Its simplicity and universal recognition make it a go-to solution for crossword creators. The mop’s versatility and daily usage contribute to its frequent appearance in such clues, making it a reliable choice for solvers.

Tips for Solving Crossword Clues

Understanding context and using anagram tools can help solve crossword clues. Eliminate unlikely options and focus on common terms like BROOM or MOP for manual cleaning tools.

5.1 Understanding Context

Understanding context is crucial for solving crossword clues. Clues often hint at wordplay or direct meanings. For example, “manual floor cleaning tool” might point to BROOM or MOP. Recognizing common terms and word lengths helps narrow down answers, ensuring quick and accurate solutions to puzzles.

5.2 Using Anagram Tools

Anagram tools are invaluable for solving crossword clues. They help rearrange letters to reveal potential answers. For example, “manual floor cleaning tool” can be decoded using an anagram tool, suggesting solutions like BROOMS or CARPETSWEEPER. These tools efficiently transform jumbled letters into meaningful words, aiding in quick and accurate puzzle solving.

5.3 Eliminating Unlikely Options

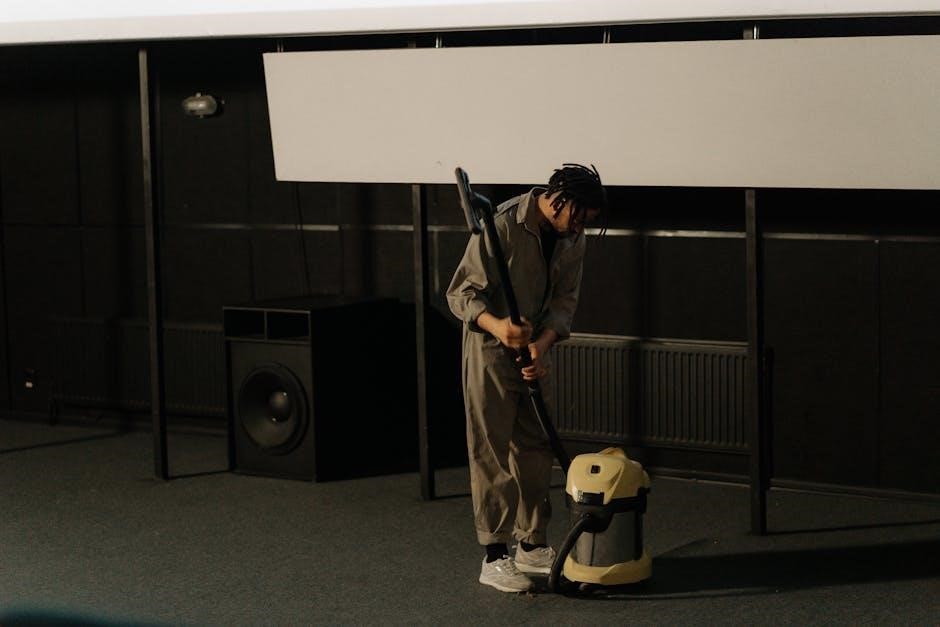
Eliminating unlikely options is crucial for solving crossword clues efficiently. Consider word length, letter composition, and context. For example, if the clue refers to a manual tool, automated solutions like “VACUUM” can be ruled out. Similarly, if the answer requires a specific letter pattern, options that don’t fit can be discarded. This strategy narrows down potential answers effectively, saving time and effort.

History of Manual Cleaning Tools

Manual cleaning tools date back to ancient times, evolving from natural materials like twigs and cloths. Brooms and mops emerged in the Middle Ages, remaining essential cleaning aids.

6.1 Evolution Over Time

Manual cleaning tools have evolved significantly over centuries. Early brooms were made from twigs and branches, while mops transitioned from cloths tied to sticks to modern, absorbent heads. Advances in materials and design have improved efficiency, reflecting changes in societal needs and technological progress.

6.2 Impact on Daily Life

Manual cleaning tools play a vital role in maintaining daily hygiene and comfort. They enable effective removal of dust, dirt, and allergens, creating cleaner living and working environments. Their simplicity and accessibility make them indispensable for routine cleaning tasks, ensuring a healthy and organized space without reliance on electricity or complex machinery.

Safety and Maintenance

Proper handling and storage of manual cleaning tools ensure safety and longevity. Regular cleaning and inspection prevent damage, while using protective gear minimizes risks during cleaning tasks effectively.

7.1 Proper Usage Guidelines

Always read instructions before using manual cleaning tools to ensure safety. Use ergonomic handles to avoid strain, and store tools in dry, secure locations. Regularly clean and inspect tools for damage. Wear protective gear like gloves when necessary. Follow these guidelines to prevent accidents and extend the lifespan of your cleaning tools effectively.

7.2 Cleaning and Storage Tips

Regularly clean manual tools with mild detergent and water to prevent dirt buildup. Allow them to air-dry to avoid mold. Store tools upright in well-ventilated areas, away from direct sunlight. Replace worn bristles or handles promptly. Proper storage and cleaning maintain tool efficiency and ensure longevity, keeping your floors consistently clean.

Environmental Benefits

Manual cleaning tools reduce chemical use and environmental impact. They promote eco-friendly cleaning, minimizing carbon footprints and supporting sustainable practices for a greener future.

8.1 Eco-Friendly Options

Eco-friendly manual cleaning tools, like brooms and mops made from sustainable materials, reduce environmental impact. They minimize chemical use and promote greener cleaning practices, aligning with modern sustainability trends and supporting a healthier planet.

8.2 Reducing Chemical Use

Manual cleaning tools like mops and brooms help reduce chemical use by relying on physical cleaning methods. This approach minimizes environmental harm and promotes healthier indoor air quality, making it a preferred choice for eco-conscious individuals and households aiming to reduce their chemical footprint.

Cultural Significance

Manual cleaning tools like brooms often symbolize simplicity and tradition in media, reflecting cultural values of hard work and resourcefulness, while also appearing as common crossword answers.

9.1 Symbolism in Media

Manual cleaning tools, like brooms, often symbolize simplicity and tradition in media, reflecting cultural values of hard work and resourcefulness. Their appearance in crosswords highlights their enduring relevance in daily life, bridging practicality with cultural significance, and showcasing their timeless utility across generations and societies.

9.2 Cultural Perceptions

Manual floor cleaning tools are often viewed as symbols of diligence and humility across cultures. Their inclusion in crossword clues reflects their universal recognition and everyday relevance. Societal perceptions vary, with some valuing their simplicity and others preferring modern alternatives, yet their presence in media and puzzles underscores their enduring cultural significance and practical appeal.

Modern Alternatives

Modern alternatives to manual tools include electric and automated devices like robotic vacuums and electric mops, offering enhanced efficiency and convenience for floor cleaning tasks.

10.1 Electric and Automated Tools

Electric and automated tools, such as robotic vacuums and electric mops, offer advanced cleaning solutions. These devices navigate independently, adjust settings, and efficiently clean various surfaces, reducing manual effort. They complement traditional crossword clue answers like “BROOMS” by providing modern, high-tech alternatives for hassle-free floor maintenance, ensuring cleaner spaces with minimal human intervention.

10.2 Hybrid Cleaning Solutions

Hybrid cleaning solutions combine manual and automated features, offering versatility for diverse cleaning needs. These tools often feature adjustable settings, blending traditional methods with modern technology. They provide efficient cleaning with minimal effort, making them ideal for both small and large spaces while fitting into crossword clues as innovative answers alongside classic manual tools.

Manual floor cleaning tools remain essential for effective cleaning, with their simplicity and versatility making them popular crossword answers. Their evolution and practicality ensure continued relevance in modern times.

11.1 Final Thoughts

Manual floor cleaning tools, like brooms and mops, remain indispensable for everyday maintenance. Their simplicity and effectiveness make them popular crossword clues, reflecting their timeless utility in keeping spaces clean and organized, even as modern alternatives emerge. These tools embody practicality, ensuring their relevance in both traditional and contemporary cleaning routines.

11.2 Encouragement for Further Exploration

Exploring manual floor cleaning tools offers insights into their historical and modern uses. From brooms to carpet sweepers, these tools are not just for cleaning but also appear in crossword clues, showcasing their cultural significance. Dive deeper into their evolution and eco-friendly options to appreciate their lasting impact on daily life and puzzle culture.

ninja foodi air fryer instruction manual

The Ninja Foodi Air Fryer is a versatile kitchen appliance that combines air frying with other advanced cooking functions. Designed for convenience and efficiency, it offers healthy cooking alternatives while maintaining crispy textures. With its user-friendly interface and robust features, the Ninja Foodi Air Fryer has become a popular choice for home cooks. This guide will walk you through its features, setup, and usage to help you make the most of your cooking experience.

1.1 Overview of the Ninja Foodi Air Fryer

The Ninja Foodi Air Fryer is a multi-functional appliance that combines air frying, baking, roasting, and dehydrating capabilities. It uses advanced DualZone Technology, allowing simultaneous cooking of two foods with different settings. With its TenderCrisp Technology, it delivers crispy results with minimal oil. Designed for efficiency, it features a digital display, customizable settings, and a spacious non-stick basket. Perfect for healthier, convenient cooking.

1.2 Key Features and Benefits

The Ninja Foodi Air Fryer boasts a range of impressive features, including DualZone Technology for simultaneous cooking, a digital control panel for precision, and TenderCrisp Technology for crispy results. Its large capacity and non-stick basket ensure even cooking and easy cleanup. Health-conscious users will appreciate the minimal oil required, while the versatile functions like dehydrate, roast, and bake offer endless meal possibilities, making it a valuable addition to any kitchen.

Unboxing and Initial Setup

Upon unboxing, ensure all components like the main unit, baskets, and crisper plate are included. Follow safety guidelines and read the manual before first use.

2.1 Unboxing the Ninja Foodi Air Fryer

Carefully unpack the Ninja Foodi Air Fryer, ensuring all components are included, such as the main unit, baskets, crisper plate, and accessories. Check for any damage and verify all items against the manual. Before first use, read the safety guidelines and instructions thoroughly to ensure proper setup and operation. This step ensures a safe and efficient cooking experience.

2.2 Pre-Use Checklist and Safety Precautions

Before using your Ninja Foodi Air Fryer, read the manual thoroughly and ensure all safety precautions are followed. Keep children away during setup and operation. Place the unit on a stable, heat-resistant surface and avoid touching hot parts. Never submerge the main unit in water, and ensure all accessories are properly secured. Adhering to these guidelines ensures safe and efficient cooking.

Understanding the Control Panel

The control panel features intuitive buttons and a digital display, allowing easy navigation through cooking functions and customizable settings for precise temperature and time control during cooking.

3.1 Functions and Buttons Explained

The Ninja Foodi Air Fryer’s control panel includes a power button, temperature control, timer, and function selection buttons. The digital display shows real-time cooking settings, ensuring precise adjustments. Dedicated buttons for air fry, roast, and dehydrate modes streamline operation. The start/stop button allows easy control, while the crisp button enhances browning. Each button is clearly labeled for intuitive use, making it easy to navigate various cooking functions.

3.2 Customizable Settings for Cooking

The Ninja Foodi Air Fryer offers customizable settings for precise control over your cooking. Adjust temperature, timer, and cooking modes to suit your recipe. The digital interface allows you to set specific heat levels and durations, ensuring optimal results. With features like DualZone Technology, you can cook multiple foods at different settings simultaneously. These customizable options empower you to tailor cooking to your preferences, enhancing versatility and ease of use.

Operating Modes and Cooking Functions

The Ninja Foodi Air Fryer offers multiple cooking functions, including air fry, roast, and dehydrate, making it a versatile appliance for various recipes. These modes streamline cooking processes, ensuring crispy results with minimal oil. DualZone Technology allows simultaneous cooking of different foods at varied settings, enhancing efficiency for home cooks and professionals alike.

4.1 Air Fry Mode: How It Works

The Air Fry mode on the Ninja Foodi uses rapid air circulation technology to crisp food evenly. By circulating super-hot air around the food, it removes moisture from the surface, creating a golden-brown finish with minimal oil. This mode is ideal for achieving fried-like results without the need for deep frying. Simply place your food in the basket, set the temperature and timer, and let the Ninja Foodi do the rest.

4.2 DualZone Technology: Cooking Multiple Foods Simultaneously

DualZone Technology allows you to cook two different foods at once with independent temperature controls. Each basket can be set to different settings, ensuring both dishes are cooked to perfection simultaneously. This feature is perfect for preparing complete meals efficiently, saving time and effort. The technology ensures even cooking and prevents flavors from mixing, making it ideal for busy households.

Safety Guidelines and Precautions

Always follow safety guidelines to ensure safe operation. Keep children away during cooking and cleaning. Avoid touching hot surfaces and use oven mitts. Read the manual thoroughly before first use to prevent accidents and ensure proper maintenance. Regular cleaning is essential to maintain performance and safety.

5;1 General Safety Tips for Using the Air Fryer

Always read the manual before using the Ninja Foodi Air Fryer. Keep children away during operation and cleaning. Avoid touching hot surfaces; use oven mitts when handling. Ensure the air fryer is placed on a heat-resistant surface. Never submerge the unit in water. Regularly clean the air fryer to prevent food residue buildup. Follow recommended cooking times and temperatures to avoid overheating.

5;2 Child Safety and Maintenance Warnings

Children should not operate or clean the Ninja Foodi Air Fryer without adult supervision. Maintenance tasks, such as cleaning, should not be performed by children. Keep the air fryer and its accessories out of reach of minors. Ensure the unit is cool before cleaning. Store all parts securely to avoid accidents. Regularly inspect for damage and ensure proper usage to maintain safety and longevity.

Cleaning and Maintenance

Regular cleaning and proper maintenance are essential for the longevity of your Ninja Foodi Air Fryer. Always unplug the unit before cleaning and avoid using abrasive materials.

6.1 Step-by-Step Cleaning Process

To clean your Ninja Foodi Air Fryer, start by unplugging it. Wipe the exterior with a damp cloth and mild detergent. Remove the crisper plate and basket, washing them with warm soapy water. Use a soft brush to scrub any food residue. Rinse thoroughly and dry. Regular cleaning prevents food buildup and ensures optimal performance. Always avoid abrasive cleaners to maintain the non-stick coating.

6.2 Regular Maintenance for Longevity

Regular maintenance ensures your Ninja Foodi Air Fryer performs optimally. After each use, clean the basket and pan thoroughly. Dry all parts to prevent rust. Avoid using metal utensils or abrasive cleaners, as they can damage the non-stick coating. Periodically, soak the basket in warm soapy water to remove stubborn residue. Always store the air fryer in a dry place to maintain its longevity and functionality.

Cooking Techniques and Recipes

Master essential cooking techniques for perfect results with your Ninja Foodi Air Fryer. Explore popular recipes, from crispy fries to tender chicken, tailored for beginners and beyond.

7.1 Essential Cooking Tips for Perfect Results

For perfect results with your Ninja Foodi Air Fryer, preheat the unit before cooking. Pat food dry to enhance crispiness and lightly spray with oil for even browning. Avoid overcrowding the basket for consistent cooking. Use the crisper plate for optimal airflow and adjust temperatures and times based on food type. These tips ensure delicious, restaurant-quality dishes every time.

7.2 Popular Recipes for Beginners

Start with simple recipes like crispy chicken wings, golden fries, or tender shrimp. Try air-fried vegetables such as broccoli or cauliflower for a healthy snack. Chicken breast with frozen onion rings is another easy option. These dishes are perfect for beginners, offering delicious results with minimal effort. Experiment with seasonings to enhance flavors and explore more complex recipes as you gain confidence.

Troubleshooting Common Issues

Address common issues like uneven cooking or the air fryer not turning on by checking power connections and ensuring proper preheating. Consult the FAQ section for solutions.

8.1 FAQs and Solutions

Frequently asked questions include issues like the air fryer not turning on or uneven cooking. Solutions often involve checking power connections, ensuring proper preheating, and cleaning the crisper plate. For more complex problems, resetting the device or consulting the manual is recommended. Always refer to the troubleshooting section for detailed guidance.

8.2 Resetting the Air Fryer

To reset the Ninja Foodi Air Fryer, unplug it from the power source and wait for 30 seconds. This allows any residual power to discharge. Plug it back in and ensure the device is turned off. Press and hold the power button for 10 seconds to complete the reset. This process resolves many operational issues. Always consult the manual for model-specific reset instructions.

Accessories and Replacement Parts

The Ninja Foodi Air Fryer offers various accessories like crisper trays, baskets, and recipe books. Genuine replacement parts are available on the official Ninja website.

9.1 Recommended Accessories for Enhanced Cooking

Enhance your Ninja Foodi Air Fryer experience with essential accessories. A crisper plate is crucial for achieving that perfect golden-brown finish on your dishes.
Additional non-stick baskets and trays are ideal for cooking multiple meals or larger portions.
Recipe books and cooking charts can inspire new meal ideas.
These accessories are designed to optimize performance and versatility.

9.2 Where to Find Genuine Replacement Parts

To ensure authenticity and quality, purchase replacement parts from the official Ninja Kitchen website or authorized retailers. These sources guarantee genuine products designed for your specific model. For assistance, contact Ninja customer support directly. Avoid third-party sellers to maintain warranty validity and performance. Always verify the seller’s authenticity to ensure compatibility and safety.

Warranty and Customer Support

Ninja Foodi Air Fryer comes with a limited warranty covering defects in materials and workmanship. For inquiries or claims, contact Ninja Customer Support via their official website or phone.

10.1 Understanding Your Warranty Coverage

The Ninja Foodi Air Fryer is backed by a limited warranty that covers defects in materials and workmanship. The warranty period varies by region, typically ranging from 1 to 5 years. Registration is recommended to activate and validate your coverage. Damages due to misuse or normal wear and tear are not covered. For detailed terms and conditions, refer to the official Ninja website or the provided warranty document.

10.2 Contacting Ninja Customer Service

For inquiries or assistance, visit the official Ninja Kitchen website and navigate to the support section. You can contact their customer service team via email at support@ninjaKitchen.com or by phone at 1-877-646-5288. Ensure you have your product model number (e.g., AF300 or AF400UK) ready for efficient service. For troubleshooting or warranty-related questions, refer to the provided manual or visit the support page for detailed guidance.

Advanced Features and Customization

The Ninja Foodi Air Fryer offers advanced features like a digital screen for precision cooking and customizable settings. Users can adjust cooking times, temperatures, and functions to suit their preferences. The TenderCrisp technology ensures crispy results, while programmable functions like Dehydrate and Broil expand cooking possibilities. These features allow for personalized cooking experiences.

11.1 Using the Digital Screen for Precision Cooking

The digital screen on the Ninja Foodi Air Fryer allows for precise control over cooking functions, temperatures, and timers. Users can easily navigate through preset settings or customize their own. The screen provides real-time feedback, ensuring accurate adjustments. For DualZone models, it also enables synchronized or independent control of both baskets. This feature enhances cooking efficiency and offers a seamless user experience.

11.2 Customizing Cooking Times and Temperatures

The Ninja Foodi Air Fryer allows users to customize cooking times and temperatures, ensuring optimal results for various foods. By using the digital screen, you can adjust settings to suit delicate items or tougher textures. This feature provides flexibility and precision, enabling you to achieve your desired outcomes efficiently. Customization enhances cooking control, making it ideal for a wide range of recipes and preferences.

Health Benefits of Air Frying

Air frying significantly reduces oil consumption compared to traditional frying, making it a healthier option. It also helps retain essential nutrients in food, promoting better health outcomes.

12.1 Reducing Oil Consumption

The Ninja Foodi Air Fryer uses little to no oil, making it a healthier alternative to deep frying. By circulating hot air, it achieves crispy results without excessive fat, reducing calorie intake significantly. This method is ideal for those seeking to lower their dietary oil consumption while enjoying flavorful meals. It promotes a healthier lifestyle effortlessly.

12.2 Retaining Nutrients in Food

The Ninja Foodi Air Fryer helps retain nutrients by using minimal oil and lower temperatures. Air frying preserves vitamins and minerals that are often lost in traditional deep-frying. The precise temperature control and shorter cooking times ensure that your food stays nutritious while remaining crispy and flavorful. This makes it a healthier choice for maintaining dietary health and flavor.

The Ninja Foodi Air Fryer is a game-changer for healthy, versatile cooking. Experiment with new recipes, explore its features, and enjoy delicious meals with minimal effort and maximum flavor.

13.1 Maximizing Your Ninja Foodi Air Fryer Experience

To maximize your Ninja Foodi Air Fryer experience, explore its versatile cooking modes and customize settings for precise results. Regularly clean and maintain the appliance to ensure longevity. Experiment with new recipes and techniques to unlock its full potential, ensuring every meal is a culinary success. This approach will help you make the most of your air fryer.

13.2 Encouragement to Experiment and Explore

Don’t hesitate to explore the full potential of your Ninja Foodi Air Fryer by trying new recipes and cooking techniques. Experiment with different flavors, ingredients, and settings to discover your favorite dishes. Whether you’re a beginner or an experienced cook, the air fryer’s versatility encourages creativity, helping you craft delicious, healthy meals effortlessly. Keep exploring and enjoy the culinary journey!

schumacher 6 12 volt battery charger manual

Welcome to the Schumacher 6/12 Volt Battery Charger Manual, your guide to safe and effective battery charging. This manual covers key features, safety tips, and usage instructions for optimal performance.

Overview of the Schumacher 6/12 Volt Battery Charger

The Schumacher 6/12 Volt Battery Charger is a versatile charging solution designed for both 6V and 12V batteries. It offers automatic charging and maintenance modes, ensuring optimal battery health. With a digital display, users can monitor charge levels and voltage effortlessly. The charger also features safety protections to prevent overcharging and overheating, making it a reliable choice for various applications, from automotive to marine use.

Importance of the Manual for Safe and Effective Use

The Schumacher 6/12 Volt Battery Charger Manual is crucial for safe and effective use, providing essential guidelines to prevent accidents and ensure optimal performance. It outlines proper charging procedures, safety precautions, and troubleshooting steps, making it indispensable for users of all experience levels. Regular consultation of this manual guarantees longevity and reliability of both the charger and batteries, while also ensuring user safety and compliance with manufacturer recommendations.

Key Features of the Schumacher 6/12 Volt Battery Charger

This charger features 6V and 12V compatibility, automatic charging with maintenance mode, a digital display for real-time monitoring, and robust safety protections for reliable operation.

6V and 12V Battery Compatibility

The Schumacher charger supports both 6V and 12V batteries, making it versatile for various applications. Its adaptive technology ensures optimal charging for different battery types, enhancing flexibility and convenience. This feature allows users to charge everything from small 6V batteries to larger 12V ones, catering to a wide range of vehicles and equipment. The charger automatically detects the battery voltage, ensuring a safe and efficient charging process.

Automatic Charging and Maintenance Mode

The Schumacher charger features an automatic charging mode that adjusts to the battery’s needs, ensuring efficient and safe charging. Once the battery is fully charged, it switches to maintenance mode, preventing overcharging. This intelligent system prolongs battery life and maintains optimal performance. The charger automatically detects the battery type and voltage, making it a reliable choice for both 6V and 12V applications. This hands-off approach ensures your batteries stay healthy and ready for use.

Digital Display for Monitoring Charge Levels

The Schumacher charger includes a digital display that provides real-time updates on battery charge levels and voltage. This feature allows users to monitor the charging process accurately and ensures the battery is charged to the correct level. The display is easy to read and offers precise information, helping to prevent overcharging or undercharging. It enhances user convenience and ensures the battery remains in optimal condition throughout the charging cycle.

Safety Features and Protections

The Schumacher charger is equipped with advanced safety features to protect both the user and the battery. It includes overcharge protection, reverse polarity prevention, and thermal protection to prevent overheating. These features ensure safe and reliable charging, minimizing risks of damage or hazards. The charger also automatically detects battery type and adjusts settings accordingly, providing a secure charging experience for 6V and 12V batteries alike.

Understanding the Manual Content

This manual provides essential guidance for using the Schumacher charger safely and effectively, covering safety guidelines, charging procedures, troubleshooting, and maintenance tips for optimal performance.

Safety Guidelines and Precautions

Always read the manual before using the Schumacher charger. Wear protective eyewear and gloves. Ensure the charger is on a stable, flat surface. Avoid overcharging, as it can damage the battery. Keep the charger away from flammable materials and moisture. Never touch electrical components with wet hands. Use only approved cables and connectors. Follow proper ventilation guidelines to prevent hydrogen gas buildup. Keep children and pets away during operation. Regularly inspect cables for damage.

Charging Procedures for 6V and 12V Batteries

Select the correct voltage (6V or 12V) on the charger before connecting. Attach the positive (red) clamp to the battery terminal, then the negative (black) clamp to the chassis or grounding point. Use the digital display to monitor charge progress. For 6V batteries, ensure the charger is set to 6V mode to prevent overcharging. Allow the charger to complete the cycle, then disconnect the clamps in reverse order. Always follow the manual for specific timing and settings.

Troubleshooting Common Issues

If the charger fails to power a 12V device, ensure the battery is fully charged and connections are secure. Check the digital display for error codes. For a battery that won’t hold a charge, verify the charger is set to the correct voltage (6V or 12V). If issues persist, consult the manual for reset procedures or contact support. Always power off devices before disconnecting to prevent damage.

Installation and Setup

Proper installation ensures safe and efficient charging. Begin with initial setup, connecting the charger to a power source, and preparing the battery. Mounting options are available for convenience.

Initial Setup and Preparation

Begin by unpacking the charger and ensuring all components are included. Choose a well-ventilated area for setup to prevent gas buildup. Read the manual thoroughly before starting. Set the charger to the correct voltage (6V or 12V) based on your battery type. Place the charger on a stable surface and plug it into a grounded outlet. Ensure the battery is disconnected from any electrical system to avoid damage or electrical shock.

Connecting the Charger to the Battery

Connect the charger to the battery by attaching the positive (red) clamp to the positive terminal and the negative (black) clamp to the negative terminal. Ensure the charger is set to the correct voltage (6V or 12V) before connecting. Double-check the terminals to avoid cross-connection, which can cause damage or sparks. Always disconnect the battery from the vehicle’s electrical system before charging to prevent electrical interference or system damage.

Mounting and Storage Options

Mount the charger securely in a well-ventilated area, such as a garage or workshop, using the provided brackets. For storage, keep the charger in a cool, dry place away from direct sunlight and flammable materials. Store the cables neatly to avoid damage, and ensure the charger is disconnected from power and the battery. Always refer to the manual for specific mounting and storage recommendations to ensure safety and longevity of the device.

Operating the Charger

Learn how to operate the Schumacher 6/12 Volt Battery Charger safely and efficiently. This section covers selecting charging modes, monitoring the process, and using the 12V DC outlet effectively.

Selecting the Correct Charging Mode

Selecting the right charging mode is crucial for optimal battery performance. Use the 6V mode for 6-volt batteries and 12V for standard automotive batteries. The charger features automatic detection, ensuring safe and efficient charging. For long-term maintenance, switch to the maintenance mode to prevent overcharging. Always refer to the digital display for real-time charge level monitoring and voltage readings to ensure accurate and safe charging processes.

Monitoring the Charging Process

Monitor the charging process using the digital display, which shows real-time charge levels and voltage readings. The charger automatically switches from fast charge to maintenance mode, ensuring optimal battery health. Check the display periodically to track progress and ensure the battery reaches full charge. The charger also provides visual and audible alerts when charging is complete or if an issue is detected, ensuring a safe and efficient process.

Using the 12V DC Power Outlet

The Schumacher charger features a convenient 12V DC power outlet for powering accessories. Connect compatible devices directly to the outlet, ensuring they meet the voltage and power requirements. Always turn off the device before plugging or unplugging it from the outlet. Avoid using the 12V outlet while the internal battery is charging to prevent overloading the system. This feature is ideal for powering small electronics or maintaining auxiliary systems safely and efficiently.

Troubleshooting and Maintenance

Identify common issues like battery not charging or charger malfunction. Check connections, power sources, and battery condition. Regularly inspect cables and terminals for damage or corrosion. Clean terminals to ensure proper conductivity and maintain optimal performance. Refer to the manual for detailed diagnostic steps and maintenance schedules to resolve issues effectively and extend charger lifespan.

Diagnosing Common Charging Issues

Check if the charger is properly connected to both the battery and power source. Verify the selected voltage matches the battery type (6V or 12V). Ensure all cables are secure and free from damage. If the charger fails to turn on, inspect the power cord and outlet. For a battery that won’t charge, test its condition using a multimeter. Refer to the manual’s troubleshooting section for detailed guidance on resolving these and other common issues.

Maintenance Tips for Optimal Performance

  • Regularly inspect the charger’s cables and terminals for damage or corrosion and clean them as needed.
  • Ensure the charger is stored in a cool, dry place when not in use to prevent damage.
  • Always follow the manual’s guidelines for charging different battery types to avoid overcharging.
  • Check for firmware updates to ensure the charger operates with the latest features and improvements.

Updating or Replacing Charger Components

  • Periodically check for firmware updates to ensure the charger operates with the latest features and improvements.
  • If a component is damaged, such as the power cord or cables, replace it with genuine Schumacher parts to maintain performance and safety.
  • Always disconnect the charger from the power source before performing any component replacement or maintenance.
  • Dispose of old or damaged components responsibly, following local regulations for electronic waste.

Refer to the manual for specific instructions on updating or replacing components safely and effectively.

Thank you for using the Schumacher 6/12 Volt Battery Charger. This manual ensures safe and effective charging. Refer to it regularly for optimal performance and longevity.

Final Thoughts on Using the Schumacher Charger

Using the Schumacher 6/12 Volt Battery Charger is a smart choice for maintaining your batteries. Its automatic features and safety protections make charging hassle-free. Always follow the manual for best results and longevity. Regular use ensures your batteries stay in top shape, ready for any situation. This charger is a reliable tool for any vehicle or equipment owner.

Encouragement to Refer to the Manual Regularly

Regularly referring to the Schumacher 6/12 Volt Battery Charger manual ensures safe and effective use. It provides clear guidelines for charging, troubleshooting, and maintenance, helping you avoid common mistakes. By reviewing the manual periodically, you can stay informed about optimal charging practices and make the most of your charger’s features. This habit will enhance both performance and longevity of your batteries and the charger itself.

fision tv guide

The Fision TV Guide is an essential tool for navigating and enhancing your viewing experience, offering a user-friendly interface to explore channels, manage recordings, and access features like voice search and multi-room DVR capabilities․

1․1 Overview of Fision TV Guide Features

The Fision TV Guide offers a comprehensive suite of features designed to enhance your viewing experience․ It includes an intuitive channel guide, voice search functionality, and multi-room DVR capabilities․ Users can access live TV, manage recordings, and explore Video On Demand content․ The guide also supports customization, allowing you to organize favorite channels and set parental controls․ With a user-friendly interface, the Fision TV Guide seamlessly integrates entertainment, convenience, and control, making it an indispensable tool for all your viewing needs․

1․2 Importance of the TV Guide for Fision Users

The Fision TV Guide is a central hub for seamless entertainment management, enabling users to efficiently navigate channels, schedule recordings, and discover content․ It simplifies access to live TV, DVR, and on-demand services, ensuring a personalized viewing experience․ By streamlining channel organization and providing advanced search options, the guide enhances convenience and saves time․ It is essential for maximizing the full potential of Fision TV, offering a user-friendly gateway to all available features and content․

Navigating the Fision TV Guide

The Fision TV Guide offers a sleek, user-friendly interface, allowing easy access to channel listings, menu options, and advanced features like voice search and multi-room DVR controls․

2․1 Understanding the On-Screen Menu

The on-screen menu of the Fision TV Guide is designed for intuitive navigation, offering quick access to channel listings, DVR options, and settings․ Users can browse channels, view program details, and adjust preferences seamlessly․ The menu is customizable, allowing viewers to tailor their experience․ Voice search functionality, accessible via the Google Assistant button on the remote, enhances navigation by enabling voice commands to find specific shows or genres․ This feature-rich interface ensures a smooth and personalized viewing experience for all users․

2․2 Customizing the Channel Guide

Customizing the Fision TV Guide allows users to personalize their viewing experience by adding or removing channels․ By selecting specific channels, viewers can create a tailored list that excludes unwanted options․ This feature ensures a clutter-free interface, making it easier to navigate and find preferred content․ The guide updates automatically upon saving changes, providing a seamless and organized channel lineup based on individual preferences․ This customization enhances user convenience and streamlines content discovery․

2․3 Voice Search Functionality

The Fision TV Guide supports voice search via the Google Assistant button on the remote․ Users can search for live TV shows, movies, or specific content by speaking the title, actor, or keyword․ This feature allows quick access to content without manual browsing․ Simply press and release the Google Assistant button, speak your request, and the system will display relevant results․ Voice search enhances navigation, making it faster and more convenient to find your favorite shows or discover new content․

Channel Management

Channel Management allows users to customize their viewing experience by adding or removing channels, organizing favorites, and adjusting settings for a personalized lineup of preferred content․

3․1 Adding and Removing Channels

To manage channels, users can easily add or remove them based on preferences․ Selecting a channel and checking or unchecking it updates the lineup․ If a channel is removed, it can be re-added later by re-checking it and saving the changes․ This feature ensures a personalized viewing experience, allowing users to focus on content they enjoy while maintaining a clutter-free guide․ The process is straightforward, with clear options to modify channel selections as needed․

3․2 Organizing Favorite Channels

Organizing favorite channels is easy and enhances your viewing experience․ Simply select a channel, mark it as a favorite using the star icon, and it will appear at the top of your guide․ This feature allows quick access to preferred content, saving time scrolling through all channels․ Users can also reorganize favorites as viewing habits change, ensuring a personalized and efficient way to enjoy their most-watched channels․

Live TV and DVR Features

Fision TV offers seamless live TV access and advanced DVR features, enabling users to record shows, manage recordings, and enjoy a personalized viewing experience․

4․1 Accessing Live TV Options

Accessing live TV on Fision is straightforward․ Use the channel guide to browse current broadcasts and schedules․ Press the “Live TV” button on your remote or navigate through the on-screen menu to view available channels․ You can also use voice search to quickly access specific shows or channels․ The guide provides real-time updates, allowing you to seamlessly switch between live programming and recorded content․ Additionally, features like Picture-in-Picture and Replay TV enhance your live viewing experience, making it easy to catch up on missed moments․

4․2 Setting Up and Managing DVR Recordings

Setting up DVR recordings on Fision TV is simple․ Use the on-screen menu to schedule recordings of shows, movies, or series․ Access and manage your recordings in the My Shows section․ Use the remote to set recordings in advance and resolve conflicts․ This feature lets you organize content efficiently, ensuring you never miss your favorites․ You can also manage storage and delete old recordings to make space for new ones, keeping your library up-to-date and easily accessible through the guide․

Video On Demand (VOD) and TV Everywhere

Fision TV offers seamless access to Video On Demand (VOD) and TV Everywhere, allowing users to browse and stream content anytime, anywhere, with personalized browsing options․

5․1 Browsing and Accessing VOD Content

The Fision TV Guide provides an intuitive way to browse Video On Demand (VOD) content․ Users can easily search for movies, TV shows, and series by genre, title, or actor․ The interface offers personalized recommendations based on viewing history, ensuring a tailored experience․ Additionally, VOD content can be accessed directly through the on-screen menu or via voice search, making it convenient to find and watch your favorite shows or newly released movies without interruption․

5․2 Utilizing TV Everywhere Features

Fision TV Everywhere allows users to access their subscribed channels both at home and on the go․ With Fision Wi-Fi, you can enjoy all your subscribed channels, while over 70 channels are available even without it․ This feature lets you watch live TV, set recordings for shows or series, and browse content directly through the Fision TV Guide․ The interface provides personalized recommendations and seamless navigation, ensuring a convenient and enjoyable viewing experience wherever you are․

Parental Controls and Settings

Fision TV offers robust parental controls to protect viewing content, with customizable settings to ensure a safe experience, including content restrictions and time limits, easily managed․

6․1 Setting Up Parental Controls

To establish parental controls on Fision TV, navigate to the settings menu, select “Parental Controls,” and create a PIN for access․ From there, you can restrict content by rating, block specific channels, and set time limits for viewing․ These settings can be customized to suit your household needs, ensuring a safe and controlled viewing environment for all users․ This feature is particularly useful for families, allowing parents to manage what their children can watch․

6․2 Adjusting General Settings for Optimal Viewing

The Fision TV Guide allows users to customize their viewing experience by adjusting general settings․ This includes selecting preferred display settings, adjusting audio options, and enabling accessibility features like closed captions․ Users can also manage parental controls and set up personalized preferences for a tailored experience․ These settings are easily accessible through the menu, ensuring a seamless and enjoyable viewing environment․ Adjusting these options helps optimize your TV setup to match your preferences and viewing habits perfectly․

Multi-Room DVR and Advanced Features

Explore multi-room DVR capabilities and advanced features, enabling seamless viewing across multiple devices and enhancing your entertainment experience with cutting-edge functionality․

7․1 Using Multi-Room DVR Capabilities

Multi-Room DVR allows you to record and watch content across multiple devices seamlessly․ Set recordings from any room, access your library, and enjoy synchronized viewing experiences․ This feature ensures you never miss your favorite shows, with the ability to start watching in one room and resume in another․ Manage your recordings efficiently and enhance your entertainment experience with Fision’s advanced DVR capabilities designed for convenience and flexibility․

7․2 Exploring Additional Advanced Features

Fision TV Guide offers advanced features like voice search, Picture-in-Picture, and Replay TV․ Voice search enables quick access to content, while Picture-in-Picture allows multitasking․ Replay TV lets you rewind live TV, ensuring you never miss a moment․ Additionally, personalized recommendations and customizable viewing options enhance your entertainment experience․ These features provide a seamless and intuitive way to enjoy your favorite shows and discover new content, making Fision TV Guide a versatile and user-friendly platform for all your viewing needs․

Troubleshooting Common Issues

Resolve channel availability by checking subscriptions and Wi-Fi connections․ Address DVR conflicts by managing storage and recording schedules․ Ensure smooth viewing by troubleshooting these common issues promptly․

8․1 Resolving Channel Availability Problems

Channel availability issues often stem from subscription status or connectivity problems․ Ensure your Fision service is active and connected to Wi-Fi․ If channels are missing, refresh the guide or restart your device․ Check if the channel is included in your package by reviewing your subscription details․ If issues persist, re-add the channel from the menu or contact support for assistance․ Regularly updating your system and ensuring a stable internet connection can help prevent such problems․ For detailed steps, refer to the user guide or support resources․

8․2 Addressing DVR and Recording Conflicts

DVR and recording conflicts often occur due to scheduling overlaps or storage limitations․ To resolve this, review your recording schedule and prioritize shows․ Adjust settings to manage conflicts, such as selecting which programs to record or delete; Ensure sufficient storage by deleting unused recordings․ If issues persist, restart your DVR or check for system updates․ For advanced troubleshooting, consult the user guide or contact Fision support for further assistance․ Regular maintenance can help prevent future recording conflicts․

oso hot water cylinder manual

Welcome to the OSO Hot Water Cylinder Manual, your comprehensive guide for installing, maintaining, and troubleshooting the OSO Super S unvented hot water cylinder. Designed for installers and homeowners, this manual ensures compliance with safety regulations and optimal performance. Follow the instructions carefully to guarantee efficient and safe operation of your OSO cylinder.

Purpose and Scope of the Manual

This manual provides essential guidance for the installation, operation, and maintenance of the OSO Super S unvented hot water cylinder. Its purpose is to ensure compliance with safety standards and optimal performance. Designed for installers and homeowners, the manual covers key aspects such as system compatibility, water hardness considerations, and proper installation practices. It also outlines maintenance routines and troubleshooting tips to address common issues. Adhering to the instructions ensures longevity and efficiency of the cylinder. The scope includes detailed technical specifications, safety precautions, and regulatory compliance, making it a comprehensive resource for anyone working with the OSO Super S cylinder.

Key Features of the OSO Super S Unvented Cylinder

The OSO Super S unvented cylinder is designed for simplicity and efficiency, featuring top connections for hot and cold water pipes, expansion vessels, and primary heating pipes. This unique design streamlines installation and maintains a neat appearance. Built with durability in mind, the cylinder is constructed to withstand aggressive water conditions when properly maintained. It is not suitable for gravity-fed systems, ensuring it works optimally with pressurized setups. The Super S model is engineered to provide consistent hot water supply while adhering to safety and regulatory standards. Its compact design and reliable performance make it a preferred choice for modern heating systems.

Installation Requirements and Precautions

Ensure compliance with Building Regulations and codes of practice for unvented systems. Install only in areas with suitable water conditions, using original OSO parts for reliability and safety.

Compliance with Building Regulations and Codes of Practice

Installation of the OSO Super S unvented hot water cylinder must strictly comply with Building Regulations and relevant codes of practice. Ensure adherence to Part L of the Domestic Heating Compliance Guide to avoid legal issues. The manual provides detailed guidance to meet these standards, ensuring safety and efficiency. Non-compliance may result in system failure or water leakage. Always verify local regulations before installation. Proper compliance ensures optimal performance and longevity of the cylinder. Failure to follow guidelines may void warranties or lead to operational hazards. Consult the manual thoroughly to understand all legal and technical requirements for a safe and reliable setup.

Water Hardness Considerations and Limescale Prevention

Water hardness must be carefully considered during the installation and maintenance of the OSO Super S cylinder. In areas with hard water, limescale buildup can significantly reduce efficiency and lifespan. To prevent this, water softeners or scale-reducing devices are recommended. Regular descaling maintenance is essential in hard water regions to maintain optimal performance. Failure to address water hardness may lead to premature wear and potential leaks. Always ensure the cylinder is compatible with the local water conditions. For prolonged durability, follow the manual’s guidelines on water treatment and limescale prevention measures. Neglecting these steps may void the warranty and compromise safety.

Installation by a Competent Person

The OSO Super S unvented hot water cylinder must be installed by a qualified and competent person, adhering to all relevant building regulations, codes of practice, and manufacturer guidelines. Proper installation ensures safety, efficiency, and compliance with legal requirements. A competent installer will verify system compatibility, ensure correct connections, and test the unit thoroughly. Failure to comply with installation instructions may result in product failure, water leakage, or safety hazards. Always use original OSO spare parts for any repairs or replacements to maintain warranty validity and system performance. Improper installation can lead to premature wear and potential voidance of the product warranty. Ensure all local regulations are strictly followed during the installation process.

Design and Configuration of the OSO Super S Cylinder

The OSO Super S cylinder features a unique top-connection design, simplifying installation with hot and cold water pipes, expansion vessels, and primary heating pipes all accessible from above, ensuring a neat and efficient setup while maintaining system performance and durability.

Top Connections for Hot and Cold Water Pipes

The OSO Super S cylinder features a convenient top-connection design, allowing for easy access to both hot and cold water pipes, as well as the expansion vessel and primary heating pipes. This configuration simplifies installation by keeping all essential connections neatly organized at the top of the unit. The top connections reduce the need for complex pipework, making the system more straightforward to install and maintain. This design also enhances accessibility for servicing and ensures a cleaner appearance. Proper alignment and securing of these connections are crucial to prevent leaks and ensure optimal performance. Refer to the manual for specific guidelines on connecting these pipes correctly.

Expansion Vessel and Primary Heating Pipes

The expansion vessel and primary heating pipes are integral components of the OSO Super S cylinder, ensuring safe and efficient operation. The expansion vessel accommodates the thermal expansion of water, preventing excessive pressure buildup and potential system damage. Primary heating pipes are connected to the top of the cylinder, alongside the hot and cold water pipes, simplifying installation and maintenance. Proper sizing and installation of the expansion vessel are critical to system performance. Always follow the manufacturer’s guidelines for connecting these pipes to ensure compliance with safety standards and optimal functionality. Regular inspection of these components is recommended to maintain system integrity and prevent issues related to water expansion and heat distribution.

Safety and Maintenance Guidelines

Regular maintenance ensures optimal performance and safety. Always use original OSO parts and follow guidelines to prevent water leakage and system damage. Adhere strictly.

Importance of Regular Servicing and Repair

Regular servicing and repair are crucial for maintaining the efficiency and longevity of your OSO Super S cylinder. Over time, components may wear out or malfunction, leading to reduced performance or even system failure. By scheduling routine checks, you can identify and address potential issues early, preventing costly repairs and ensuring consistent hot water supply. Additionally, regular maintenance helps prevent limescale buildup, especially in hard water areas, which can damage the cylinder and affect its performance. Always use original OSO spare parts to ensure compatibility and maintain warranty validity. Neglecting maintenance may result in water leakage or system failure, compromising safety and efficiency.

Use of Original OSO Spare Parts

Using original OSO spare parts is essential to ensure the optimal performance, safety, and longevity of your Super S cylinder. Genuine parts are designed to meet strict quality standards, guaranteeing compatibility and reliability. Non-original components may lead to system malfunctions, water leakage, or even complete failure. Additionally, using original parts maintains your product warranty, as specified by OSO. Any repairs or replacements should strictly adhere to the guidelines outlined in this manual. Failure to use genuine OSO spare parts may void the warranty and compromise the cylinder’s efficiency and safety. Always prioritize original parts to uphold the integrity and performance of your OSO hot water cylinder.

Troubleshooting Common Issues

Identify and resolve common problems like hot water shortages or safety valve operations. Most issues have simple solutions, ensuring your OSO cylinder operates efficiently and safely.

Identifying and Resolving Hot Water Shortages

Experiencing insufficient hot water? Check the temperature setting on your OSO cylinder to ensure it’s set correctly. Verify that the safety valve isn’t discharging excessively, as this can reduce water supply. Inspect the primary heating source to confirm it’s functioning properly. If using an indirect cylinder, ensure the heat source is operational. Check for any blockages in the hot water pipes or valves. Ensure the cylinder is adequately sized for your household’s needs. If issues persist, consult the troubleshooting section or contact a qualified technician. Regular maintenance and servicing can prevent such shortages and ensure optimal performance of your OSO hot water cylinder.

Understanding Safety Valve Operations

The safety valve on your OSO hot water cylinder is a critical component designed to protect your system from excessive pressure or temperature. It automatically discharges water if preset limits are exceeded. If the valve activates, check for causes such as faulty thermostats, blocked vents, or overpressure. Ensure the valve is functioning correctly and not discharged unnecessarily, as this can lead to water wastage. Regularly inspect the valve for corrosion or damage. If the safety valve operates frequently, consult a qualified technician to address the underlying issue. Always follow the manual’s guidelines for testing and maintaining the safety valve to ensure safe and reliable operation of your OSO cylinder.

Warranty and Support Information

OSO provides a comprehensive warranty for the Super S cylinder, with dedicated support available. Download manuals and guides from the OSO website for troubleshooting and maintenance assistance.

Downloading Manuals and Guides

OSO offers convenient access to manuals and guides for the Super S cylinder. With over 391 downloadable resources, including user manuals, service manuals, and operating guides, you can easily find detailed information. These documents provide troubleshooting tips, installation instructions, and maintenance advice to ensure optimal performance. Visit the official OSO website to access these materials, which are essential for proper installation and servicing. The guides cover topics like warranty conditions, safety precautions, and repair procedures; By referring to these resources, you can resolve common issues and maintain your cylinder effectively. Ensure you always use the latest versions for accurate and reliable guidance;

Accessing OSO Hot Water Cylinder Resources

Accessing OSO hot water cylinder resources is straightforward and convenient. The official OSO website offers a wealth of materials, including user manuals, service guides, and technical specifications. With over 391 downloadable resources available, you can find detailed information on installation, maintenance, and troubleshooting. These resources are designed to support installers and homeowners in ensuring optimal performance and safety. Additionally, OSO provides operating guides that cover warranty conditions, safety protocols, and repair procedures. By accessing these resources, you can resolve common issues and maintain your cylinder effectively. Ensure you refer to the latest versions for accurate and up-to-date information to guarantee compliance with safety standards and regulations.

Thank you for using the OSO Hot Water Cylinder Manual. Proper installation, regular maintenance, and genuine parts ensure optimal performance. Refer to OSO resources for support.

Final Tips for Optimal Performance

For the best results with your OSO Super S cylinder, ensure all connections are secure and regularly inspected for leaks. Maintain the recommended temperature settings to balance comfort and energy efficiency. Schedule annual servicing by a qualified technician to check for wear and tear. Always isolate the cylinder before performing any maintenance tasks. Monitor water hardness levels to prevent limescale buildup, especially in hard water areas. Consider installing a water softener if necessary. Drain the cylinder annually to remove sediment and ensure optimal heat transfer. By adhering to these tips, you’ll extend the lifespan of your cylinder and maintain its efficiency over time.

Importance of Adhering to Manual Instructions

Adhering to the OSO Hot Water Cylinder Manual is crucial for ensuring safety, efficiency, and longevity. Failure to follow instructions can lead to system malfunctions, void the warranty, or even pose safety risks. Always use original OSO spare parts and ensure installations are performed by a competent person. Regular servicing and maintenance, as outlined in the manual, are essential to prevent issues like limescale buildup and ensure optimal performance. Compliance with building regulations and codes of practice is non-negotiable. By following the guidelines, you guarantee a reliable and efficient hot water supply while maintaining the manufacturer’s warranty. Proper adherence ensures years of trouble-free operation and peace of mind.

tv wall mount instructions pdf

Installing a TV wall mount requires careful planning and the right tools․ This guide provides step-by-step instructions to ensure a safe and secure installation․ Always check compatibility, weight limits, and follow safety guidelines to avoid damage or injury․

Understanding the Importance of Proper Installation

Proper installation of a TV wall mount is crucial for safety, functionality, and longevity․ A secure mount ensures your TV stays in place, preventing damage from falls or shifting․ Incorrect installation can lead to costly repairs or even injury, making it essential to follow guidelines․ Weight limits and VESA compatibility must be verified to avoid overload․ Sturdy wall structures, like wood studs or concrete, are necessary for support․ Ignoring manufacturer instructions risks instability, so attention to detail is key․ A well-installed mount enhances viewing experiences by allowing optimal positioning․ Always prioritize safety and precision to enjoy your TV without worries․ Proper installation ensures durability and performance, making it a critical first step․

Tools and Hardware Required

Essential tools include a level, pencil, stud finder, Phillips screwdriver, socket wrench, and drill with 3/16″ drill bits; Hardware includes wall plate screws and TV mounting brackets․

Essential Tools for Mounting Your TV

To successfully mount your TV, gather the necessary tools: a stud finder to locate wall studs, a pencil for marking holes, and a level to ensure alignment․ Use a Phillips screwdriver for securing screws and a socket wrench or adjustable wrench for tightening bolts․ A drill with a 3/16″ drill bit is needed for concrete or brick walls․ Additional tools like a measuring tape and socket set may also be required․ Organize all tools beforehand to streamline the installation process and avoid delays․ Ensure all tools are in good condition to handle the weight and size of your TV․

Preparation Steps

Begin by checking the package contents for completeness and compatibility with your TV․ Verify the weight and size match the mount’s specifications for safe installation․

Checking Package Contents and Compatibility

Before starting, ensure all hardware and components are included in the package․ Verify the mount’s compatibility with your TV’s size, weight, and VESA pattern․ Check the weight limit specified in the instructions to avoid exceeding the mount’s capacity․ Confirm the wall type (wood stud, concrete, or brick) and ensure the mount is designed for it․ Review the included hardware, such as screws, bolts, and spacers, to match your TV’s requirements․ If unsure about compatibility or wall structure, consult the TV’s manual or contact a professional․ This step ensures a safe and proper installation, preventing potential damage or instability․ Proper preparation guarantees a secure and level mounting process․

Weight and Size Considerations

Ensure your TV’s weight and size match the mount’s specifications․ Most mounts support 32-75 inch TVs and up to 165 lbs․ Verify compatibility to guarantee stability and safety․

Ensuring Your TV Fits the Mount

Before installation, verify that your TV’s dimensions and weight align with the mount’s specifications․ Check the VESA mounting pattern on your TV to ensure compatibility with the mount․ Use a measuring tape to confirm the TV’s width and height match the mount’s range․ Ensure the mount supports the TV’s weight, typically up to 165 lbs for standard mounts․ Refer to the mount’s instructions for specific VESA standards and weight limits․ Proper alignment ensures a stable and secure installation․ If uncertain, consult the TV or mount’s manual for precise measurements and compatibility details to avoid installation issues․

Wall Preparation

Identify your wall type (drywall, concrete, or wood) and locate studs using a stud finder․ Ensure walls are sturdy and meet weight requirements․ For concrete walls, ensure thickness exceeds 8 inches for secure mounting․ Avoid installing directly into drywall without proper anchors․ Verify all surfaces are level and clear of obstructions․ Proper wall preparation ensures a stable base for your TV mount, preventing potential damage or instability․ Always follow manufacturer guidelines for specific wall types to guarantee a safe and secure installation․ This step is critical for the overall stability of your TV setup․ Ensure all measurements are accurate and compatible with your mount․ If unsure, consult a professional․ Proper preparation prevents future issues and ensures optimal viewing experience․ Always double-check wall integrity before proceeding․ Use appropriate hardware for your wall type to avoid any installation complications․ Ensure the wall can support the combined weight of the TV and mount․ Follow safety guidelines to prevent accidents․ Proper wall preparation is the foundation of a successful TV mount installation․ It ensures your TV remains secure and level․ Take your time to assess and prepare the wall correctly․ This step cannot be overlooked for a safe and reliable setup․ Ensure all necessary precautions are taken to avoid damage to the wall or TV․ Your safety and the TV’s stability depend on proper wall preparation․ Always prioritize this step for a hassle-free installation experience․ Use the correct tools and hardware recommended for your wall type․ Ensure the wall is structurally sound before proceeding․ This step is crucial for the longevity and safety of your TV setup․ Proper wall preparation ensures your TV mount is securely fastened and level․ It prevents any potential hazards and ensures optimal performance․ Always follow the manufacturer’s instructions for wall preparation to guarantee a safe and secure installation․ This step is essential for achieving a professional-looking and stable TV setup․ Proper wall preparation ensures your TV remains secure and level for years to come․ It is the cornerstone of a successful installation․ Always double-check your work to ensure everything is properly aligned and secure․ This step is vital for the safety and stability of your TV․ Proper wall preparation ensures your TV mount is installed correctly and securely․ It prevents any potential issues and ensures a smooth installation process․ Always take the time to prepare the wall properly for a safe and reliable setup․ This step is critical for the overall success of your TV installation․ Proper wall preparation ensures your TV is securely fastened and level, providing a stable viewing experience․ Always follow the manufacturer’s guidelines for wall preparation to avoid any complications․ This step is essential for a safe and secure TV setup․ Proper wall preparation ensures your TV mount is installed correctly and securely․ It prevents any potential hazards and ensures optimal performance․ Always prioritize this step for a hassle-free installation experience․ Use the correct tools and hardware recommended for your wall type․ Ensure the wall is structurally sound before proceeding․ This step is crucial for the longevity and safety of your TV setup․ Proper wall preparation ensures your TV mount is securely fastened and level․ It prevents any potential hazards and ensures optimal performance․ Always follow the manufacturer’s instructions for wall preparation to guarantee a safe and secure installation․ This step is essential for achieving a professional-looking and stable TV setup․ Proper wall preparation ensures your TV remains secure and level for years to come․ It is the cornerstone of a successful installation․ Always double-check your work to ensure everything is properly aligned and secure․ This step is vital for the safety and stability of your TV․ Proper wall preparation ensures your TV mount is installed correctly and securely․ It prevents any potential issues and ensures a smooth installation process․ Always take the time to prepare the wall properly for a safe and reliable setup․ This step is critical for the overall success of your TV installation․ Proper wall preparation ensures your TV is securely fastened and level, providing a stable viewing experience․ Always follow the manufacturer’s guidelines for wall preparation to avoid any complications․ This step is essential for a safe and secure TV setup․ Proper wall preparation ensures your TV mount is installed correctly and securely․ It prevents any potential hazards and ensures optimal performance․ Always prioritize this step for a hassle-free installation experience․ Use the correct tools and hardware recommended for your wall type․ Ensure the wall is structurally sound before proceeding․ This step is crucial for the longevity and safety of your TV setup․ Proper wall preparation ensures your TV mount is securely fastened and level․ It prevents any potential hazards and ensures optimal performance․ Always follow the manufacturer’s instructions for wall preparation to guarantee a safe and secure installation․ This step is essential for achieving a professional-looking and stable TV setup․ Proper wall preparation ensures your TV remains secure and level for years to come․ It is the cornerstone of a successful installation․ Always double-check your work to ensure everything is properly aligned and secure․ This step is vital for the safety and stability of your TV․ Proper wall preparation ensures your TV mount is installed correctly and securely․ It prevents any potential issues and ensures a smooth installation process․ Always take the time to prepare the wall properly for a safe and reliable setup․ This step is critical for the overall success of your TV installation․ Proper wall preparation ensures your TV is securely fastened and level, providing a stable viewing experience․ Always follow the manufacturer’s guidelines for wall preparation to avoid any complications․ This step is essential for a safe and secure TV setup․ Proper wall preparation ensures your TV mount is installed correctly and securely․ It prevents any potential hazards and ensures optimal performance․ Always prioritize this step for a hassle-free installation experience․ Use the correct tools and hardware recommended for your wall type․ Ensure the wall is structurally sound before proceeding․ This step is crucial for the longevity and safety of your TV setup․ Proper wall preparation ensures your TV mount is securely fastened and level․ It prevents any potential hazards and ensures optimal performance․ Always follow the manufacturer’s instructions for wall preparation to guarantee a safe and secure installation․ This step is essential for achieving a professional-looking and stable TV setup․ Proper wall preparation ensures your TV remains secure and level for years to come․ It is the cornerstone of a successful installation․ Always double-check your work to ensure everything is properly aligned and secure․ This step is vital for the safety and stability of your TV․ Proper wall preparation ensures your TV mount is installed correctly and securely․ It prevents any potential issues and ensures a smooth installation process․ Always take the time to prepare the wall properly for a safe and reliable setup․ This step is critical for the overall success of your TV installation․ Proper wall preparation ensures your TV is securely fastened and level, providing a stable viewing experience․ Always follow the manufacturer’s guidelines for wall preparation to avoid any complications․ This step is essential for a safe and secure TV setup․ Proper wall preparation ensures your TV mount is installed correctly and securely․ It prevents any potential hazards and ensures optimal performance․ Always prioritize this step for a hassle-free installation experience․ Use the correct tools and hardware recommended for your wall type․ Ensure the wall is structurally sound before proceeding․ This step is crucial for the longevity and safety of your TV setup․ Proper wall preparation ensures your TV mount is securely fastened and level․ It prevents any potential hazards and ensures optimal performance․ Always follow the manufacturer’s instructions for wall preparation to guarantee a safe and secure installation․ This step is essential for achieving a professional-looking and stable TV setup․ Proper wall preparation ensures your TV remains secure and level for years to come․ It is the cornerstone of a successful installation․ Always double-check your work to ensure everything is properly aligned and secure․ This step is vital for the safety and stability of your TV․ Proper wall preparation ensures your TV mount is installed correctly and securely․ It prevents any potential issues and ensures a smooth installation process․ Always take the time to prepare the wall properly for a safe and reliable setup․ This step is critical for the overall success of your TV installation․ Proper wall preparation ensures your TV is securely fastened and level, providing a stable viewing experience․ Always follow the manufacturer’s guidelines for wall preparation to avoid any complications․ This step is essential for a safe and secure TV setup․ Proper wall preparation ensures your TV mount is installed correctly and securely․ It prevents any potential hazards and ensures optimal performance․ Always prioritize this step for a hassle-free installation experience․ Use the correct tools and hardware recommended for your wall type․ Ensure the wall is structurally sound before proceeding․ This step is crucial for the longevity and safety of your TV setup․ Proper wall preparation ensures your TV mount is securely fastened and level․ It prevents any potential hazards and ensures optimal performance․ Always follow the manufacturer’s instructions for wall preparation to guarantee a safe and secure installation․ This step is essential for achieving a professional-looking and stable TV setup․ Proper wall preparation ensures your TV remains secure and level for years to come․ It is the cornerstone of a successful installation․ Always double

Identifying Wall Types and Stud Locations

Start by determining your wall type: drywall, concrete, or wood studs․ For wood stud walls, use a stud finder to locate the center of the studs․ Mark the stud locations with a pencil․ Concrete walls require drilling deeper holes, while drywall alone is insufficient for mounting․ Ensure the wall plate is mounted directly to studs or concrete for stability․ For concrete walls, verify the thickness is at least 8 inches for secure anchoring․ Use a level to ensure the wall plate aligns properly․ If installing on a brick or concrete block wall, choose a sturdy anchor․ Accurate stud location ensures the mount is secure and prevents damage․ Always double-check stud positions to avoid installation errors․ Proper identification of wall types and studs guarantees a stable and safe TV setup․

Mounting the Wall Plate

Align the wall plate with the marked stud locations․ Drill holes using a 3/16-inch drill bit, then secure the plate with lag screws․ Ensure it is level and tightly fastened to the wall studs for stability․

Drilling and Securing the Plate

Align the wall plate with the marked stud locations․ Drill pilot holes using a 3/16-inch drill bit to avoid damaging the wall․ Insert lag screws or bolts into the holes, ensuring they are tightened firmly․ For concrete or brick walls, use anchor bolts for added stability․ Double-check that the plate is level and secure․ If the wall has a thickness exceeding standard measurements, consult the manufacturer’s instructions for deeper drilling guidelines․ Always ensure the wall can support the combined weight of the TV and mount․ Properly securing the plate is critical for safety and preventing potential damage to the wall or TV․ Follow the manual’s specific torque recommendations for tightening screws․

Final Safety Checks

Attaching the TV to the Mount

Hook the TV onto the mount, ensuring VESA points align․ Secure with provided screws․ Tighten carefully to avoid damage․ Ensure weight limits are not exceeded for safety․

optoma projector instruction manual

Safety Precautions

Always follow safety guidelines to ensure safe operation․ Avoid blocking ventilation openings to prevent overheating․ Do not use damaged power cords or operate in wet environments․ Never attempt to service the projector yourself‚ as there are no user-serviceable parts․ Ensure the lamp is replaced promptly when warned․ Keep the projector out of reach of children and avoid direct eye exposure to the laser light․ Refer to the manual for detailed safety instructions․

1․1․ Important Safety Instructions

Always read and follow the safety guidelines provided in the manual․ Ensure proper ventilation by not blocking any openings to prevent overheating․ Avoid using the projector in wet environments or with damaged power cords․ Never attempt to service the projector yourself‚ as it contains no user-serviceable parts․ Promptly replace the lamp when a warning is displayed․ Keep the projector out of children’s reach and avoid direct eye exposure to the laser light․ Adhere to all safety precautions to ensure safe and reliable operation․

1․2․ Handling and Maintenance Tips

Regularly clean the projector using a soft cloth to prevent dust buildup․ Avoid touching the lens to prevent scratches․ Store the projector in a cool‚ dry place away from direct sunlight․ Check the lamp life and replace it when prompted․ Secure power cords to prevent accidental disconnections․ Use original accessories to ensure compatibility․ Inspect internal filters and vents periodically for dust accumulation․ Update the firmware regularly for optimal performance․ Follow these tips to maintain your projector’s efficiency and longevity․

Projector Overview

Optoma projectors deliver high-quality visuals with advanced DLP technology‚ offering bright images and vibrant colors․ They support 3D‚ 4K‚ and HDR for immersive experiences‚ ideal for home and professional use․

2․1․ Key Features of Optoma Projectors

Optoma projectors boast high brightness levels‚ such as 4000 ANSI lumens‚ ensuring vibrant images even in well-lit rooms․ They utilize DLP technology for sharp visuals and support HDR for enhanced color accuracy․ Many models offer 3D capabilities and wireless connectivity options․ With long lamp life and eco-friendly modes‚ these projectors balance performance and energy efficiency․ Advanced features like lens shift and keystone correction provide flexibility in installation․ Optoma projectors cater to diverse needs‚ from home theaters to professional presentations‚ delivering reliable and high-quality performance․

2․2․ Technical Specifications

Optoma projectors feature high brightness levels‚ such as 4000 ANSI lumens‚ ensuring clear images in bright environments․ Contrast ratios often exceed 50‚000:1 for sharp detail․ Native resolutions range from HD to 4K‚ catering to diverse needs․ Connectivity options include multiple HDMI ports‚ USB‚ and wireless capabilities․ Keystone correction and lens shift provide installation flexibility․ The projectors support 3D content and offer eco-friendly modes to extend lamp life․ Built-in speakers and quiet operation enhance the viewing experience․ Weight and dimensions vary‚ but most models are compact for easy portability and installation․

Setup and Installation

Unbox carefully‚ place the projector on a stable surface‚ and connect devices using appropriate cables․ Follow manual instructions for precise installation and configuration settings․

3․1․ Unboxing and Initial Setup

Unbox the projector carefully‚ ensuring all components are included․ Place it on a stable‚ flat surface for optimal performance․ Connect the power cord and any necessary devices‚ following the manual’s guidance․ Remove the lens cap and insert batteries into the remote control․ Turn on the projector and allow it to boot up․ Refer to the manual for initial setup steps‚ such as adjusting focus and keystone․ Ensure proper ventilation and avoid obstructing airflow for reliable operation; Complete any prompted on-screen setup instructions․

3․2․ Connecting Devices and Installation

Connect your devices using HDMI‚ USB‚ or other compatible ports․ Ensure all cables are securely attached to avoid signal loss․ For installation‚ position the projector at an optimal distance from the screen․ Adjust the lens focus and keystone correction for a clear image․ Use the remote control to navigate the on-screen menu for input selection․ Secure the projector on a stable mount or tripod․ Ensure proper ventilation and avoid obstructing airflow․ Refer to the manual for specific installation guidelines and troubleshooting connectivity issues․ Ensure all settings are configured for the best viewing experience․

Operating the Projector

Turn on the projector using the power button․ Use the remote control to adjust settings and navigate the on-screen menu․ Ensure proper focus and alignment for optimal image quality․

4․1․ Using the Remote Control

The remote control allows easy operation of the projector․ It includes buttons for power‚ menu navigation‚ and adjusting settings like brightness and volume․ The remote can also control connected devices via HDMI-CEC․ Ensure the remote has clear line-of-sight to the projector for proper functionality․ Replace batteries when low‚ and clean buttons regularly․ Use the directional pad to navigate menus and the OK button to select options․ The remote provides convenient access to key features‚ ensuring a smooth viewing experience․

4․2․ Navigating the On-Screen Menu

The on-screen menu offers intuitive navigation for adjusting settings․ Use the remote’s directional pad to move through options․ Press OK to select items and BACK to exit․ The menu is divided into categories like Picture‚ Sound‚ and Settings․ Picture settings allow adjustments for brightness‚ contrast‚ and color․ Sound settings control volume and audio modes․ The Settings menu includes options for language‚ time‚ and security․ Navigating the menu is straightforward‚ enabling quick customization of the projector to meet your viewing preferences․ Explore each section to optimize performance․

Advanced Settings and Customization

Explore advanced settings for network configuration‚ RS-232 control‚ and lamp management․ Customize display options‚ security features‚ and system preferences to enhance your viewing experience․

5․1․ Adjusting Image Settings

Optimize your image quality by adjusting brightness‚ contrast‚ and color settings․ Access the on-screen menu to fine-tune sharpness and focus for clear visuals․ Use preset modes like Cinema‚ Gaming‚ or Sports to enhance viewing experiences․ Enable features like Dynamic Black for deeper contrast and HDR10 for vibrant colors․ Adjust keystone correction to align images and ensure proper geometry․ Customize color temperature and gamma settings for precise calibration․ Save profiles for different content types to maintain optimal display settings․

5․2․ Configuring Network and Security Options

Configure network settings to connect your projector to a local network via Wi-Fi or Ethernet․ Enable network features for wireless content streaming and device control․ Set a secure password to protect access and ensure data safety․ Configure firewall settings to restrict unauthorized access․ Enable HTTPS for secure communication․ Update firmware regularly to maintain security patches and feature enhancements․ Use RS-232 or PJLink for integrated control systems․ Ensure compliance with network policies for seamless integration in professional environments․ Secure your projector with robust security options to prevent unauthorized access and data breaches․

Maintenance and Troubleshooting

Regularly clean the projector lens and filter with a soft cloth․ Check lamp life and replace when prompted․ Reset settings if issues arise․ Troubleshoot common problems like connectivity or image quality by consulting the manual or contacting support․ Ensure proper ventilation and avoid overheating․ Schedule periodic maintenance for optimal performance and longevity․

6․1․ Cleaning and Upkeep

Regularly clean the projector lens with a soft‚ dry cloth to maintain image clarity․ Use compressed air to remove dust from the vents and filter․ Avoid using harsh chemicals or abrasive materials‚ as they may damage the surface․ Check the lamp life and replace it when prompted by the projector․ Ensure the filter is cleaned every 100 hours of use to prevent overheating․ Proper upkeep extends the projector’s lifespan and ensures optimal performance․ Refer to the manual for detailed cleaning instructions․

6․2․ Common Issues and Solutions

Address common issues promptly to ensure optimal performance․ If the image appears blurry‚ adjust the focus or lens shift․ For lamp failure‚ replace it with an Optoma-approved lamp․ Connectivity problems may require restarting the projector or checking cable connections․ If the remote control isn’t working‚ ensure line-of-sight isn’t obstructed or replace batteries․ For overheating‚ clean the vents and ensure proper ventilation․ Refer to the troubleshooting section in the manual for detailed solutions and guidelines to resolve these issues effectively․

Additional Resources

Access comprehensive support by visiting Optoma’s official website for downloadable manuals‚ FAQs‚ and troubleshooting guides․ Contact customer support for further assistance with your projector․

7․1․ Downloading the Full Manual

To access the complete manual for your Optoma projector‚ visit Optoma’s official website․ Navigate to the support page and enter your projector’s model number in the search bar․ Download the PDF manual‚ which includes detailed setup instructions‚ troubleshooting tips‚ and advanced settings․ Ensure you select the correct model to get accurate information․ This resource is essential for understanding your projector’s features and resolving any operational issues․ Additional guides and FAQs are also available for further assistance․

7․2․ Optoma Support and FAQs

Optoma provides comprehensive support resources to help users resolve issues and optimize their projector experience․ Visit the official Optoma website and navigate to the support page‚ where you’ll find FAQs‚ troubleshooting guides‚ and detailed technical documentation․ For specific queries‚ contact Optoma’s customer support team via email or phone․ Additional resources‚ such as tutorial videos and user forums‚ are also available to address common concerns and provide step-by-step solutions․ Utilize these tools to ensure your projector operates at its best and resolve any issues efficiently․

By following the guidelines in this manual‚ you’ve successfully set up and optimized your Optoma projector for an exceptional viewing experience․ Regular maintenance‚ proper handling‚ and adherence to safety precautions will ensure longevity and performance․ Explore advanced features to customize settings according to your preferences․ For any further assistance‚ refer to the support resources or contact Optoma’s customer service․ Enjoy your enhanced visual experiences with your Optoma projector‚ designed to deliver high-quality imagery and versatility for various applications․

bodyguardian mini plus instructions

The BodyGuardian Mini Plus is a remote cardiac monitoring system designed for continuous‚ near real-time tracking of heart activity. It offers a waterproof‚ user-friendly design with options for vertical or horizontal placement on the chest. The device supports up to 30 days of monitoring and provides detailed insights for healthcare providers. It is equipped with adhesive options like Bridge or Strip for secure placement and requires proper skin preparation for optimal performance. Electrodes can be replaced as needed‚ and the system includes comprehensive resources like manuals and instructional videos for easy setup and use.

1.1 Overview of the Device and Its Purpose

The BodyGuardian Mini Plus is a cutting-edge‚ portable cardiac monitoring system designed to track heart activity remotely. Its primary purpose is to provide continuous‚ near real-time monitoring of a patient’s heart rhythm‚ ensuring early detection of irregularities. The device is lightweight‚ waterproof‚ and designed for comfort‚ making it suitable for daily wear. It supports both vertical and horizontal placement on the chest‚ offering flexibility for different body types. The system is intended for patients requiring long-term cardiac surveillance‚ offering up to 30 days of uninterrupted monitoring. It is supported by comprehensive instructional resources‚ including manuals and videos‚ to guide users through setup and usage.

1.2 Key Features of the BodyGuardian Mini Plus

The BodyGuardian Mini Plus boasts a fully waterproof design‚ safe for showers‚ baths‚ and submersion up to 3 feet. It offers up to 30 days of near real-time monitoring‚ ensuring continuous cardiac surveillance. The device supports both Bridge and Strip adhesive options for secure placement. Proper skin preparation is required for optimal adhesion. It features a rechargeable battery with a charging time of 1.5-2.5 hours. The system is designed for remote monitoring‚ providing detailed insights for healthcare providers and ensuring patient safety and comfort during extended use.

Setting Up the BodyGuardian Mini Plus

Setting up involves unboxing‚ charging (1.5-2.5 hours)‚ and preparing the device according to the patient manual for optimal performance and accurate readings.

2.1 Unboxing and Preparing the Device

Upon unboxing‚ ensure all components are included‚ such as the monitor‚ adhesives (Bridge or Strip)‚ electrodes‚ and the patient manual. Before use‚ charge the device for 1.5-2.5 hours until the indicator shows it is fully powered. Properly prepare the skin where the monitor will be placed‚ removing any hair or lotions to ensure optimal adhesion. Replace electrodes as needed‚ following the instructions provided in the manual or instructional videos. This step ensures accurate readings and comfortable wear for continuous monitoring.

2.2 Charging the Monitor (1.5-2.5 Hours)

Charge the BodyGuardian Mini Plus using the provided USB cable and adapter for 1.5 to 2.5 hours. Ensure the monitor is fully charged‚ as indicated by the charging indicator turning solid. Once charged‚ the device is ready for use. Avoid interrupting the charging process to ensure optimal battery performance. After charging‚ apply new electrodes and attach the monitor to your chest following the instructions provided in the manual or instructional videos. Proper charging is essential for continuous‚ accurate monitoring. Always use the original charging accessories to maintain device functionality and safety.

Placing the BodyGuardian Mini Plus on the Chest

Place the BodyGuardian Mini Plus on your chest‚ either vertically or horizontally‚ ensuring proper adhesion and skin contact for accurate monitoring. Prepare your skin by removing hair if necessary and cleaning the area. Follow the adhesive instructions for secure placement. Once attached‚ the device will begin recording heart activity for remote monitoring. Proper placement is crucial for reliable data collection and comfort during extended use.

3.1 Skin Preparation for Proper Adhesion

Proper skin preparation is essential for secure adhesion of the BodyGuardian Mini Plus. Ensure the area is clean‚ dry‚ and free of oils or lotions. If hair is present‚ gently remove it to allow better contact. Avoid using powders or creams on the skin where the device will be placed. Clean the chest area with an alcohol wipe and let it dry completely before applying the monitor. This ensures optimal adhesion and accurate heart activity monitoring. Proper preparation helps prevent poor skin contact messages and ensures reliable data collection. Follow these steps carefully for best results during your monitoring period.

3.2 Vertical vs. Horizontal Placement Options

The BodyGuardian Mini Plus can be worn either vertically or horizontally on the chest‚ depending on personal comfort and preference. Vertical placement aligns with the natural contour of the chest‚ while horizontal placement may suit broader chest structures. Regardless of orientation‚ ensure the device is centered and firmly attached to clean‚ prepared skin. Proper alignment is crucial for accurate heart readings and to prevent shifting during movement. Choose the option that feels most comfortable and secure for your daily activities‚ ensuring continuous monitoring without disruption.

Using Adhesive Options

The BodyGuardian Mini Plus offers two adhesive options: the Bridge and Strip adhesives. Both ensure secure placement on the chest for reliable heart monitoring. Follow specific instructions for each type to achieve proper adhesion and maintain device functionality. Proper application is essential for accurate readings and uninterrupted monitoring. Refer to the provided guides for detailed steps on using these adhesives effectively.

4.1 Instructions for Using the Bridge Adhesive

To use the Bridge adhesive with the BodyGuardian Mini Plus‚ start by ensuring the skin is clean‚ dry‚ and free of hair for proper adhesion. Peel the backing from the Bridge adhesive and align it with the device’s adhesive area. Press firmly to secure it to your chest‚ following the vertical or horizontal placement guidelines. The Bridge adhesive is designed for extended wear and provides a secure fit. For detailed steps‚ refer to the instruction manual or the accompanying video guide. Proper application ensures accurate monitoring and device functionality.

4.2 Instructions for Using the Strip Adhesive

To use the Strip adhesive‚ ensure the skin is clean‚ dry‚ and free of hair. Peel the backing from the Strip and align it with the BodyGuardian Mini Plus. Press firmly to secure it to your chest‚ either vertically or horizontally. The Strip adhesive is designed for easy repositioning and can be reused for a short period. For best results‚ follow the preparation and placement guidelines outlined in the manual or instructional video. Proper application ensures reliable monitoring and comfort during extended wear.

Replacing ECG Electrodes

Replacing ECG electrodes is a straightforward process. Peel off the old electrodes‚ then align and press the new ones firmly onto your chest. Follow the steps on page 16 for detailed instructions.

5.1 Steps to Replace Electrodes (See Page 16)

To replace the ECG electrodes‚ start by gently peeling off the old ones from your skin. Clean the area with water or alcohol to ensure proper adhesion. Remove the protective backing from the new electrodes and align them with the marks left by the previous ones. Press firmly to secure them in place. Ensure the electrodes are positioned correctly for accurate readings. Refer to page 16 for detailed diagrams and additional guidance to complete the process effectively and maintain continuous monitoring.

Troubleshooting Common Issues

The “Poor Skin Contact” message indicates improper electrode adhesion. Check for hair or dry skin‚ clean the area‚ and reattach the electrodes firmly for better connection.

6.1 Resolving the “Poor Skin Contact” Message

To resolve the “Poor Skin Contact” message‚ ensure the skin is clean‚ dry‚ and free of hair where the electrodes are applied. Gently remove the monitor‚ clean the area with mild soap and water‚ and dry thoroughly. Reattach the electrodes firmly‚ pressing down to secure proper adhesion. If issues persist‚ check for worn-out electrodes and replace them as needed. Proper skin preparation is essential for accurate monitoring and to avoid false alerts.

Waterproof Features and Usage Guidelines

The BodyGuardian Mini Plus is fully waterproof‚ safe for showers‚ baths‚ and submerging up to 3 feet‚ ensuring continuous monitoring in wet environments without compromise.

7.1 Safe Usage in Showers‚ Baths‚ and Submerged Environments

The BodyGuardian Mini Plus is fully waterproof‚ allowing safe use in showers‚ baths‚ and submerged environments up to 3 feet deep; This feature ensures continuous monitoring without interruption‚ even in wet conditions. Proper placement and preparation of the device are essential to maintain functionality underwater. Users can confidently wear the monitor during these activities‚ knowing it will remain operational. Always inspect the device for damage before submerging to ensure optimal performance and safety during use.

Monitoring and Remote Capabilities

The BodyGuardian Mini Plus offers up to 30 days of near real-time monitoring‚ providing continuous and remote tracking of heart activity for extended periods.

8.1 Understanding Up to 30 Days of Near Real-Time Monitoring

The BodyGuardian Mini Plus enables uninterrupted‚ near real-time heart monitoring for up to 30 days. This extended duration ensures comprehensive data collection‚ allowing healthcare providers to detect irregularities and trends over time. The device transmits data continuously‚ providing immediate insights into cardiac activity. Its remote capabilities ensure that patients can be monitored from anywhere‚ enhancing flexibility and reducing the need for frequent in-person check-ups. This feature is particularly beneficial for long-term cardiac conditions requiring ongoing surveillance.

Additional Resources

Access the Patient Instruction Manual and instructional videos for detailed guidance. These resources cover setup‚ usage‚ and troubleshooting‚ ensuring comprehensive support for optimal device operation and understanding.

9.1 Accessing the Patient Instruction Manual

The Patient Instruction Manual for the BodyGuardian Mini Plus is available as a downloadable PDF and is also included in printed form in the device box. This manual provides detailed instructions on how to use‚ set up‚ and troubleshoot the device. It covers topics such as skin preparation‚ electrode placement‚ and monitoring features. Refer to the manual for step-by-step guidance on optimizing your experience with the BodyGuardian Mini Plus.

9.2 Watching Instructional Videos for Setup and Usage

In addition to the printed manual‚ instructional videos are available online to guide patients through the setup and usage of the BodyGuardian Mini Plus. These videos cover topics such as applying the device with Bridge or Strip adhesives‚ replacing electrodes‚ and troubleshooting common issues. They also demonstrate proper skin preparation and placement techniques. Videos are accessible via the official website or through links provided in the patient manual‚ offering visual step-by-step instructions to ensure a smooth and effective monitoring experience.

char broil infrared turkey fryer instruction manual

The Char-Broil Infrared Turkey Fryer offers a revolutionary oil-free cooking experience, perfect for achieving crispy, flavorful results without the hassle of traditional deep frying.

Its patented infrared technology ensures even heat distribution, while its spacious capacity accommodates up to a 16-pound turkey, making it ideal for family gatherings or special occasions.

1.1 Overview of the Appliance and Its Benefits

The Char-Broil Infrared Turkey Fryer is a versatile and efficient cooking appliance designed for oil-free frying, offering a healthier alternative to traditional methods. Its infrared technology ensures even heat distribution, delivering crispy results without the need for oil. This fryer is ideal for cooking turkeys up to 16 pounds, as well as other meats like chicken and roasts. The appliance is user-friendly, with a focus on safety and convenience, making it perfect for both novice and experienced cooks. Its compact design and easy cleanup add to its appeal for home use.

  • Oil-free cooking for a healthier option
  • Even heat distribution for consistent results
  • Large capacity for various meats
  • Easy to use and clean

1.2 Importance of Following the Instruction Manual

Adhering to the Char-Broil Infrared Turkey Fryer manual is crucial for safe and effective operation. It provides detailed assembly steps, safety precautions, and cooking guidelines to ensure optimal performance. Neglecting the instructions may lead to improper assembly, safety hazards, or subpar cooking results. The manual also includes troubleshooting tips and maintenance advice to extend the appliance’s lifespan. By following the guide, users can maximize their cooking experience while minimizing risks. Always refer to the manual before first use and for any operational concerns.

  • Ensures safe and efficient operation
  • Provides clear assembly and cooking instructions
  • Helps troubleshoot common issues
  • Extends appliance longevity

Assembly and Installation

Estimated assembly time is approximately 1 hour. Follow the step-by-step guide to ensure proper setup, including attaching the burner, legs, and other essential components. Tools required include a wrench and screwdriver for secure connections. Proper installation ensures safe and efficient operation of the fryer.

2.1 Unboxing and Inventory of Parts

Begin by carefully unboxing the Char-Broil Infrared Turkey Fryer and laying out all components. The package should include the main fryer body, burner assembly, cooking basket, lid, regulator, and hardware. Verify each item against the manual’s parts list to ensure nothing is missing. Pay attention to smaller pieces like screws and connectors, as they are essential for proper assembly. Organize the parts neatly to avoid losing any during the setup process. Double-checking the inventory ensures a smooth and stress-free assembly experience. Proper organization prevents delays and ensures all components are accounted for before starting. Always refer to the manual for clarity on part identification.

2.2 Step-by-Step Assembly Instructions

Begin by assembling the burner and regulator, ensuring all connections are secure. Attach the burner assembly to the fryer base following the manual’s alignment guide. Next, connect the LP gas line to the regulator, tightening firmly to prevent leaks. Install the cooking basket by aligning its hooks with the fryer’s frame and securing it with the provided hardware. Double-check all connections and ensure the fryer is placed on a stable, heat-resistant surface. Refer to the manual for specific torque settings and safety precautions. Proper assembly is critical for safe and efficient operation.

2.3 Tools and Materials Required for Assembly

To assemble the Char-Broil Infrared Turkey Fryer, you’ll need a few essential tools and materials. Start with a screwdriver for securing bolts and a wrench for tightening gas connections. Gloves are recommended for handling sharp or hot components. Ensure you have the regulator/valve assembly and LP gas line ready for installation. Additionally, a gas leak detector is crucial for safety checks. Optional items like a digital thermometer can enhance your setup. Gather all parts from the box and refer to the manual for a complete list of required tools and materials to ensure a smooth assembly process.

Infrared Cooking Technology

Infrared cooking technology uses radiant heat for even cooking and crispy results without oil, ensuring moisture retention and flavor enhancement in every dish.

3.1 How Infrared Cooking Works

Infrared cooking uses radiant heat emitted by heating elements to cook food evenly without oil. The Char-Broil Infrared Turkey Fryer employs this technology to ensure crispy results and moisture retention. When the burner is ignited, it produces infrared waves that penetrate the food, cooking it thoroughly and quickly. This method avoids the need for oil, making it a healthier alternative to traditional frying while maintaining flavor and texture. The even heat distribution ensures consistent cooking results, making it ideal for turkeys and other meats.

3.2 Benefits of Infrared Technology for Turkey Cooking

Infrared technology offers superior even heat distribution, ensuring a crispy exterior and juicy interior without the need for oil. This method reduces cooking time compared to traditional frying, while maintaining consistent results. The Char-Broil Infrared Turkey Fryer delivers uniform cooking, eliminating hot spots and undercooked areas. It also retains natural flavors and moisture, resulting in a tastier turkey. The oil-free design makes cleanup easier and provides a healthier cooking option, perfect for achieving restaurant-quality results at home.

Capacity and Cooking Options

The Char-Broil Infrared Turkey Fryer can cook a 16-pound turkey, 8-pound roast, or 6-pound pork shoulder, offering versatile cooking options for various meats with consistent results.

4.1 Maximum Capacity for Turkey and Other Meats

The Char-Broil Infrared Turkey Fryer can accommodate a whole turkey up to 16 pounds, ensuring even cooking and crispy results. Beyond turkeys, it can handle an 8-pound roast, a 6-pound pork shoulder, or chicken, making it a versatile option for family meals or special events. The spacious interior allows for uniform heat distribution, ensuring that every piece of meat is cooked to perfection without the need for oil, making it a healthier alternative to traditional frying methods.

4.2 Cooking Time Estimates and Temperature Control

Cooking time varies based on the meat type and size, but a whole turkey typically cooks at 10-15 minutes per pound. The infrared technology ensures even heat distribution, allowing for consistent cooking. Temperature control is straightforward, with adjustable settings to achieve the perfect doneness. Use a food thermometer to monitor internal temperatures, ensuring safety and flavor. This feature-rich design makes cooking efficient and stress-free, delivering delicious results every time while maintaining precise temperature control for optimal cooking outcomes.

Safety Precautions and Operating Instructions

Always turn off the control knob and LP cylinder valve, allowing flames to die down before inspecting or cleaning. Use only LP gas with the supplied regulator/valve assembly for safe operation.

5.1 Essential Safety Tips for First-Time Users

For first-time users, ensure the fryer is placed on a stable, heat-resistant surface away from flammable materials. Always read the manual thoroughly before use. Turn off the control knob and LP cylinder valve, allowing flames to die down completely before inspecting or cleaning. Never leave the fryer unattended while in operation. Use a meat thermometer to monitor internal temperatures safely. Keep children and pets at a safe distance. Ensure proper ventilation to avoid gas buildup. Follow ignition procedures carefully, and avoid using abrasive cleaners that could damage the finish.

5.2 Proper Ignition and Shutdown Procedures

For ignition, press and turn the burner control knob to the flame symbol, then quickly turn the rotary ignitor knob. If ignition doesn’t occur within 5 seconds, turn off and wait before retrying. For shutdown, turn off the control knob and LP cylinder valve, allowing flames to die down completely. After the fryer cools, inspect the burner for blockages like spider webs or rust. Always wait 5 minutes before repeating the lighting procedure to ensure safety and proper functioning of the appliance.

5.3 Monitoring the Cooking Process Safely

Always monitor the cooking process to ensure safe and even cooking. Use the included food thermometer to check internal temperatures, ensuring poultry reaches 165°F. For enhanced accuracy, consider upgrading to a digital thermometer like the Char-Broil Smart Temp. Keep the lid closed during cooking to retain heat and promote even browning. Never leave the fryer unattended while in operation. Regularly inspect the turkey through the lid’s viewing window to avoid overcooking. Proper monitoring ensures a perfectly cooked, safe, and delicious meal every time.

Maintenance and Cleaning

Regular maintenance and cleaning are essential for optimal performance. After each use, clean the fryer with soap and water, and dry thoroughly to prevent rust. Store seasonally in a dry place to maintain longevity and functionality; Always inspect for wear and tear before and after use to ensure safety and efficiency.

6.1 Cleaning the Fryer After Use

Clean the Char-Broil Infrared Turkey Fryer immediately after use for optimal maintenance. Turn off the burner, allow the unit to cool, and disconnect the LP cylinder. Remove all food residues and wipe surfaces with a mild soap solution. Avoid abrasive cleaners or scourers to prevent damage. Rinse thoroughly and dry with a clean towel. Regular cleaning prevents rust and ensures longevity. Always inspect burner ports for blockages and clean them with a small brush if necessary. Proper cleaning ensures safe and efficient performance for future use.

6.2 Seasonal Storage and Maintenance Tips

For seasonal storage, clean the fryer thoroughly and ensure it is dry. Store it in a cool, dry, protected area away from direct sunlight and moisture. Cover the unit to prevent dust accumulation. Regularly inspect burner ports and ensure they are clear of debris. Lubricate movable parts if necessary. Before storing, disconnect the LP cylinder and store it separately. Follow the manual for specific dismantling instructions if needed. Proper storage maintains the fryer’s performance and extends its lifespan. Always ensure the fryer is completely cool before storing to prevent any accidental ignition risks.

Troubleshooting Common Issues

Common issues include ignition problems or uneven cooking. Ensure burner ports are clear of debris and the ignitor is functioning properly. If issues persist, consult the manual.

7.1 Common Problems and Solutions

Common issues with the Char-Broil Infrared Turkey Fryer include ignition problems, where the burner fails to light. Solutions involve checking the ignitor knob and ensuring propane flow. Uneven cooking can occur if the turkey isn’t centered; always use the provided rack. Excess smoke may indicate food debris; clean the burner regularly. For persistent issues, refer to the troubleshooting guide in the manual or contact Char-Broil customer support for assistance.

7.2 When to Contact Customer Support

Contact Char-Broil customer support if you encounter issues beyond basic troubleshooting, such as defective parts, persistent malfunctions, or complex errors. For assistance, visit their official website or refer to the contact information in the manual. Ensure you have your fryer’s model number and a detailed description of the problem ready to expedite support. Their team is available to address warranty claims, repair needs, and provide advanced guidance for optimal performance.

Accessories and Additional Resources

Enhance your cooking experience with recommended accessories like the Char-Broil food thermometer for precise temperature control. Additional manuals and guides are available on the official Char-Broil website.

8.1 Recommended Accessories for Enhanced Cooking

Enhance your Char-Broil Infrared Turkey Fryer experience with essential accessories. A food thermometer ensures precise internal temperature monitoring, while a digital Smart Temp thermometer offers advanced control. Consider a durable cooking basket for easy food handling and a protective cover for storage. These accessories optimize performance and convenience, helping you achieve perfect results every time. Visit the Char-Broil website or authorized retailers to explore these options and elevate your cooking experience.

  • Food Thermometer
  • Smart Temp Digital Thermometer
  • Cooking Basket
  • Protective Cover

For more details, visit: sizzleonthegrill.com

8.2 Where to Find Additional Manuals and Guides

For additional manuals and guides, visit the official Char-Broil website or authorized retailers. The manual is also available on platforms like ManualsLib and Manualzilla. For specific models, refer to the Sizzle on the Grill resource page. Ensure you download the correct version for your Char-Broil Infrared Turkey Fryer model. If you need further assistance, contact Char-Broil customer support directly.

Always verify the source for authenticity and the latest updates.

evidence based training meal plan pdf

Evidence-based training meal plans combine scientific research with practical nutrition strategies to optimize performance and recovery. They emphasize balanced macronutrients, hydration, and tailored dietary approaches for specific fitness goals.

1.1 Understanding the Importance of Evidence-Based Nutrition

Evidence-based nutrition is rooted in scientific research, ensuring that dietary recommendations are grounded in proven outcomes rather than fads or anecdotal experiences. This approach prioritizes the use of high-quality studies to guide meal planning, making it a reliable method for achieving specific health and performance goals. By focusing on validated nutritional strategies, individuals can make informed decisions about their diet, reducing the risk of ineffective or harmful practices. Evidence-based nutrition also emphasizes the importance of personalized plans, considering factors like age, health status, and lifestyle to create tailored solutions. This scientific framework not only enhances physical performance but also supports overall well-being, making it a cornerstone of effective training meal plans.

1.2 Benefits of a Structured Training Meal Plan

A structured training meal plan offers numerous benefits, including enhanced physical performance, faster recovery, and improved overall health. By providing a clear dietary framework, it helps athletes and individuals maintain consistency in their nutrition, ensuring they meet their energy needs and support muscle growth. Such plans also reduce the risk of nutritional deficiencies and prevent overeating or undereating, which can hinder progress. Additionally, a well-structured meal plan promotes mental clarity and focus, enabling individuals to perform at their best. It also fosters discipline and accountability, making it easier to stick to long-term fitness goals. Overall, a structured approach to nutrition is essential for maximizing the effectiveness of any training regimen and achieving sustainable results.

Key Components of an Evidence-Based Training Meal Plan

An evidence-based training meal plan includes balanced macronutrients, essential micronutrients, and optimal hydration strategies to fuel performance, support recovery, and promote overall health and wellness.

2.1 Macronutrient Breakdown: Proteins, Carbohydrates, and Fats

A well-structured training meal plan emphasizes a balanced macronutrient breakdown. Proteins are essential for muscle repair and growth, with recommendations ranging from 1.2 to 2.2 grams per kilogram of body weight, depending on activity level. Carbohydrates serve as the primary energy source, particularly for high-intensity workouts, and should constitute 45-65% of total calories. Fats, including healthy unsaturated options, support hormone production and overall health, making up 20-35% of the diet. The ratio of these macronutrients should be tailored to individual goals, whether endurance, strength, or weight management, ensuring optimal performance and recovery.

2.2 Micronutrients: Vitamins and Minerals for Optimal Performance

Micronutrients, including vitamins and minerals, play a crucial role in supporting energy production, immune function, and overall athletic performance. Key vitamins such as B vitamins, vitamin C, and vitamin D are essential for energy metabolism, collagen synthesis, and bone health. Minerals like iron, calcium, magnesium, and zinc are vital for oxygen delivery, muscle contraction, and recovery. Deficiencies in these micronutrients can hinder performance and prolong recovery times. A well-balanced diet rich in whole foods, fruits, vegetables, and lean proteins ensures adequate intake. For athletes with specific needs, supplementation may be necessary to maintain optimal levels. Prioritizing micronutrient-dense foods helps athletes perform at their best and supports long-term health.

2.3 Hydration Strategies for Athletes and Trainers

Proper hydration is critical for physical performance and recovery. Even mild dehydration can impair endurance, strength, and focus. Athletes should drink 17-20 ounces of water 2-3 hours before training and 8-10 ounces every 10-15 minutes during exercise. Sports drinks are recommended for intense or prolonged sessions to replenish lost electrolytes. Monitoring urine color is a simple way to assess hydration levels—pale yellow indicates optimal hydration. Avoid overhydration, as it can lead to hyponatremia. Post-workout, prioritize water or electrolyte-rich beverages to restore fluid balance. Tailoring hydration plans to individual needs, climate, and activity intensity ensures optimal performance and reduces injury risk. Consistent hydration habits support overall health and enhance training outcomes.

Meal Timing and Frequency

Meal timing and frequency optimize performance by fueling workouts and aiding recovery. Eating balanced meals every 3-4 hours supports energy levels and muscle repair effectively.

3.1 Pre-Workout Nutrition: What and When to Eat

Pre-workout nutrition is crucial for maximizing performance and preventing fatigue. Aim to eat a balanced meal containing complex carbohydrates, lean proteins, and healthy fats 1-3 hours before training. This timing allows for proper digestion and energy release. Examples include oatmeal with nuts or whole-grain toast with avocado and eggs. Additionally, hydration is key—drink 16-20 ounces of water 30 minutes before starting. Avoid heavy or high-fiber foods that may cause discomfort. For early morning workouts, a light snack like a banana or yogurt 30 minutes prior can provide a quick energy boost. Tailor your choices based on personal tolerance and exercise intensity to ensure optimal results.

3.2 Post-Workout Recovery: Refueling for Muscle Repair

Post-workout recovery nutrition is essential for muscle repair, replenishing energy stores, and supporting overall fitness goals. Aim to consume a mix of carbohydrates and protein within 30-60 minutes after exercise, known as the anabolic window. Carbohydrates help restore glycogen levels, while protein provides amino acids for muscle repair. Examples include a smoothie with lean protein powder, berries, and almond milk or a meal of grilled chicken with quinoa and steamed vegetables. Stay hydrated by drinking water or a sports drink if needed. Additionally, incorporating healthy fats like nuts or avocado can enhance nutrient absorption. Tailor portions based on workout intensity and individual caloric goals to optimize recovery and performance.

3.3 Meal Frequency: How Often Should You Eat?

Meal frequency depends on individual goals, lifestyle, and metabolic needs. Some evidence suggests that eating 3-5 main meals with 2-3 snacks in between can support stable energy levels and metabolism. For athletes, maintaining a consistent eating schedule helps fuel workouts and aids recovery. For weight loss, portion control and timing meals to avoid overeating are key. Others find success with intermittent fasting, which involves eating within a specific window, such as 8 hours, and fasting for the remaining time. Ultimately, the best approach is one that aligns with your schedule, hunger cues, and dietary preferences. Listening to your body and adjusting meal frequency accordingly ensures sustainability and satisfaction. Balanced and nutrient-dense meals, regardless of frequency, are essential for overall health and performance.

Supplements and Ergogenic Aids

Supplements like protein powders, creatine, and beta-alanine can enhance performance and recovery. Evidence-based options are scientifically proven to support muscle growth and endurance. Always consult a dietitian to avoid over-supplementation.

4.1 Protein Powders and Their Role in Muscle Building

Protein powders are a cornerstone of evidence-based training meal plans, providing essential amino acids for muscle repair and growth. Whey, casein, and plant-based options like pea or rice protein are popular choices. Research indicates that consuming 1.2-2.2 grams of protein per kilogram of body weight daily supports muscle synthesis. Protein powders offer convenience, especially post-workout, when timely nutrition is critical for recovery. They can also help athletes meet high protein demands without excessive calorie intake. When combined with resistance training, protein powders enhance muscle hypertrophy and strength gains. Always choose unflavored or minimally processed options to avoid unnecessary additives.

4.2 Creatine and Other Performance-Enhancing Supplements

Creatine is one of the most widely researched and effective performance-enhancing supplements, proven to increase strength, power, and endurance. It works by boosting intramuscular ATP stores, delaying fatigue during high-intensity efforts. Recommended dosages range from 3-5 grams daily, with studies showing significant improvements in muscle performance. Other supplements like beta-alanine, which increases muscle carnosine levels, and nitric oxide boosters, improving blood flow, can also support training. However, it’s crucial to consult a healthcare professional or dietitian to ensure safe and appropriate use, as individual responses vary. Always prioritize whole-food nutrition before adding supplements, and avoid unnecessary combinations to minimize potential side effects. Evidence-based recommendations ensure these aids complement, rather than replace, a well-structured meal plan.

Monitoring and Adjusting the Meal Plan

Regularly track weight, body composition, and performance metrics to assess progress. Adjust caloric intake and macronutrient ratios as needed to align with evolving goals and ensure optimal results.

5.1 Tracking Progress: Weight, Body Composition, and Performance Metrics

Monitoring progress is crucial for optimizing an evidence-based training meal plan. Regularly measuring weight and body composition helps assess changes in muscle mass and fat percentage. Performance metrics, such as strength, endurance, and recovery speed, provide insights into how nutrition impacts physical outputs. Using tools like food diaries, mobile apps, and bioelectrical impedance analysis ensures accurate data collection. This information allows for data-driven adjustments to the meal plan, ensuring alignment with fitness goals. Consistent tracking also helps identify plateaus or imbalances, enabling timely interventions to maintain progress. Over time, this systematic approach fosters a deeper understanding of how nutrition influences overall performance and health outcomes.

5.2 Adjusting Caloric Intake Based on Goals and Progress

Caloric intake adjustments are essential for aligning nutrition with training objectives and progress. Whether aiming for weight loss, muscle gain, or maintenance, evidence-based meal plans require precise calorie modulation. Progress monitoring, such as weight changes or performance improvements, guides these adjustments. For instance, increasing calories may be necessary for muscle growth, while reducing them could support fat loss. Macronutrient ratios should also be fine-tuned to ensure optimal energy and recovery. Regular reassessment ensures the meal plan remains effective and tailored to individual needs. By balancing calorie intake with macronutrient distribution, athletes and trainers can achieve their goals efficiently; Adjustments should be gradual and data-driven to avoid plateaus or imbalances.