manual to automatic gearbox conversion

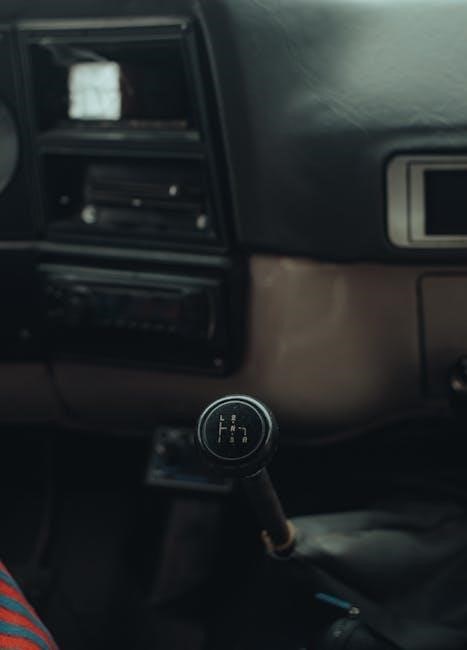
Converting a manual transmission to an automatic gearbox is a complex yet rewarding modification‚ offering enhanced convenience and smoother driving experiences‚ especially in urban traffic conditions.

Understanding the Basics of Transmission Conversion

Transmission conversion involves replacing a manual gearbox with an automatic system‚ including a torque converter and new transmission. This process requires engine compatibility and significant mechanical adjustments. It’s not just a simple swap; it demands precise modifications to chassis‚ electrical systems‚ and drivetrain components. Professional expertise is often essential due to the complexity and specialized tools required for a successful conversion.

Why Convert from Manual to Automatic?

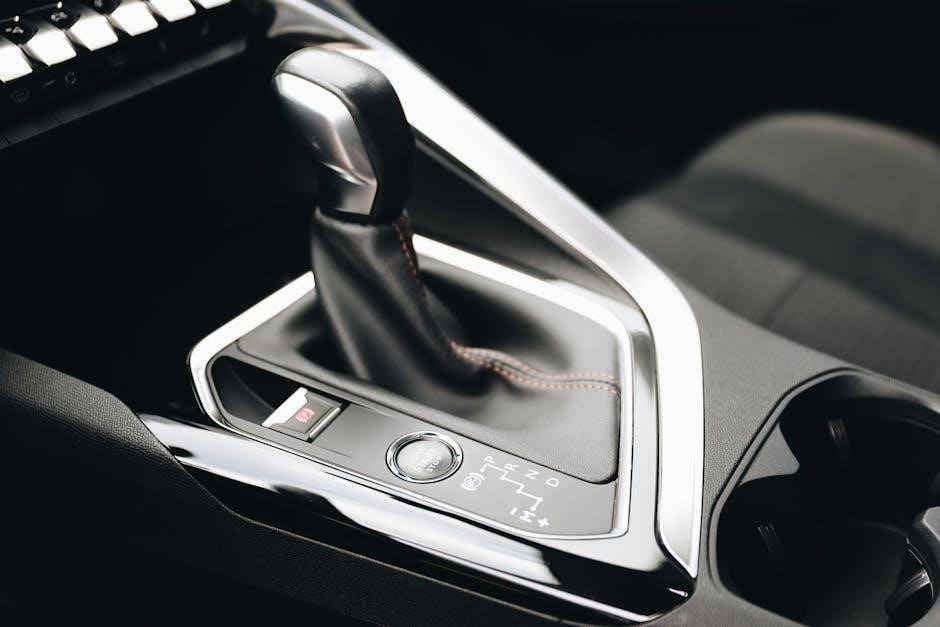
Converting to an automatic transmission enhances driving convenience‚ reducing the need for manual gear shifts. This is ideal for urban driving‚ offering smoother acceleration and reduced driver fatigue. Automatic transmissions adapt seamlessly to varying conditions‚ improving overall comfort and ease of use‚ making long commutes and heavy traffic more manageable while maintaining performance.

Overview of the Conversion Process

Converting a manual to an automatic transmission involves removing the manual system‚ including the clutch and gearbox‚ and installing a compatible automatic transmission. This process requires modifications to the chassis‚ electrical systems‚ and drivetrain. The torque converter replaces the clutch‚ and the transmission is integrated with the engine and wiring. Calibration of the speedometer and other systems ensures proper functionality post-conversion.

Assessing Feasibility for Conversion

Evaluating vehicle age‚ make‚ and model is crucial to determine if a manual-to-automatic conversion is practical and cost-effective‚ considering engine compatibility and parts availability.

Vehicle Compatibility and Age Considerations

Vehicle compatibility and age play a critical role in determining the feasibility of a manual-to-automatic conversion. Older models may lack readily available automatic transmission parts‚ increasing complexity and costs. Newer vehicles often feature advanced electronic systems‚ which can complicate the integration of a new transmission. Consulting a mechanic is essential to assess compatibility and ensure the conversion is viable and cost-effective.

Engine and Transmission Compatibility

Ensuring engine and transmission compatibility is crucial for a successful conversion. The selected automatic transmission must align with the vehicle’s engine specifications‚ including torque capacity and gear ratios. Proper compatibility guarantees optimal performance and reliability‚ avoiding potential mechanical failures; Researching and selecting a transmission that matches the engine’s power output is essential for a seamless integration and satisfactory driving experience.

Cost and Time Investment Analysis

Converting a manual to an automatic transmission is a costly endeavor‚ with expenses including the transmission‚ torque converter‚ labor‚ and potential custom fabrication. The process is time-intensive‚ often requiring weeks of skilled labor. The total investment can exceed the vehicle’s value‚ making it essential to weigh the costs against the benefits and consult a mechanic for a detailed estimate.

Selecting the Right Automatic Transmission

Selecting the appropriate automatic transmission involves matching torque capacity‚ gear ratios‚ and compatibility with your vehicle’s engine and performance needs for optimal reliability and efficiency.

Types of Automatic Transmissions

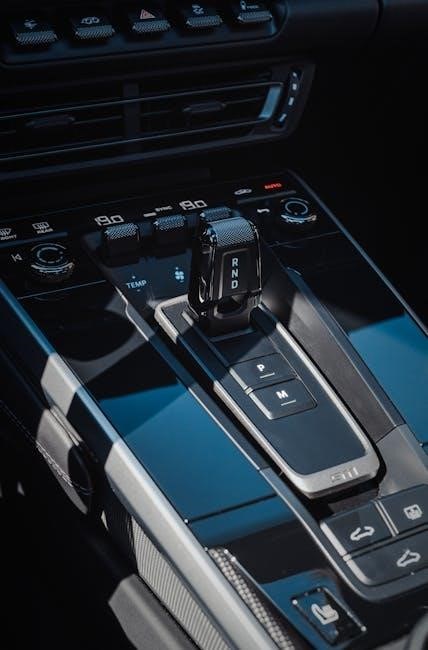
Automatic transmissions come in various types‚ including traditional automatics with torque converters‚ continuously variable transmissions (CVTs)‚ and dual-clutch transmissions (DCTs). Each offers unique benefits‚ such as smooth acceleration‚ fuel efficiency‚ or sporty performance. Understanding these differences is crucial for selecting the right transmission to match your vehicle’s engine and driving needs effectively.

Transmission Compatibility with Vehicle Make and Model

Ensuring transmission compatibility with your vehicle’s make and model is vital for a successful conversion. Factors such as engine specifications‚ torque capacity‚ and electronic systems must align with the chosen automatic transmission. Compatibility issues can arise‚ especially in older models‚ where parts may be scarce or require extensive modifications. Always consult a mechanic to verify compatibility before proceeding with the conversion.

Researching and Sourcing the Appropriate Transmission

Researching and sourcing the right automatic transmission is crucial for a seamless conversion. Start by identifying compatible models that match your vehicle’s engine and performance needs. Utilize manufacturer databases‚ forums‚ and specialized suppliers to find the ideal transmission. Consider purchasing from reputable dealers or salvage yards to ensure quality and reliability. Proper research ensures compatibility and avoids costly mistakes during installation.

The Conversion Process

Converting a manual to an automatic transmission involves replacing key components and modifying systems for compatibility. Precision is essential to ensure proper installation and functionality of the new gearbox.

Removing the Manual Transmission System

The process begins with dismantling the manual transmission system‚ including the clutch‚ flywheel‚ and driveshaft. Careful documentation and organization of components are essential for a smooth reassembly process later.

Installing the Automatic Transmission

Installing the automatic transmission involves precise modifications to the transmission mount‚ bell housing‚ and other components for proper fit and alignment. The torque converter replaces the clutch‚ ensuring smooth power transfer. The driveshaft must be adjusted or replaced to accommodate the new transmission‚ requiring careful alignment to prevent damage and ensure optimal performance.

Modifying Chassis and Electrical Systems

Modifying the chassis and electrical systems is critical for a seamless automatic transmission integration. The transmission tunnel and crossmember may need resizing‚ while the wiring harness must be updated to support the new transmission’s electronic controls. The ECU may require reprogramming to communicate effectively with the automatic gearbox‚ ensuring proper gear shifting and torque converter engagement.

Post-Conversion Calibration and Testing

Post-conversion calibration ensures proper functionality‚ requiring adjustments to systems like the speedometer and electronic controls. Thorough testing is essential to verify seamless integration and performance.

Recalibrating the Speedometer and Gauges

Recalibrating the speedometer and gauges is crucial after a manual to automatic conversion. The automatic transmission’s gear ratios alter speed readings‚ requiring adjustments to ensure accuracy. This process involves reprogramming the vehicle’s computer to account for the new transmission’s specifications‚ ensuring proper functionality of all dashboard indicators and maintaining reliable performance monitoring.

Testing the Automatic Transmission Integration

Testing the automatic transmission integration is essential to ensure smooth operation and compatibility. This involves driving the vehicle under various conditions to monitor gear shifts‚ torque converter engagement‚ and overall performance. Any issues‚ such as slipping or hesitation‚ must be addressed. Proper integration ensures reliable functionality and an optimal driving experience‚ verifying the success of the conversion.

Cost Implications of the Conversion

The cost of converting a manual to automatic transmission varies widely‚ depending on the vehicle’s make‚ model‚ and transmission type. Expenses can exceed the vehicle’s value‚ making it a significant financial decision.

Parts and Labor Costs

Converting a manual to automatic transmission involves significant parts and labor costs. The transmission itself is the most expensive component‚ with prices varying based on type and compatibility. Additional parts like the torque converter‚ clutch replacement‚ and electrical components add to the expense. Labor costs are high due to the complexity of the process‚ requiring specialized tools and skilled mechanics. These costs can quickly escalate‚ often exceeding the vehicle’s value.

Hidden Expenses and Budgeting Tips

Hidden expenses in a manual-to-automatic conversion include potential mechanical repairs‚ custom fabrication‚ and future maintenance. Budgeting tips involve allocating extra funds for unforeseen costs‚ opting for remanufactured parts‚ and prioritizing essential modifications. Plan meticulously to avoid financial strain‚ ensuring the project remains within your means while achieving the desired outcome.

Risks and Challenges

Converting a manual to automatic gearbox involves significant technical risks‚ including mechanical failures‚ compatibility issues‚ and potential damage to existing systems. High costs‚ complexity‚ and the need for specialized expertise add to the challenges‚ making professional consultation crucial to mitigate these risks effectively.

Technical Difficulties and Potential Failures

Technical difficulties in manual to automatic gearbox conversion often arise from incompatible components or improper installation. Issues like faulty torque converters‚ incorrect gear ratios‚ or electrical system malfunctions can lead to transmission failure. Additionally‚ improper calibration of the automatic transmission’s control module may result in poor performance‚ unexpected disengagement‚ or complete system failure‚ requiring costly repairs or even a full rebuild.

Impact on Vehicle Performance and Maintenance

Converting to an automatic transmission can alter fuel efficiency‚ particularly in city driving‚ as automatics often consume more fuel than manuals. Maintenance becomes more complex due to the additional components‚ requiring specialized tools and knowledge. While driving convenience improves‚ the added weight and potential wear on the automatic transmission may affect long-term vehicle performance and reliability.

Legal and Insurance Considerations

Converting a manual to automatic transmission requires compliance with local regulations. Insurance policies may need updating‚ and legal documentation must be completed to avoid penalties and ensure proper coverage.

Compliance with Local Regulations

Converting a manual to automatic transmission requires adherence to local laws and regulations. Vehicle inspections‚ certifications‚ and updated documentation are often mandatory. Failure to comply may result in fines or legal penalties. Ensure all modifications meet regional safety and emissions standards to avoid complications. Proper certification is essential for legal operation of the converted vehicle.

Insurance Implications of the Conversion

Converting a manual to automatic transmission can impact your vehicle’s insurance. Notify your insurer to update your policy‚ as the modification may affect premiums or coverage terms. Ensure the conversion complies with their requirements to avoid policy violations. Additionally‚ the vehicle’s value post-conversion may influence insurance rates‚ so verify with your provider before proceeding.

Alternatives to Manual to Automatic Conversion

Exploring alternatives to manual to automatic conversion can be cost-effective and less stressful. Purchasing a pre-automatic vehicle or considering semi-automatic options offers similar benefits without the conversion hassle.

Purchasing a Pre-Automatic Vehicle

Buying a pre-automatic vehicle is a cost-effective alternative to conversion‚ eliminating the need for complex modifications. It offers a hassle-free experience with a factory-installed transmission‚ ensuring reliability and warranty coverage. This option is ideal for those prioritizing convenience and budget efficiency‚ allowing you to enjoy automatic features without the risks and expenses associated with a conversion.

Exploring Semi-Automatic or Dual-Clutch Options

Semi-automatic and dual-clutch transmissions offer a middle ground between manual and automatic systems. These systems provide the convenience of automatic shifting while retaining some driver control. They are often more affordable and simpler to install than a full automatic conversion‚ making them an attractive alternative for drivers seeking a balance between ease and engagement without the complexity of a manual-to-automatic swap.

Converting a manual to automatic gearbox is a significant decision requiring careful consideration of costs‚ complexity‚ and personal driving needs. Professional guidance is essential for success.

Is the Conversion Worth the Investment?

The decision to invest in a manual to automatic transmission conversion hinges on balancing convenience‚ performance‚ and cost. While it offers enhanced driving ease and adaptability‚ the high expense and complexity often outweigh benefits for many drivers. Carefully weigh personal needs‚ budget‚ and vehicle value before committing to this significant investment.

Final Recommendations for Drivers

Drivers considering a manual to automatic transmission conversion should carefully evaluate their needs and budget. Consult a professional mechanic to assess feasibility and costs. Explore financing options or savings to cover expenses. Research thoroughly and understand the process before committing. Weigh the benefits against potential drawbacks and consider alternatives‚ such as purchasing a pre-automatic vehicle‚ for a cost-effective solution.

care certificate answers pdf free download

The Care Certificate is a foundational qualification for health and social care workers, ensuring they meet essential standards. It focuses on person-centered care, privacy, and dignity.

1.1 What is the Care Certificate?

The Care Certificate is a foundational qualification for health and social care workers, introduced in April 2015. It ensures staff meet essential standards, covering 15 key areas such as person-centered care, privacy, dignity, and safety. This certification is mandatory for new care workers, providing a consistent approach to care delivery and preparing them for their roles effectively.

1.2 Importance of the Care Certificate in Health and Social Care

The Care Certificate is crucial for ensuring high-quality care by setting consistent standards. It equips workers with essential skills and knowledge, promoting person-centered care, privacy, and dignity. This certification builds confidence in care delivery, ensuring safety and respect for service users. By standardizing training, it helps create a skilled workforce, improving overall care quality and meeting regulatory expectations in health and social care settings.

Key Standards of the Care Certificate

The Care Certificate includes 15 standards focusing on essential care skills. It covers understanding roles, person-centered care, privacy, dignity, and communication, ensuring high-quality support for individuals.

2.1 Standard 1: Understanding Your Role

Standard 1 focuses on understanding your role in health and social care. It covers responsibilities, boundaries, and the importance of working within organizational policies. Care workers must demonstrate core skills, such as effective communication and respecting individual needs. This standard ensures clarity in duties, promoting accountability and professionalism. It also emphasizes contributing to team effectiveness and adhering to legal and ethical standards, fostering high-quality, person-centered care delivery.

2.2 Standard 5: Working in a Person-Centred Way

Standard 5 emphasizes working in a person-centered manner, prioritizing the individual’s needs, preferences, and values. It involves respecting their autonomy, promoting independence, and ensuring active participation in care decisions. Care workers must adapt support to meet unique requirements, fostering dignity and empowerment. This approach ensures tailored care plans, reflecting personal goals and preferences, and highlights the importance of effective communication and respect for diversity in care delivery.

2.3 Standard 7: Privacy and Dignity

Standard 7 focuses on respecting individuals’ privacy and dignity in care settings. It requires maintaining confidentiality, respecting personal space, and ensuring care is delivered in a way that preserves dignity. This includes supporting individuals to make choices and providing care that aligns with their preferences. Practitioners must be mindful of cultural and personal differences, ensuring environments are safe and respectful. This standard is crucial for building trust and delivering high-quality, person-centered care.

Care Certificate Workbook Answers

Access essential resources like workbooks and guides to prepare for the Care Certificate. Find examples of answers and download free PDF materials to study confidently.

3.1 Examples of Answers for Standard 1

Understanding your role is crucial in health and social care. Examples of answers for Standard 1 include explaining your responsibilities, boundaries, and the importance of adhering to care standards. Demonstrating awareness of your duties, such as maintaining confidentiality and promoting dignity, is key. Access workbooks and guides for sample answers to ensure comprehension and confidence in your role. These resources provide clear examples to help you meet the required standards effectively.

3.2 Examples of Answers for Standard 7

Standard 7 focuses on maintaining privacy and dignity in care. Examples of answers include respecting confidentiality, ensuring personal space, and supporting individuals with dignity. Demonstrating understanding of privacy laws and ethical practices is essential. Access workbooks or free PDF guides for sample answers that highlight how to uphold these values in daily care tasks, ensuring compliance with standards and promoting a respectful care environment for all individuals.

Study Guides and Resources

Official study materials and additional resources provide comprehensive guidance for understanding the Care Certificate standards. These include workbooks, PDF downloads, and supplementary guides to aid effective preparation and knowledge retention.

4.1 Official Care Certificate Study Materials

Official study materials for the Care Certificate include detailed workbooks and guides. These resources are designed to help learners understand the 15 standards required for completion. They cover essential topics like person-centred care, privacy, and dignity. The materials are available in various formats, including downloadable PDFs, making them accessible for self-paced learning. They provide clear examples and practical scenarios to reinforce understanding and competence.

4.2 Additional Study Resources for Better Understanding

Beyond official materials, additional resources like sample questions, case studies, and practice workbooks are available. These tools provide hands-on experience and deeper insights. Many websites offer free downloadable PDFs containing example answers and guides. These resources are invaluable for reinforcing learning and preparing for assessments. They also include tips for practical application, helping learners connect theory with real-world scenarios in health and social care settings.

Preparing for the Care Certificate Interview

Securing your Care Certificate requires thorough preparation. Utilize free PDF resources to review common questions and practice confident responses, ensuring you are well-equipped for your interview.

5.1 Common Interview Questions and Answers

Common interview questions for the Care Certificate include understanding your role, person-centered care, and handling emergencies. Free PDF resources provide example answers, such as explaining person-centered values or describing how to maintain privacy and dignity. Prepare to discuss scenarios like supporting individuals with unique needs or responding to feedback. Practice confident responses using the 6 Cs—care, compassion, competence, communication, courage, and commitment.

5.2 Tips for Confidently Answering Care Certificate Questions

  • Understand the question fully before responding to ensure relevance.
  • Relate answers to the 6 Cs: care, compassion, competence, communication, courage, and commitment.
  • Use examples from care plans or personal experiences to illustrate points.
  • Practice answering common questions using free PDF resources.
  • Stay calm, speak clearly, and maintain eye contact during interviews.
  • Be honest and reflect on learning opportunities when appropriate.

Accessing Free Care Certificate Resources

Access free Care Certificate resources through official websites and educational platforms, offering PDF downloads, study guides, and workbook answers to aid preparation and understanding effectively online.

6.1 Where to Find Free PDF Downloads

Free PDF downloads for the Care Certificate are available on official health and social care websites, educational platforms, and dedicated resource hubs. These PDFs often include study guides, workbook answers, and detailed standards for each module, providing comprehensive support for learners. Additionally, many organizations offer downloadable materials to aid in preparation for the Care Certificate assessment and interview processes.

6.2 How to Use Free Resources Effectively

To maximize the benefits of free Care Certificate PDF downloads, create a structured study plan and review each module systematically. Use the materials to prepare for interviews by practicing with sample questions. Highlight key points and take notes to reinforce learning. Focus on understanding person-centered care, privacy, and dignity standards. Regularly test your knowledge with included exercises to ensure comprehension and confidence in your role.

Best Practices for Completing the Care Certificate

Set clear goals, prioritize tasks, and allocate dedicated time for each standard. Regular review and practice ensure consistent progress and successful completion of the certification.

7.1 Avoiding Common Mistakes

Common mistakes when completing the Care Certificate include incomplete answers, lack of personal examples, and poor time management. To avoid these, thoroughly review questions, provide detailed responses with specific workplace examples, and allocate sufficient time for each section. Additionally, ensure familiarity with the assessment criteria and seek feedback from supervisors to improve understanding and performance; Proper preparation and attention to detail are key to success.

7.2 Time Management for Successful Completion

Effective time management is crucial for completing the Care Certificate. Allocate specific time slots for each standard, prioritize challenging areas, and break tasks into smaller, manageable sections. Regularly review progress, use study materials efficiently, and avoid procrastination. Consistency and organization are key to ensuring all requirements are met within the allocated timeframe, enabling confident and successful completion of the Care Certificate.

Staying Updated on Care Certificate Requirements

Regularly check official sources for updates on Care Certificate requirements. Continuous learning ensures compliance with the latest standards and advancements in health and social care practices.

8.1 Latest Updates and Changes

Stay informed about the latest updates and changes to the Care Certificate requirements. Regular reviews and amendments ensure the standards align with current best practices in healthcare. Checking official sources and subscribing to updates helps professionals maintain compliance and deliver high-quality care. Updates may include new training modules, revised assessment criteria, or expanded standards to reflect evolving care needs and industry expectations.

8.2 Continuous Learning in Health and Social Care

Continuous learning is essential for health and social care professionals to stay updated with best practices and industry standards. Engaging in ongoing training, reflecting on experiences, and seeking feedback enhances competence and confidence. Leveraging resources like the Care Certificate workbook and official study materials supports lifelong learning, ensuring high-quality care delivery and adaptability to evolving care needs and regulatory requirements.

The Care Certificate is a vital qualification for health and social care professionals, ensuring high-quality care. Continuous learning and adherence to its standards are crucial for career growth and effective care delivery.

9.1 Final Tips for Success

To succeed, utilize free PDF resources effectively, practice consistently, and seek feedback. Focus on understanding person-centered care and maintaining privacy and dignity. Stay updated on the latest standards and continuously improve your skills. Confidence and dedication are key to excelling in your role and providing high-quality care. Remember, the Care Certificate is just the starting point for a rewarding career in health and social care;

9.2 The Role of the Care Certificate in Your Career

The Care Certificate serves as a cornerstone in your career, demonstrating your commitment to quality care. It equips you with essential skills and knowledge, enhancing your professionalism. By completing it, you build a strong foundation for advanced roles, showcasing your dedication to person-centered values. It is a vital step toward career growth and making a meaningful impact in health and social care settings.

nh snowmobile trail map pdf

New Hampshire’s snowmobile trail maps are essential for navigating the state’s extensive network of trails‚ ensuring safe and enjoyable rides through scenic landscapes. These maps detail trail routes‚ locations‚ and key points of interest like food‚ fuel‚ and lodging‚ helping riders plan adventures efficiently. Available in both digital and printed formats‚ they provide critical information for exploring NH’s snowmobile trails.

1.1 Overview of the Importance of Trail Maps for Snowmobilers

Snowmobile trail maps are essential for navigating New Hampshire’s vast trail network‚ ensuring riders stay on designated paths and avoid hazards. They provide critical information on trail conditions‚ food‚ fuel‚ and lodging locations‚ helping snowmobilers plan safe and enjoyable trips. Maps also promote responsible riding by highlighting trail etiquette and environmental conservation‚ enhancing the overall snowmobiling experience in NH.

1.2 Brief History of Snowmobiling in New Hampshire

Snowmobiling in New Hampshire emerged in the mid-20th century‚ evolving from a practical mode of winter transportation to a popular recreational activity. The establishment of organized trail networks and local clubs in the 1960s and 1970s laid the foundation for today’s extensive trail system. Trail maps became essential for navigation‚ fostering the sport’s growth and enabling riders to explore NH’s scenic winter landscapes efficiently.

Sources for NH Snowmobile Trail Maps

Official NH snowmobile trail maps are available as downloadable PDFs from state websites and local clubs. Printed maps can also be found at stores and club meetings‚ ensuring easy access to trail information for riders.

2.1 Official NH Snowmobile Trail Map PDF Downloads

Official NH snowmobile trail maps are available as downloadable PDFs from the NH Snowmobile Association and state parks websites. These maps provide detailed trail routes‚ points of interest‚ and are compatible with both digital and printed use. Regularly updated‚ they offer accurate trail conditions and Etiquette guidelines‚ ensuring riders can plan safe and enjoyable adventures across New Hampshire’s scenic trails.

2.2 Local Snowmobile Clubs and Their Trail Maps

Local snowmobile clubs in New Hampshire provide detailed trail maps‚ often available at club meetings or local stores like The Vernondale Store in Sutton. These maps highlight club-specific trails‚ offering insights into regional routes. Clubs also distribute updated PDF versions‚ ensuring members have accurate trail information. Joining a club offers access to exclusive trail details and community support for planning rides effectively.

2.3 Where to Find Printed Maps (Stores‚ Clubs‚ etc.)

Printed NH snowmobile trail maps can be found at local stores like The Vernondale Store in Sutton or obtained through snowmobile clubs during meetings. Clubs often provide updated PDF maps for printing‚ while stores offer convenient access to physical copies. These sources ensure riders have reliable‚ detailed trail information for planning their adventures across New Hampshire’s snowmobile trails.

Interactive and Digital Versions of the Trail Map

NH snowmobile trail maps are available online as interactive versions‚ offering real-time updates‚ trail conditions‚ and navigation features. Mobile apps like SledNH provide offline access for seamless adventures.

3.1 Features of the Interactive Online Map

The interactive NH snowmobile trail map offers real-time trail conditions‚ zoom functionality‚ and point-of-interest markers. Riders can plan routes‚ save itineraries‚ and share them with friends. The map highlights corridor trails with red shields and distinguishes between groomed and ungroomed paths‚ ensuring accurate navigation. It also provides information on nearby amenities like food‚ fuel‚ and lodging‚ enhancing the riding experience significantly.

3.2 Mobile Apps for Snowmobile Trail Navigation

Dedicated mobile apps‚ such as SledNH‚ provide offline access to NH snowmobile trail maps‚ ensuring navigation without cell service. These apps offer GPS tracking‚ real-time trail conditions‚ and points of interest like food and fuel stops. They are available for both iOS and Android‚ making it easy for riders to explore NH’s trails with confidence and convenience on their adventures.

Key Snowmobile Trail Systems in New Hampshire

New Hampshire boasts three main snowmobile trail systems: the Great North Woods‚ Southern NH clubs‚ and the White Mountains. Each offers extensive‚ interconnected trails with stunning scenic views‚ catering to all skill levels and providing endless exploration opportunities for riders across the state.

4.1 The Great North Woods Trail System

The Great North Woods Trail System‚ located in northern New Hampshire‚ offers an extensive network of snowmobile trails. It is renowned for its pristine landscapes and abundant wildlife. Clubs like the Jefferson Hi-Landers maintain well-marked trails‚ ensuring a smooth ride. The system appeals to both novice and experienced riders‚ with trails winding through forests and alongside frozen lakes‚ providing breathtaking winter scenery. Amenities such as on-trail food and fuel stops are plentiful‚ making it a favorite destination for snowmobilers from across the region.

4.2 Southern NH Club Systems

Southern New Hampshire’s club systems provide diverse and well-maintained trails‚ offering accessible routes for all skill levels. Clubs like the Bow Pioneers and Twinridge Mountaineers manage extensive networks‚ connecting riders to scenic areas. These trails are popular for their proximity to urban centers and amenities. Riders can enjoy groomed paths‚ local eateries‚ and convenient fuel stops‚ making southern NH a hub for snowmobile enthusiasts seeking both adventure and convenience.

4.3 The White Mountains Trail Network

The White Mountains Trail Network in New Hampshire offers some of the most scenic and challenging snowmobile routes in the northeast. With over 200 miles of trails‚ riders can explore rugged terrain‚ dense forests‚ and breathtaking mountain vistas. The network connects popular destinations like the Kancamagus Highway and Franconia Notch‚ providing endless opportunities for adventure. Groomed trails ensure smooth rides‚ while local amenities cater to all needs‚ making it a must-visit for snowmobilers.

Safety Tips and Regulations

Always stay on designated trails‚ wear helmets‚ and obey speed limits. Carry emergency supplies and ride sober. Respect private property and follow NH snowmobile regulations for a safe experience.

5.1 Trail Etiquette and Best Practices

Respect private property and stay on marked trails to avoid trespassing. Always yield to other riders‚ hikers‚ and skiers. Keep noise levels low and avoid riding in sensitive or protected areas. Carry a trail map and emergency supplies‚ and never ride under the influence of alcohol or drugs. Follow all posted signs and regulations to ensure a safe and enjoyable experience for everyone.

  • Stay informed about trail conditions and closures.
  • Keep the environment clean by disposing of trash properly.
  • Be courteous to other trail users and wildlife.

Practicing good etiquette helps preserve trails for future riders and maintains positive relationships with landowners and communities.

5.2 Registration and Safety Requirements

Registration is mandatory for all snowmobiles operated in New Hampshire. Riders must carry proof of registration and liability insurance. Safety requirements include wearing a helmet and completing a safety education course if under 18. Stay informed about trail rules‚ speed limits‚ and prohibited areas. Always check trail conditions and weather forecasts before heading out. Adhere to all posted signs and regulations to ensure a safe riding experience.

  • Register your snowmobile with the NH Fish and Game Department.
  • Complete a safety course for riders under 18.
  • Wear protective gear‚ including a helmet.

Following these guidelines helps protect riders and preserves access to trails for future use.

Points of Interest and Amenities

New Hampshire’s snowmobile trails offer convenient access to on-trail food‚ fuel‚ and lodging‚ enhancing your riding experience. Plan your trip with these essential amenities nearby.

  • On-trail restaurants and fuel stations.
  • Lodging options near popular trail systems.
  • Scenic viewpoints and local attractions.

6.1 On-Trail Food and Fuel Options

New Hampshire’s snowmobile trails feature convenient food and fuel options‚ ensuring riders stay replenished during their adventures. Restaurants‚ convenience stores‚ and gas stations are strategically located along popular routes‚ providing easy access to essentials. These amenities are highlighted on trail maps‚ allowing riders to plan stops efficiently and enjoy the scenic beauty of NH without interruption.

  • On-trail restaurants serving hearty meals;
  • Convenience stores for snacks and supplies.
  • Fuel stations to keep your sled running.

Check trail maps for exact locations of these amenities to maximize your riding experience.

6.2 Lodging and Accommodations Near Trails

New Hampshire offers a variety of lodging options near snowmobile trails‚ catering to all preferences. Cozy cabins‚ convenient hotels‚ and rustic lodges provide comfortable stays for riders. Many accommodations are situated near trailheads‚ ensuring easy access to the trails. These lodgings often feature amenities like secure sled parking and proximity to local eateries‚ making them ideal for snowmobilers seeking convenience and comfort.

  • Cozy cabins
  • Convenient hotels
  • Rustic lodges

Local Snowmobile Clubs and Their Roles

Local snowmobile clubs are vital for maintaining trails‚ organizing events‚ and fostering community among riders. They collaborate with state organizations to ensure safe and enjoyable experiences.

7.1 Club Membership Benefits

Joining a local snowmobile club offers numerous benefits‚ including access to exclusive trail maps‚ discounted rates on gear‚ and invitations to club events. Members also receive updates on trail conditions and safety tips‚ enhancing their riding experience. Many clubs provide opportunities to connect with fellow enthusiasts‚ fostering a sense of community and shared passion for snowmobiling in New Hampshire.

7.2 Volunteer Opportunities and Trail Maintenance

Volunteering with local snowmobile clubs offers opportunities to contribute to trail maintenance‚ ensuring safe and enjoyable rides. Tasks include clearing paths‚ marking trails‚ and repairing signs. Clubs like the Twinridge Mountaineers actively maintain trails‚ highlighting the importance of community involvement. Volunteers are crucial for preserving New Hampshire’s extensive snowmobile network‚ making their efforts vital for the sport’s sustainability and growth.

Seasonal Updates and Trail Conditions

Seasonal updates and real-time trail conditions are crucial for planning safe and enjoyable snowmobile rides in New Hampshire. Check interactive maps and local club updates regularly.

8.1 How to Check Real-Time Trail Conditions

To check real-time NH snowmobile trail conditions‚ visit official websites like nhsa.com or nhstateparks.org. Use interactive maps for updates‚ or download mobile apps like SledNH for iPhone and Android. Local clubs also provide current trail statuses. Always verify conditions before heading out to ensure a safe and enjoyable ride.

8.2 Planning Trips Based on Seasonal Changes

Seasonal changes significantly impact NH snowmobile trail conditions. Plan trips during peak winter months for optimal riding. Early winter offers fresh snow‚ while late winter may bring warmer temperatures. Check trail maps regularly for updates and plan routes around maintained trails‚ ensuring safe and enjoyable adventures through New Hampshire’s scenic snowmobile trail systems.

Future of NH Snowmobile Trail Maps

The future of NH snowmobile trail maps lies in digital innovations‚ with enhanced interactive features and mobile apps improving navigation. Environmental conservation efforts will also play a key role in preserving trails for future generations.

9.1 Digital Innovations in Trail Mapping

Digital innovations are transforming NH snowmobile trail maps‚ offering interactive features like real-time trail conditions‚ GPS navigation‚ and route planning. Mobile apps now provide offline access‚ ensuring navigation without cell service. These advancements enhance user experience‚ improve safety‚ and promote environmental conservation by reducing paper use. They also enable faster updates‚ reflecting trail changes and maintenance efforts accurately.

9.2 Environmental and Conservation Efforts

New Hampshire’s snowmobile trail maps play a crucial role in environmental conservation by promoting sustainable trail usage. They help riders identify sensitive habitats and protected areas‚ ensuring trails remain untouched. Local clubs and organizations work tirelessly to maintain trails while preserving natural landscapes. These efforts minimize the sport’s environmental impact‚ fostering a balance between recreation and nature preservation.

Conservation initiatives‚ such as trail restoration and wildlife protection programs‚ are often highlighted in trail maps. Riders are encouraged to respect private property and stay on designated paths‚ reducing ecosystem disruption. Digital maps further support these efforts by reducing paper usage and promoting eco-friendly navigation. These practices ensure NH’s snowmobile trails remain a pristine destination for future generations.

New Hampshire’s snowmobile trail maps are indispensable for planning safe and enjoyable rides. They guide riders through scenic landscapes while promoting environmental awareness and responsible trail usage.

10.1 Final Thoughts on Using NH Snowmobile Trail Maps

NH snowmobile trail maps are essential for a safe and enjoyable riding experience. They provide detailed routes‚ amenities‚ and safety tips‚ ensuring riders are well-prepared. Whether digital or printed‚ these maps help navigate New Hampshire’s vast trail network efficiently. Always check for updates and carry a map to maximize your adventure and respect the environment.

10.2 Encouragement to Explore NH’s Snowmobile Trails

New Hampshire’s snowmobile trails offer an exhilarating experience‚ with over 7‚000 miles of well-maintained paths through stunning landscapes. From scenic rides to thrilling adventures‚ the trails cater to all skill levels. Plan your trip using NH snowmobile trail maps to discover on-trail food‚ fuel‚ and lodging. Embark on a journey through the Granite State’s winter wonderland and create unforgettable memories while respecting nature and local guidelines.

viper remote car starter manual

The Viper Remote Car Starter offers a convenient solution to start your vehicle remotely, ensuring comfort in extreme temperatures․ It combines advanced security features with easy operation, providing convenience and peace of mind for drivers․ With various models available, it caters to different vehicle needs, enhancing your driving experience effortlessly․

Overview of Viper Remote Start Technology

The Viper Remote Start Technology enables drivers to start their vehicles remotely using a key fob or smartphone app, providing unmatched convenience․ It operates via radio frequency (RF) signals, ensuring reliable communication between the remote and the vehicle․ This technology integrates seamlessly with modern vehicles, offering features like keyless entry, trunk release, and panic mode․ Advanced security measures, such as rolling code encryption, protect against unauthorized access․ The system also supports smartphone connectivity, allowing users to monitor and control their vehicle remotely․ Whether it’s freezing winters or sweltering summers, Viper’s remote start ensures your car is ready to go, enhancing your daily driving experience with ease and security․

Key Features and Benefits

The Viper Remote Car Starter offers a range of key features that enhance convenience and security․ It includes a two-way remote with LED confirmation, ensuring users know when commands are received․ The system supports keyless entry and trunk release, adding versatility․ Additionally, it features a panic mode for emergencies and a car finder function for locating your vehicle․ The remote start also includes advanced anti-theft protection, such as Rolling Code Encryption, to prevent unauthorized access․ These features provide a seamless and secure way to control your vehicle, while the long-range capability ensures reliable operation from a distance․ With Viper, you can enjoy a hassle-free and enhanced driving experience every time you get behind the wheel․

Installation Guide for Viper Remote Start System

Start by selecting the correct Viper model for your vehicle․ Follow the wiring diagram to connect essential components, ensuring proper integration with door and hood switches․ Professional installation is recommended for complex setups․

Choosing the Right Viper Model for Your Vehicle

Selecting the correct Viper model is crucial for seamless compatibility with your vehicle․ Consider factors like make, model, and year to ensure proper functionality․ Manual transmission vehicles may require additional components for safety․ Viper offers various models, such as the 5706v, designed for specific vehicle needs․ Refer to the compatibility chart or consult a professional to avoid installation issues․ The wrong model could lead to poor performance or incompatibility․ Always verify your vehicle’s specifications before purchasing to ensure a smooth installation process and optimal system performance․

Wiring Diagram and Connections

Understanding the wiring diagram is essential for a successful installation․ The tach wire is typically connected to the white wire at the cluster, which can be verified using a DMM on ACV․ Ensure the ignition, starter, and constant power wires are correctly connected․ The door, hood, and trunk switches must also be integrated for proper functionality․ Consult the manual or a professional to avoid errors․ Proper wiring ensures safety and reliable operation of the remote start system, preventing potential issues like engine failure or security breaches․ Always double-check connections to match your vehicle’s specifications for a seamless setup․

Door, Hood, and Trunk Switch Integration

Proper integration of door, hood, and trunk switches is crucial for the Viper remote start system to function securely․ These switches prevent unauthorized starting when doors or compartments are open․ The door switch ensures the vehicle stays locked when armed, while the hood switch prevents remote start if the hood is open․ The trunk switch integrates with the system to maintain security․ Common issues arise from faulty switches or wiring problems․ Testing these switches with a multimeter can help identify malfunctions․ Ensure all connections are secure and consult the manual or a professional if issues persist․ Proper integration ensures safety and reliable operation, preventing potential security breaches or system errors․ Accurate installation guarantees optimal performance and peace of mind for users․

Programming the Viper Remote Starter

Programming the Viper remote starter involves entering programming mode, typically by pressing the valet switch or remote buttons in a specific sequence․ Syncing the remote with your vehicle ensures proper communication․ The process varies by model, so refer to your manual for exact steps․ If issues arise, consult the troubleshooting guide or contact a professional installer․ Proper programming ensures reliable operation and security․ Always follow the manufacturer’s instructions for accurate setup and functionality․

Steps to Program the Remote Starter

Programming your Viper remote starter involves a few straightforward steps․ First, locate the valet switch, usually found under the steering wheel or in the glove compartment․ Press and hold the valet switch until the LED indicator lights up․ Next, turn the ignition to the “ON” position without starting the engine; Press the “LOCK” button on your remote, followed by the “START” button within five seconds․ The vehicle should respond with a confirmation, such as a chirp or flash of the lights․ Release the valet switch to complete the programming․ Test the remote to ensure proper functionality․ If issues arise, consult your manual or contact a certified installer for assistance․

Syncing the Remote with Your Vehicle

Syncing your Viper remote with your vehicle ensures seamless communication between the remote and the car starter system․ Start by turning the ignition to the “ON” position without starting the engine․ Press and hold the valet switch until the LED indicator flashes․ Then, press the “LOCK” button on your remote, followed by the “START” button within five seconds․ The vehicle will respond with a confirmation signal, such as a chirp or a flash of the lights․ Release the valet switch to complete the sync process․ Test the remote by pressing the “START” button to ensure the vehicle responds correctly․ If the remote does not sync, repeat the process or consult your manual for troubleshooting tips․

Troubleshooting Common Issues

Common issues with Viper remote starters include wiring problems, faulty sensors, or incorrect installations․ Check connections, sensors, and error codes to identify and resolve issues efficiently․

Remote Start Activation Problems

Remote start activation issues can occur due to wiring faults, sensor malfunctions, or incorrect system settings․ Symptoms include the engine failing to start or inconsistent remote responses․ Check the hood, door, and trunk switches for proper function, as these often trigger issues․ Verify the tachometer wire connection, especially in manual transmission vehicles․ Ensure the remote fob has a clear signal path and sufficient battery power․ Review the wiring diagram to confirm all connections are secure and correctly routed․ If problems persist, consult a professional installer or refer to the Viper troubleshooting guide for advanced diagnostics and solutions to restore functionality effectively․

Understanding Error Codes and LED Indicators

Modern Viper remote starters use error codes and LED indicators to diagnose issues․ Common codes include flashing LEDs for sensor faults or wiring problems․ A steady LED often indicates a successful remote start, while rapid blinking may signal a failed attempt․ Check the system manual for specific code meanings, such as door switch or hood switch malfunctions․ Use a multimeter to verify connections, especially the tachometer wire, which is crucial for engine synchronization․ If error codes persist, consult a professional installer to resolve wiring or sensor issues promptly․ Proper diagnosis ensures reliable system performance and prevents further complications, keeping your car secure and functional․

Safety and Security Features

The Viper remote car starter includes automatic shut-off and anti-theft protection to ensure your vehicle’s safety․ Features like fail-safe start and engine monitoring provide added security, preventing unauthorized use and potential damage․ These advanced safeguards enhance your driving experience while maintaining peace of mind, ensuring your car remains protected and secure at all times․

Automatic Shut-Off and Anti-Theft Protection

The Viper remote car starter features automatic shut-off, which disables the engine if a problem is detected, ensuring safety․ Its anti-theft protection prevents unauthorized starts, using advanced encryption and rolling code technology․ The system monitors the vehicle’s status, stopping operation if suspicious activity is detected․ This ensures your car remains secure and protected from potential threats․ Regular checks of door, hood, and trunk switches are recommended to maintain optimal performance and security․ These features provide peace of mind, knowing your vehicle is safeguarded against theft and malfunction․ The Viper system prioritizes both convenience and security, offering a reliable solution for modern drivers․

Fail-Safe Start and Engine Monitoring

The Viper remote car starter includes a fail-safe start mechanism to prevent accidental or unauthorized engine activation․ It continuously monitors the vehicle’s engine status, ensuring it only starts when safe conditions are met․ The system checks crankshaft and camshaft sensors to confirm proper engine operation before enabling remote start․ If irregularities are detected, the engine shuts down automatically․ This feature enhances safety by preventing unintended starts, especially in manual transmission vehicles․ Additionally, the engine monitoring function ensures the vehicle operates within normal parameters after remote start, providing an extra layer of protection and reliability for drivers; This technology ensures a seamless and secure remote starting experience․

Maintenance and Upkeep

Regular checks of the Viper remote car starter ensure optimal performance․ Inspect the battery life, update firmware, and verify wiring connections to maintain reliability and functionality over time․

Regular Checks for Proper Functionality

Regular checks are crucial to ensure your Viper remote car starter operates smoothly․ Start by inspecting the battery life in both the remote and your vehicle․ A weak battery can cause inconsistent performance․ Next, verify all wiring connections, especially around the ignition, starter, and door switches, as loose connections can disrupt functionality․ Additionally, test the remote’s range and signal strength to ensure reliable activation from a distance․ Finally, review error codes on the LED indicator, if available, to identify potential issues early․ Addressing these areas during regular maintenance helps prevent unexpected malfunctions and ensures your system remains efficient and secure․

Updating Firmware and Software

Regular firmware and software updates are essential to keep your Viper remote car starter functioning optimally․ These updates often include bug fixes, performance improvements, and compatibility enhancements․ To update, connect the system to a PC or smartphone using the appropriate interface cable or app․ Ensure the device is powered on and in programming mode․ Download the latest firmware from the official Viper website and follow the step-by-step instructions provided․ Avoid interrupting the update process to prevent system corruption․ Once complete, test the remote starter to confirm proper functionality․ If issues arise, consult a professional installer or contact Viper customer support for assistance․ Regular updates ensure your system remains secure and operates seamlessly․

japji sahib vyakhya pdf

Japji Sahib‚ a foundational Sikh scripture‚ is explored in-depth through its Vyakhya‚ offering insights into its spiritual and philosophical essence. This PDF guide provides a comprehensive translation and interpretation‚ making it accessible for seekers of divine knowledge.

Significance of Japji Sahib in Sikhism

Japji Sahib‚ composed by Guru Nanak Dev Ji‚ is a cornerstone of Sikh theology and daily worship. Recited as part of Nitnem‚ it encapsulates the essence of Sikh spirituality‚ offering insights into the nature of the Divine and humanity’s purpose. Its teachings emphasize equality‚ morality‚ and devotion‚ guiding followers toward a balanced life. Considered a universal prayer‚ Japji Sahib transcends cultural boundaries‚ making it a revered text for spiritual seekers worldwide. Its recitation fosters inner peace and clarity‚ making it an integral part of Sikh practice and identity.

Overview of Vyakhya (Commentary) in Sikh Scriptures

Vyakhya‚ or commentary‚ plays a vital role in elucidating the profound spiritual and philosophical concepts within Sikh scriptures. These commentaries provide deeper insights into the teachings of the Gurus‚ helping followers grasp complex ideas. In the context of Japji Sahib‚ Vyakhya offers detailed explanations of its verses‚ making the divine message accessible. Prominent scholars like Professor Sahib Singh have contributed significantly to these interpretations‚ ensuring the preservation of authentic meanings. Today‚ these commentaries are widely available in PDF formats and online resources‚ facilitating easy access for spiritual seekers and scholars alike‚ thus enriching their understanding of Sikh theology.

Renowned Translations and Commentaries

Professor Sahib Singh’s translation of Japji Sahib is widely revered for its authenticity and depth. His work‚ part of Guru Granth Sahib Darpan‚ remains a cornerstone for understanding Sikh scriptures‚ enhancing accessibility for spiritual seekers and scholars alike.

Professor Sahib Singh’s Contributions to Japji Sahib Translation

Professor Sahib Singh‚ a revered Sikh scholar‚ is celebrated for his meticulous translation and commentary on Japji Sahib. His work‚ part of the esteemed Guru Granth Sahib Darpan‚ offers a profound understanding of the scripture. With a systematic approach‚ he unveiled the spiritual and philosophical depth of Japji Sahib‚ making it accessible to both scholars and devotees. His 79-page translation is noted for its clarity and authenticity‚ providing insights into the teachings of Guru Nanak Dev Ji. This seminal work remains a cornerstone in Sikh literature‚ enriching the community’s understanding of its sacred texts.

Other Eminent Scholars and Their Interpretations

Beyond Professor Sahib Singh‚ scholars like Dr. Gurcharan Singh Mehta and Giani Sant Singh Maskeen Ji have contributed significantly to Japji Sahib’s interpretation. Dr. Mehta’s Vichar Darshan Atey Kala offers a philosophical analysis‚ while Maskeen Ji’s works blend spiritual insights with practical wisdom. Their commentaries‚ available in Punjabi and other languages‚ provide diverse perspectives‚ enriching the understanding of Japji Sahib. These scholars’ efforts have made the scripture accessible to a broader audience‚ ensuring its teachings resonate across generations and cultures.

Understanding the Essence of Japji Sahib

Japji Sahib‚ composed by Guru Nanak Dev Ji‚ is a timeless spiritual composition that balances philosophy and devotion‚ guiding seekers on a path of self-realization and divine connection;

Core Teachings and Spiritual Insights

Japji Sahib embodies profound spiritual truths‚ emphasizing the oneness of God‚ self-reflection‚ and detachment from worldly desires. It teaches the divine within and the path to liberation through devotion and service‚ fostering mental clarity and inner peace for those who recite it daily.

Structure and Composition of Japji Sahib

Japji Sahib‚ composed by Guru Nanak Dev Ji‚ is structured into 40 sections‚ each with unique spiritual and philosophical themes. It begins with the Mool Mantar‚ a declaration of God’s oneness‚ followed by 38 Slokas and Pauris‚ and concludes with two Dohras; The composition uses a rhythmic meter and rhyme‚ enhancing its musicality during recitation. This structure not only aids in understanding but also facilitates memorization‚ making it a cornerstone of Sikh devotion and daily Nitnem practice‚ guiding seekers on a path of self-realization and divine connection.

Popular Resources for Learning Japji Sahib

Discover Japji Sahib through YouTube channels offering Gurmukhi lessons and pronunciation guides. Downloadable PDFs with translations and commentaries provide easy access to its divine teachings.

YouTube Channels Like Basics of Sikhi

Channels like Basics of Sikhi offer invaluable resources for learning Japji Sahib‚ including Gurmukhi lessons and pronunciation guides. These platforms provide step-by-step explanations‚ making the scripture accessible to learners of all levels. Videos often include transliterations‚ translations‚ and interpretations‚ helping viewers grasp the spiritual depth of Japji Sahib. Additionally‚ they share stories and insights‚ such as the NASA story‚ which highlights the universal appeal of Sikh scriptures. Such channels are instrumental in preserving and spreading the teachings of Japji Sahib globally‚ ensuring its message reaches a modern audience.

Recommended Books and PDF Guides

For a deeper understanding of Japji Sahib‚ several recommended books and PDF guides are available. Professor Sahib Singh’s Japji Sahib Darpan is a seminal work‚ offering a detailed commentary in Punjabi. Other notable resources include Japji Sahib Vyakhya by Dr. Gurcharan Singh Mehta and Sunn Galaa Aakaas Kee‚ which provide insightful interpretations. These guides often include transliterations and translations in multiple languages‚ making them accessible to global learners. Additionally‚ PDFs like Japji Sahib Nitnem Path offer phonetic translations‚ aiding in accurate recitation. These resources are invaluable for both spiritual seekers and scholars.

Downloading Japji Sahib Vyakhya PDF

Japji Sahib Vyakhya PDFs are available for free download from reliable sources. Quick and accessible links provide easy access to this sacred Sikh scripture online effortlessly.

Reliable Sources for Download

Reliable Sources for Download

Authentic platforms like SikhBookClub‚ DiscoverSikhism‚ and PanjabDigitalLibrary offer secure and free downloads of Japji Sahib Vyakhya PDFs. These sources ensure high-quality‚ accurate translations and interpretations‚ preserving the sacred text’s integrity. They provide easy navigation and quick access‚ making it convenient for devotees worldwide to obtain the PDF. Additionally‚ these websites are trusted within the Sikh community for their commitment to maintaining the purity and authenticity of Guru Granth Sahib Ji’s teachings‚ including Japji Sahib.

Quick Download Links and Accessibility

Several platforms offer quick and easy access to Japji Sahib Vyakhya PDF downloads. Websites like SikhBookClub and DiscoverSikhism provide direct links‚ ensuring seamless accessibility. Mobile apps and online libraries also feature one-click downloads‚ catering to modern convenience. These resources are optimized for various devices‚ making it simple for users to access the PDF on smartphones‚ tablets‚ or computers. The availability of multiple formats further enhances accessibility‚ allowing devotees worldwide to engage with the sacred text effortlessly. This ease of access promotes widespread learning and recitation of Japji Sahib.

Benefits of Reciting Japji Sahib

Reciting Japji Sahib offers profound spiritual growth‚ mental clarity‚ and inner peace. Daily practice fosters a calm and focused mind‚ essential for emotional well-being.

Spiritual and Mental Health Benefits

Japji Sahib holds profound significance for spiritual and mental well-being. Its recitation fosters inner peace‚ connecting one with the divine and offering moral guidance. Mentally‚ it reduces stress and anxiety‚ enhancing focus and clarity. Regular practice uplifts the mind‚ promoting emotional balance and resilience. This sacred text is a powerful tool for spiritual growth and mental harmony‚ ideal for daily reflection and discipline.

Importance of Daily Recitation

Daily recitation of Japji Sahib is a cornerstone of Sikh spiritual practice‚ fostering a deep connection with the divine. It instills discipline‚ clarity‚ and inner peace‚ helping to navigate life’s challenges with resilience. Regular recitation enhances mental focus and emotional stability‚ while its teachings guide ethical living. By integrating Japji Sahib into daily routine‚ individuals cultivate a stronger spiritual foundation‚ promoting personal growth and a balanced life. Consistency in recitation is emphasized for its transformative benefits.

Cultural and Scientific Interest in Japji Sahib

Japji Sahib’s universal teachings have sparked cultural and scientific curiosity‚ with studies exploring its philosophical depth and mental health benefits. Its influence extends beyond spirituality‚ inspiring global research.

Cultural Impact and Community Practices

Japji Sahib deeply influences Sikh cultural practices‚ with daily recitation (Nitnem) being a cornerstone of community life. Gurdwaras worldwide host congregations to recite and reflect on its teachings. Educational initiatives‚ like tolerance programs in schools‚ incorporate its values to foster harmony. Its impact extends to mental health‚ with studies highlighting benefits for emotional well-being. The scripture’s universal appeal is evident in its inclusion in global discussions‚ such as the widely-shared story of NASA scientists studying its wisdom. These practices and discussions underscore Japji Sahib’s enduring relevance in modern society.

Scientific Perspectives and the NASA Story

A fascinating narrative surrounds Japji Sahib’s alleged use by NASA scientists to explore its scientific integrity. According to popular accounts‚ researchers were astonished by the depth of its spiritual and cosmic insights. While the story’s authenticity remains unverified‚ it highlights the scripture’s universal appeal and perceived alignment with modern scientific thought. This narrative has sparked curiosity‚ blending spirituality with science‚ and inspiring further exploration of its teachings in diverse fields‚ making Japji Sahib a subject of interest beyond religious circles.

vermeer manuals pdf

Vermeer Manuals PDF provide essential operation and maintenance guides, ensuring safety and efficiency. They cover troubleshooting, parts, and best practices. Accessible online, these resources support equipment longevity and cost savings.

The Importance of Vermeer Manuals

Vermeer manuals are crucial for ensuring the safe and efficient operation of equipment. They provide detailed guidelines for maintenance, troubleshooting, and proper usage, helping to prevent damage and reduce repair costs. By following these manuals, operators can extend the lifespan of their machines and maintain optimal performance. Additionally, they serve as a valuable resource for diagnosing and resolving common issues, promoting workplace safety and operational efficiency. Their importance lies in empowering users with the knowledge to handle equipment effectively, ensuring longevity and productivity.

Overview of Vermeer Equipment and Manuals

Vermeer manufactures a wide range of equipment, including agricultural, construction, and environmental machinery. Their manuals are comprehensive guides tailored to specific models, offering detailed instructions for operation, maintenance, and troubleshooting. These manuals are designed to enhance user understanding and ensure equipment longevity. They cover essential aspects such as safety protocols, technical specifications, and diagnostic procedures. Regular updates reflect advancements in technology and industry standards, making them indispensable for operators seeking to optimize performance and compliance. Each manual is structured to address the unique needs of its corresponding equipment, ensuring clarity and effectiveness.

Accessing Vermeer Manuals Online

Vermeer manuals are easily accessible online, enabling users to download necessary resources for optimal equipment performance and longevity through the official Vermeer website.

How to Register Your Vermeer Machine for Manual Access

Visit the Vermeer website and navigate to the “Manuals & Documentation” section. Create an account or log in if you already have one. Provide your machine’s serial number and other required details. After registration, verify your account via the confirmation email. Log in to access and download the PDF manuals specific to your machine, including operator and maintenance guides.

Navigating the Vermeer Website for PDF Downloads

To access Vermeer manuals, visit the official website and log in to your account. Navigate to the “Manuals & Documentation” section. Use the search function to find your machine by model or serial number. Select the desired manual type, such as Operator or Maintenance. Click “Download” to retrieve the PDF. Ensure you have the correct browser settings to view or save the document. The website is user-friendly, with clear categories and filters to streamline your search process.

Key Sections of Vermeer Manuals

Vermeer manuals include essential sections like the Operator’s Manual and Maintenance Manual. These provide detailed operation, safety, and maintenance guidelines, ensuring efficient and safe equipment use.

Understanding the Operator’s Manual

The Operator’s Manual is a primary guide for Vermeer equipment, detailing safe operation procedures, safety precautions, and machine components. It outlines basic maintenance tasks and operational guidelines, ensuring safe and efficient use. Studying this manual thoroughly is essential before operating any Vermeer machine to understand its functionality and safety protocols. It serves as a foundational resource for operators, helping them optimize performance while minimizing risks. The manual is structured to be user-friendly, providing clear instructions for everyday operations and maintenance.

Maintenance and Parts Manual: What You Need to Know

The Maintenance and Parts Manual provides detailed instructions for routine upkeep, parts identification, and replacement procedures. It ensures optimal equipment performance and longevity by outlining essential maintenance tasks. This manual is crucial for operators to understand how to identify and address minor issues before they escalate; Additionally, it offers guidelines for extending the lifespan of Vermeer equipment through proper care and timely repairs. Accessing this manual online simplifies maintenance planning and execution, helping users maintain their machines efficiently and effectively.

Maintenance and Troubleshooting

Vermeer manuals PDF provide detailed maintenance schedules and troubleshooting guides, enabling operators to identify and resolve issues efficiently. Regular upkeep ensures equipment longevity and peak performance.

Regular Maintenance Tasks Detailed in the Manual

Vermeer manuals PDF outline essential maintenance tasks, including routine inspections, lubrication schedules, and part replacements. These guides ensure equipment runs optimally, preventing breakdowns and extending lifespan. By following detailed procedures, operators can maintain performance, reduce wear, and uphold safety standards. The manual also provides diagnostic tools to identify potential issues early, allowing for proactive solutions. Regular upkeep, as specified, ensures Vermeer equipment operates efficiently and reliably over time.

Troubleshooting Common Issues with Vermeer Equipment

Vermeer manuals PDF include troubleshooting sections to help identify and resolve common equipment issues. Detailed diagnostic guides and step-by-step solutions empower operators to address problems efficiently. From error codes to mechanical faults, the manual offers clear instructions to restore functionality. This resource reduces downtime and ensures equipment longevity by providing actionable solutions for operators to implement promptly and effectively.

Safety Precautions and Guidelines

Vermeer manuals PDF emphasize safety protocols to prevent accidents. They outline operational risks, hazard prevention, and emergency procedures, ensuring safe equipment use and regulatory compliance for operators.

Safety Procedures Outlined in the Manual

The Vermeer manual provides detailed safety procedures to ensure operator well-being. It outlines pre-operation checks, emergency shutdown processes, and hazard prevention measures. Compliance with these guidelines minimizes risks and ensures safe equipment operation, protecting both the user and the machine. These procedures are essential for maintaining a secure working environment and preventing potential accidents. Adhering to the manual’s safety protocols is crucial for optimal performance and longevity of Vermeer equipment.

Best Practices for Safe Equipment Operation

  • Always wear appropriate protective gear, including safety glasses and gloves, during operation.
  • Ensure the work area is clear of obstacles and bystanders before starting tasks.
  • Follow all guidelines outlined in the Vermeer manual for specific equipment models.
  • Conduct regular inspections of equipment to identify and address potential hazards.
  • Never operate machinery when fatigued or under the influence of substances that impair judgment.
  • Stay alert to surroundings and maintain focus while operating Vermeer equipment.

Benefits of Using Vermeer Manuals

Vermeer manuals offer clear benefits, such as extending equipment lifespan through proper maintenance and enabling cost savings from DIY repairs and maintenance.

Extending Equipment Lifespan Through Proper Maintenance

Proper maintenance is key to extending equipment lifespan. Vermeer manuals provide detailed schedules and procedures, ensuring machinery operates efficiently. Regular lubrication, inspections, and part replacements prevent wear and tear. By following these guidelines, operators can avoid premature breakdowns, reducing downtime and extending the machine’s operational life. This proactive approach not only saves costs but also ensures optimal performance over the long term, making maintenance a critical investment in equipment longevity.

Cost Savings from DIY Repairs and Maintenance

Vermeer manuals enable users to perform DIY repairs and maintenance, reducing reliance on costly professional services. Detailed instructions and diagrams guide operators through routine tasks, minimizing unexpected expenses. By addressing minor issues early, users avoid major repairs, saving money. Additionally, proper maintenance extends equipment lifespan, further reducing long-term costs. Accessing these manuals online ensures convenience, empowering users to handle repairs independently and optimize their budget.

Environmental and Business Benefits

Vermeer manuals promote eco-friendly practices, reducing waste and resource consumption. They also enhance business efficiency through optimized operations and compliance with environmental regulations.

Eco-Friendly Practices Encouraged by Vermeer Manuals

Vermeer manuals emphasize sustainable practices, guiding users to reduce environmental impact. They include energy-efficient operation tips and waste reduction methods. By promoting proper machine maintenance, they help minimize resource consumption and emissions, aligning with global eco-friendly initiatives. These practices not only benefit the environment but also support long-term business sustainability and compliance with environmental regulations, ensuring responsible equipment use.

How Manuals Support Business Efficiency and Compliance

Vermeer manuals provide clear guidelines, ensuring businesses operate efficiently and comply with industry standards. They outline proper maintenance schedules and operational procedures, reducing downtime and enhancing productivity. By adhering to manual instructions, companies can avoid legal issues and ensure equipment meets regulatory requirements. This support for compliance and efficiency helps businesses maintain trust and profitability while optimizing their operations for long-term success.

Future Trends in Vermeer Manuals

Future Vermeer manuals will feature digital advancements, including interactive guides and multimedia elements. These innovations enhance accessibility and user experience, providing operators with efficient, modern tools for equipment management.

Digital Advancements in Manual Accessibility

Digital advancements have revolutionized access to Vermeer manuals, enabling users to download PDF versions online. Registration on Vermeer’s platform allows operators to retrieve manuals swiftly. The integration of search functions ensures quick access to specific topics, enhancing efficiency. Additionally, manuals are available in multiple languages, catering to a global audience. Future enhancements include interactive guides and multimedia features, further improving user experience and accessibility.

Interactive and Multimedia Features in Future Manuals

Future Vermeer manuals will incorporate interactive and multimedia features, enhancing user engagement. Video tutorials, 3D models, and interactive diagrams will simplify complex procedures. Troubleshooting sections may include clickable error codes linked to solutions. These enhancements aim to improve comprehension and efficiency, reducing reliance on static text. The integration of multimedia content will cater to diverse learning preferences, ensuring operators can optimize equipment performance effectively. This evolution in manual design promises to elevate user experience and operational success.

Vermeer manuals are vital for optimal equipment performance, safety, and maintenance. They provide essential knowledge, ensuring longevity and efficiency while promoting cost savings and environmental responsibility through proper documentation.

The Role of Vermeer Manuals in Optimizing Equipment Performance

Vermeer manuals play a crucial role in optimizing equipment performance by providing detailed operation, maintenance, and troubleshooting guidance. They ensure operators understand safety protocols, diagnostic procedures, and repair techniques. By following these manuals, users can extend equipment lifespan, reduce downtime, and enhance productivity. The manuals also emphasize regular maintenance tasks, which are essential for preventing premature wear and tear. Adhering to the guidelines ensures equipment operates at peak efficiency, supporting both business success and environmental sustainability through proper resource management and reduced waste.

Final Thoughts on the Importance of Proper Documentation

Proper documentation is vital for ensuring clarity, consistency, and safety in operating Vermeer equipment. Manuals serve as a reliable resource for operators, detailing essential procedures and safety protocols. Accurate documentation supports compliance with industry standards and provides a foundation for training and troubleshooting. By adhering to the guidelines outlined in Vermeer manuals, users can ensure optimal performance, extend equipment lifespan, and maintain operational efficiency, ultimately supporting both business success and environmental sustainability through responsible equipment management.

nj estate tax return instructions

Understanding the Deadline for Filing New Jersey Estate Tax Return

All New Jersey Estate Tax returns must be filed within nine months of the decedent’s death. Late filing may result in penalties and accrued interest.

Taxes due must also be paid within this period to avoid additional charges. The NJ Tax Portal offers electronic filing options for convenience and efficiency.

1.1. Key Deadline: Nine Months from the Date of Death

The deadline for filing a New Jersey Estate Tax Return is nine months from the decedent’s date of death. This period includes both filing the return and paying any tax owed.

Failure to meet this deadline may result in penalties and interest on the unpaid tax. Timely filing is crucial to avoid additional financial obligations for the estate.

1.2. Importance of Timely Filing and Payment

Timely filing and payment are critical to avoid penalties and interest on the estate tax. Late submissions may delay estate administration and incur additional costs.

Meeting the deadline ensures compliance with state tax laws and prevents further financial burdens on the estate. Accurate and prompt filing helps maintain the estate’s integrity and avoids legal complications.

Determining Whether You Need to File a New Jersey Estate Tax Return

Filing requirements depend on the decedent’s residency and the gross estate value. Estates exceeding specific thresholds must file a return with the state.


Non-resident estates with New Jersey-sourced income may also need to file. Always verify the latest state guidelines for accurate compliance.

2.1. Residency Status of the Decedent

The residency status of the decedent plays a crucial role in determining filing requirements. If the decedent was a New Jersey resident at the time of death‚ their estate may be subject to state estate tax. Residency is typically determined by domicile‚ meaning where the individual intended to permanently reside.

Non-resident decedents generally do not owe New Jersey estate tax unless they hold assets with a New Jersey nexus‚ such as real property. Always verify residency status before proceeding with filings.

2.2. Gross Estate and Adjusted Taxable Gifts Threshold

The gross estate includes all assets‚ such as real estate‚ stocks‚ and personal property‚ minus debts and exemptions. Adjusted taxable gifts are gifts made during the decedent’s lifetime that count toward the estate tax. If the gross estate plus adjusted taxable gifts exceeds a certain threshold‚ a New Jersey Estate Tax Return (Form IT-Estate) must be filed. This threshold applies to resident decedents who died on or after January 1‚ 2017.

Understanding the Tax Basis for New Jersey Estate Tax

The tax basis for New Jersey estate tax is generally the fair market value of assets as of the decedent’s death‚ excluding certain exemptions and deductions.

3.1. Gross Estate Calculation

The gross estate includes the fair market value of all assets owned by the decedent at death‚ such as real estate‚ securities‚ and personal property. It also encompasses certain transfers made during the decedent’s lifetime‚ like gifts. The total is reported on Form IT-R or Form 706‚ ensuring all taxable assets are accounted for accurately. This valuation determines the tax basis for estate calculations.

3.2. Adjusted Taxable Gifts and Exclusions

Adjusted taxable gifts include certain lifetime gifts made by the decedent‚ excluding those protected by the annual exclusion or marital deduction. Gifts exceeding the federal gift tax exemption are added to the gross estate. Specific exclusions‚ such as transfers to charitable organizations or qualified spousal transfers‚ are not subject to taxation. These adjustments are calculated using Form 706 and must be accurately reported to determine the taxable estate value.

Filing the New Jersey Estate Tax Return

The estate tax return must include Form IT-Estate‚ along with required documents like the will‚ appraisals‚ and inventory. Electronic filing is available via the NJ Tax Portal for convenience and accuracy.

4.1. Required Forms and Documentation

When filing the New Jersey Estate Tax Return‚ Form IT-Estate is mandatory. Include a copy of the will‚ trusts‚ appraisals‚ and Form 706. Attach only one copy of each document. Ensure checks are stapled to the payment voucher and placed on top. Executors must provide the decedent’s Social Security number and birthdate or the estate’s federal ID number. Necessary forms and instructions are available on the NJ Tax Portal or from the Division of Taxation.

4.2. Step-by-Step Filing Process

Begin by gathering all required documents‚ including Form IT-Estate‚ wills‚ trusts‚ and appraisals. Log in to the NJ Tax Portal or create an account if needed. Fill out the form accurately‚ ensuring all fields are completed. Upload the necessary attachments securely. Review the submission for errors. Once satisfied‚ submit the return electronically. Print or save a confirmation for records. Keep copies of all submitted materials for future reference.

Calculating the New Jersey Estate Tax

Calculate the tax by applying the applicable exclusion amount to the gross estate and adjusted taxable gifts‚ then subtract deductions and credits as permitted by law.

5.1. Applying the Applicable Exclusion Amount

The applicable exclusion amount is subtracted from the gross estate and adjusted taxable gifts to determine the taxable estate. For New Jersey‚ this amount aligns with federal estate tax exemptions. Ensure accurate calculation by referencing the IRS guidelines for the year of the decedent’s death. Proper application of this exclusion helps minimize the taxable estate and potential liabilities. Always verify the most current figures to ensure compliance with state and federal regulations.

5.2. Deductions and Credits Available

Deductions for funeral expenses‚ debts‚ and administrative costs can reduce the taxable estate. Credits‚ such as the inheritance tax credit‚ may also lower the estate tax liability. Proper documentation is essential to claim these deductions and credits accurately. Consulting official New Jersey tax resources ensures compliance with specific regulations and maximizes potential tax savings.

Payment Options and Penalties

Payments can be made via check‚ electronic funds transfer‚ or credit card. Late payments incur interest and penalties‚ emphasizing timely submission to avoid additional fees.

6.1. methods of Payment

Payment options include checks‚ electronic funds transfer‚ or credit card. Checks must be stapled to the payment voucher and made payable to “New Jersey Inheritance and Estate Tax.” Electronic payments offer convenience and immediate confirmation. Ensure timely payment to avoid penalties and interest. The NJ Tax Portal provides detailed guidance on payment methods and required documentation for a smooth process.

6.2. Consequences of Late Payment

Late payment results in interest accruing on unpaid taxes. Penalties may also apply‚ increasing the total amount owed. Failure to meet deadlines can delay processing and lead to further actions. Timely payment ensures compliance and avoids additional charges. The NJ Division of Taxation emphasizes the importance of meeting deadlines to prevent complications and ensure efficient estate settlement.

Electronic Filing and Online Services

New Jersey offers electronic filing through its Tax Portal‚ enabling efficient submission of estate tax returns. This service provides faster processing and secure transactions for taxpayers.

7.1. New Jersey Tax Portal Features

The NJ Tax Portal offers streamlined filing‚ real-time account access‚ and secure payment options. Taxpayers can submit returns‚ track refunds‚ and manage notices online. Enhanced features include electronic payment options and access to prior-year returns‚ making tax management efficient and user-friendly for estates and their representatives.

7.2. Benefits of Electronic Submission

Electronic submission of the NJ Estate Tax return offers convenience‚ accuracy‚ and faster processing. It reduces errors‚ provides immediate confirmation‚ and allows for secure payment options. Taxpayers can also access their accounts and prior filings‚ streamlining the process and ensuring compliance with state tax requirements efficiently.

Inheritance Tax vs. Estate Tax in New Jersey

New Jersey distinguishes between estate and inheritance taxes. The estate tax applies to the deceased’s assets‚ while the inheritance tax is levied on beneficiaries’ shares.

The estate tax is based on the gross estate’s value‚ whereas the inheritance tax considers the beneficiary’s relationship to the decedent and the amount received.

8.1. Understanding the Difference

The estate tax in New Jersey is calculated on the deceased’s total assets before distribution‚ while the inheritance tax applies to the shares beneficiaries receive. The estate tax focuses on the decedent’s wealth‚ whereas the inheritance tax is based on who inherits and how much they receive. This distinction is crucial for accurate tax reporting and compliance with state regulations.

8.2. How They Interrelate

The New Jersey inheritance tax applies to beneficiaries’ shares‚ while the estate tax is based on the decedent’s total assets. Historically‚ the inheritance tax acted as a credit against the estate tax‚ ensuring the estate paid only the higher of the two. However‚ since the estate tax was phased out‚ the inheritance tax now applies independently‚ focusing on the distribution of assets to heirs.

Fiduciary Responsibilities and Gross Income Tax Return

The fiduciary must file Form NJ-1041 if the estate’s gross income exceeds $10‚000‚ ensuring timely reporting of income and compliance with state tax obligations.

9.1. Filing Form NJ-1041

Fiduciaries of estates or trusts must file Form NJ-1041‚ the New Jersey Gross Income Tax Fiduciary Return‚ if the estate’s gross income exceeds $10‚000. This form reports income‚ deductions‚ and credits. It is crucial to ensure accuracy and timeliness to avoid penalties. The form must be submitted annually‚ reflecting the estate’s financial activity for the tax year.

9.2. Income Threshold for Filing

The fiduciary must file Form NJ-1041 if the estate’s gross income exceeds $10‚000. This threshold applies to both resident and non-resident estates. Executors or administrators are responsible for ensuring the return is filed when required. Failure to meet this threshold may result in legal consequences or penalties. Accurate reporting of income and deductions is essential to comply with New Jersey tax regulations.

Amending a Previously Filed Estate Tax Return

To amend a return‚ file Form IT-Estate with corrected information. Include documentation supporting changes. Amendments must be filed promptly to avoid penalties and ensure accurate tax assessment.

10.1. When and How to Amend

An amendment is necessary if errors or omissions are discovered in the originally filed return. Use Form IT-Estate to correct inaccuracies or provide additional information.

Submit the amended return with supporting documentation to the NJ Division of Taxation. Ensure all corrections are clearly marked and properly signed to avoid processing delays or penalties.

10.2. Required Documentation for Amendments

When amending a New Jersey Estate Tax return‚ include a completed Form IT-Estate with corrections highlighted. Attach updated or additional documentation‚ such as appraisals‚ wills‚ or trust agreements‚ to support changes.

Submit detailed explanations for each amendment and ensure all necessary signatures are present. Include a copy of the original return and any relevant IRS forms‚ such as Form 706‚ if applicable.

Special Considerations for Non-Resident Estates

Non-resident estates with income from New Jersey sources must file a fiduciary return. Ensure accurate reporting of all NJ-derived income to avoid penalties or delays.

11.1. Filing Requirements for Non-Resident Estates

Non-resident estates must file a New Jersey Gross Income Tax Fiduciary Return (Form NJ-1041) if they receive income from New Jersey sources. The filing threshold is $10‚000 or more in gross income. Additionally‚ a New Jersey Estate Tax Return may be required if the estate exceeds the taxable threshold‚ ensuring compliance with state tax regulations. Proper documentation and timely submission are essential to avoid penalties and ensure accurate reporting of all New Jersey-derived income.

11.2. Income from New Jersey Sources

Non-resident estates must report income derived from New Jersey sources‚ such as real estate‚ businesses‚ or investments located within the state. Even if the decedent was not a New Jersey resident‚ income from these sources is subject to state tax. Proper documentation and accurate reporting of such income are essential to ensure compliance with New Jersey tax laws and avoid potential penalties or disputes.

Additional Resources and Forms

Visit the New Jersey Tax Portal for essential forms‚ instructions‚ and tutorials. Key resources include Form NJ-1041‚ IT-Estate‚ and the NJ-1040 filing guide. Contact support for assistance.

12.1. Essential Forms and Instructions

Key forms include the NJ-1041 for fiduciary returns‚ IT-R for inheritance tax‚ and Form IT-Estate for estate tax. Download these from the New Jersey Tax Portal‚ along with detailed instructions and guides. Additional resources like Form NJ-1040 for individual returns and federal Form 706 are also available. The portal offers tutorials and step-by-step filing assistance to ensure compliance and accuracy.

12.2. Contact Information for Assistance

For assistance‚ contact the New Jersey Division of Taxation at (609) 292-5033. Visit their office at 50 Barrack Street‚ Trenton‚ NJ 08695. Phone lines are open Monday to Friday‚ 8:30 AM to 4:30 PM EST. Additional support is available through the NJ Tax Portal’s help section‚ offering tutorials and real-time assistance for filing and payment inquiries.

mppt solar charge controller manual

An MPPT solar charge controller is a device that optimizes energy transfer from solar panels to batteries using Maximum Power Point Tracking technology, ensuring efficient charging and compatibility with various battery types. It is essential for safe and effective solar energy systems, requiring proper installation by qualified professionals.

1.1 What is an MPPT Solar Charge Controller?

An MPPT (Maximum Power Point Tracking) solar charge controller is a device that optimizes energy transfer from solar panels to batteries. It tracks the solar panel’s maximum power point, ensuring efficient energy utilization. Unlike traditional PWM controllers, MPPT technology improves charging efficiency by 15-20%, making it ideal for solar systems. It works with various battery types, adjusts charging based on temperature, and protects against overvoltage and overcurrent, ensuring safe and reliable operation.

1.2 Importance of Using an MPPT Solar Charge Controller

Using an MPPT solar charge controller is crucial for maximizing solar energy efficiency and protecting your system. It ensures optimal energy transfer from panels to batteries, improving overall system performance. MPPT technology enhances energy utilization, especially in varying conditions, and supports compatibility with different battery types. Additionally, it provides temperature compensation and protection against overvoltage and overcurrent, ensuring safe and reliable operation while extending battery lifespan.

Installation and Setup

installing an MPPT solar charge controller requires following the manual carefully, ensuring proper connections of solar panels, battery, and load. Safety precautions and correct wiring are essential.

2.1 Connecting Solar Panels to the MPPT Controller

Connect solar panels to the MPPT controller by ensuring the correct voltage and current ratings. Use appropriate cables and follow the wiring diagram in the manual to avoid reverse polarity. Securely attach the panels to the controller’s solar input terminals, ensuring proper alignment and configuration. Always disconnect the power source before making any connections to prevent damage or electrical hazards.

2.2 Hooking Up the Battery to the Controller

Connect the battery to the MPPT controller by attaching the positive and negative terminals to the corresponding battery input ports. Ensure correct polarity to avoid damage. Disconnect solar panels and loads before connecting the battery. The controller will automatically detect and adjust to the battery voltage. Follow the manufacturer’s guidelines for compatible battery types and ratings. Proper connection ensures safe and efficient charging, preventing overvoltage or damage to the system.

2.3 Connecting the Load to the Controller

To connect the load to the MPPT controller, identify the load terminals on the controller and attach the positive and negative wires from your appliance or device. Ensure the load’s voltage and current requirements match the controller’s specifications. Connect the wires securely to prevent loose connections. Turn off the controller before connecting the load to avoid electrical hazards. Once connected, the controller will regulate power supply to the load, ensuring safe and efficient operation. Always follow the manufacturer’s guidelines for load compatibility and configuration.

Features and Benefits

MPPT solar charge controllers offer high efficiency, advanced tracking technology, and compatibility with various battery types. They ensure optimal energy utilization, overcharge protection, and long battery life.

3.1 Maximum Power Point Tracking (MPPT) Technology

MPPT technology optimizes energy extraction from solar panels by continuously tracking and adjusting to the maximum power point, ensuring efficient energy transfer to the battery. This advanced algorithm adapts to varying solar conditions, such as temperature and irradiance, to maximize energy harvest. Compared to PWM controllers, MPPT technology improves energy utilization by 15-20%, making it ideal for solar systems requiring high efficiency and reliable performance.

3.2 High Efficiency and Energy Optimization

MPPT solar charge controllers achieve high efficiency by optimizing energy transfer from solar panels to batteries. They dynamically adjust to varying solar conditions, ensuring maximum energy capture. This technology minimizes energy loss and enhances system performance, especially in low-light conditions. By continuously tracking the optimal operating point, MPPT controllers deliver superior efficiency compared to traditional PWM controllers, making them ideal for solar systems requiring reliable and high-performance energy management.

3.3 Compatibility with Various Battery Types

MPPT solar charge controllers are designed to work seamlessly with multiple battery types, including lead-acid, lithium-ion, and gel batteries. This versatility ensures compatibility with various solar energy systems, from small-scale installations to industrial applications. The controller automatically detects and adjusts to the battery type, providing optimal charging and preventing damage. This feature enhances system flexibility and ensures safe, efficient energy storage across different configurations and requirements.

3.4 Temperature Compensation and Protection

MPPT solar charge controllers incorporate temperature compensation to adjust charging parameters based on ambient temperature, ensuring optimal battery performance and longevity. Overtemperature protection prevents damage by reducing charge current or disconnecting when temperatures exceed safe limits. This feature safeguards the system from potential overheating, ensuring reliable operation and protecting both the controller and battery from thermal stress.

3.5 LCD Display and Monitoring Capabilities

The MPPT solar charge controller features an LCD display that provides real-time monitoring of system performance, including battery voltage, charge current, and temperature. Advanced models offer PC communication for detailed data analysis and remote monitoring, enabling users to track energy production and adjust settings for optimal efficiency. This feature enhances user control and system transparency, ensuring informed decision-making for solar energy management.

Operation and Maintenance

Regularly check connections, ensure proper settings, and update firmware for optimal performance. Monitor system health and perform routine inspections to maintain efficiency and extend lifespan.

4.1 Understanding the Charging Process

The charging process involves three main stages. First, the MPPT controller tracks the solar panel’s maximum power point to optimize energy harvest; It then adjusts the voltage and current to match the battery’s requirements. Finally, it maintains a float charge to ensure the battery is fully charged without overcharging. This process ensures efficient and safe energy storage.

4.2 Routine Maintenance and Inspection

Regular maintenance ensures optimal performance. Inspect connections for tightness and cleanliness. Check solar panels for dust or debris, cleaning them as needed. Verify battery terminals for corrosion and secureness. Review cable connections to prevent damage or wear. Monitor system settings and update firmware if necessary. Keep the controller cool and dry, avoiding extreme temperatures. Refer to the manual for specific maintenance guidelines tailored to your MPPT controller model.

4.3 Updating Firmware and Software

Regular firmware updates ensure your MPPT controller operates with the latest features and improvements. Check the manufacturer’s website for updates and follow instructions carefully. Use compatible tools or software provided by the manufacturer to avoid system corruption. Always back up settings before updating. Ensure the controller is connected to a stable power source during the update process to prevent interruptions. Updated firmware enhances performance, fixes bugs, and adds new functionalities for optimal energy management.

Troubleshooting Common Issues

This section addresses common issues such as the controller not turning on, battery charging problems, and error codes, providing practical solutions and diagnostic steps.

5.1 Controller Not Turning On

If the MPPT controller fails to power on, check the battery connections for polarity and ensure the supply is correct. Verify fuses or circuit breakers are intact. Inspect for physical damage or loose wiring. Perform a visual inspection of the controller and its terminals. If issues persist, consult the user manual or contact technical support for further assistance.

  • Check battery connections and polarity.
  • Ensure proper power supply to the controller.
  • Inspect fuses or circuit breakers.
  • Verify wiring integrity and connections.

5.2 Battery Not Charging Properly

If the battery is not charging properly, check the solar panel connections for looseness or damage. Ensure the battery terminals are secure and free from corrosion. Verify that the charge settings in the controller match the battery type and voltage. Consult the manual for correct configuration. Additionally, check the state of charge and ensure the controller is not in a “full” state, which may pause charging temporarily.

  • Inspect solar panel and battery connections.
  • Verify charge settings in the controller.
  • Check for corrosion or damage to terminals.
  • Consult the user manual for configuration guidance.

5.3 Solar Panel Performance Issues

If solar panels underperform, check for loose connections, shading, or excessive temperatures. Ensure panels are clean and free from debris. Verify correct configuration and orientation. Low PV yield or high temperature above 40°C can reduce efficiency. Consult the manual for troubleshooting steps to address these issues and restore optimal performance. Regular inspection and maintenance are essential to maintain energy output.

  • Inspect panels for shading or debris.
  • Check connections for tightness and damage.
  • Verify correct orientation and configuration.
  • Refer to manual for temperature compensation settings.

5.4 Error Codes and Solutions

Error codes on an MPPT solar charge controller indicate specific issues. Common codes include “E01” for battery polarity reversal and “E02” for overvoltage. Solutions involve checking connections, ensuring correct battery polarity, and adjusting settings. Refer to the manual for code meanings and troubleshooting steps to resolve issues promptly.

  • E01: Reverse battery polarity – correct wiring.
  • E02: Overvoltage – adjust settings or check PV configuration.
  • E03: Communication error – restart the controller.

Safety Precautions

Adhere to safety guidelines to prevent electrical hazards. Avoid overvoltage and ensure proper connections. Use protective gear and follow installation manuals carefully. Prioritize system and user safety always;

  • Avoid overvoltage and overcurrent conditions.
  • Ensure proper handling and storage.
  • Follow electrical safety guidelines strictly.

6.1 Electrical Safety Guidelines

Ensure safe installation and operation by following electrical safety guidelines. Always disconnect power sources before servicing. Use appropriate fuses and avoid overvoltage conditions. Properly insulate connections to prevent short circuits. Follow manufacturer instructions for wiring and voltage settings. Never bypass safety protections. Ensure all installations are performed by qualified personnel to minimize risks of electrical hazards.

  • Disconnect power before servicing.
  • Avoid overvoltage and overcurrent situations.
  • Use proper insulation for all connections.
  • Follow manufacturer guidelines strictly.

6.2 Proper Handling and Storage

Handle the MPPT solar charge controller with care to prevent damage. Store it in a cool, dry place away from direct sunlight. Avoid exposing it to moisture or extreme temperatures. Ensure the unit is securely packaged during transportation to prevent physical stress. Keep it away from children and pets. Always follow manufacturer guidelines for storage and handling to maintain performance and longevity.

  • Store in a cool, dry environment.
  • Avoid moisture and extreme temperatures.
  • Use protective packaging during transport.
  • Keep out of reach of children and pets.

6.3 Avoiding Overvoltage and Overcurrent

To prevent damage, ensure the system operates within voltage and current limits. Overvoltage can occur if solar panel voltage exceeds the controller’s rated input. Overcurrent may result from excessive solar array size or short circuits. Install appropriate fuses or circuit breakers and ensure wire sizing matches the current requirements. Regularly inspect connections and follow manufacturer guidelines to avoid such issues.

  • Check solar panel voltage against controller ratings.
  • Use proper wire gauges to avoid overcurrent.
  • Install protective devices like fuses or breakers.

Warranty and Support

Manufacturers typically offer a 2-year warranty for MPPT controllers, covering defects in materials and workmanship. Technical support is available through contact information provided in the manual.

7.1 Manufacturer Warranty Details

Most manufacturers offer a warranty period of 1 to 5 years for MPPT solar charge controllers, covering defects in materials and workmanship. The warranty typically includes repair or replacement of faulty units. Registration may be required for extended coverage. Conditions like improper installation or unauthorized modifications can void the warranty. Always refer to the specific terms provided by the manufacturer in the user manual or product documentation.

7.2 Technical Support and Resources

Manufacturers provide comprehensive technical support, including phone, email, and website assistance. Resources like user manuals, FAQs, and troubleshooting guides are available online. Many offer downloadable firmware updates and monitoring software for optimal performance. Customers can access detailed installation and operation guides, ensuring proper setup and maintenance. Technical support teams are available to address specific issues, helping users maximize their MPPT controller’s efficiency and resolve any operational challenges effectively.

7.3 Repair and Replacement Procedures

Manufacturers often provide repair services for defective units, with options for returning faulty controllers for inspection and repair. If repair is not feasible, replacements may be offered under warranty. Users should contact technical support for guidance and ensure compliance with return merchandise authorization (RMA) procedures. Proper documentation and valid warranty coverage are typically required for smooth processing. Always follow the manufacturer’s guidelines to avoid voiding the warranty during repairs or replacements.

An MPPT solar charge controller maximizes energy efficiency and ensures reliable battery charging. Proper installation and regular monitoring are key to optimal performance and longevity.

8.1 Summary of Key Points

An MPPT solar charge controller is essential for maximizing solar energy utilization, offering high efficiency and compatibility with various battery types. It ensures optimal charging and protects against overvoltage and temperature extremes. Proper installation and regular monitoring are crucial for maintaining performance and longevity. Always follow the manufacturer’s guidelines for installation, operation, and troubleshooting to ensure safe and efficient energy management.

8.2 Final Tips for Optimal Performance

Regularly monitor system performance and update firmware to ensure optimal functionality. Keep the controller clean and well-ventilated to prevent overheating. Always follow the manufacturer’s guidelines for installation and maintenance. Check battery connections periodically to avoid power loss. Use compatible solar panels and batteries to maximize efficiency. Ensure proper grounding and fuse installation for safety. By adhering to these tips, you can extend the lifespan and maintain peak performance of your MPPT solar charge controller.

References

Refer to the manufacturer’s official manuals, technical guides, and support resources for detailed instructions and troubleshooting. These documents provide comprehensive information for optimal use and maintenance.

9.1 Recommended Reading and Resources

For comprehensive understanding, refer to official manufacturer manuals like the SmartSolar MPPT Series Manual by Victron Energy and the Tracer AN Series Manual by Renogy. Additional resources include technical guides from AIMS Power and Tycon Solar. Online forums and tutorials provide practical insights, while downloadable PDFs like the MPPT Solar Charger Manual by PowMr offer detailed troubleshooting and installation tips. Visit official websites for the latest updates and support materials.

9.2 Manufacturer Documentation and Guides

Consult the official MPPT Solar Charge Controller Manual by PowMr for detailed specifications and safety guidelines. Victron Energy’s SmartSolar MPPT Series Manual offers advanced troubleshooting and installation tips. Renogy’s Tracer AN Series Manual provides comprehensive operational guidance. AIMS Power and Tycon Solar also publish extensive technical documents. Always refer to the manufacturer’s official guides for specific models like the SmartSolar MPPT 150/35 or TS-SC48-60P-MPPT for accurate information and warranty details;

suzuki book 6 violin pdf

Suzuki Violin Book 6 is a pivotal volume in the Suzuki Method, offering advanced repertoire for skilled students. It includes works like La Folia by Corelli and Handel’s Sonata No. 3, fostering technical mastery and artistic expression.

Significance of Book 6 in the Suzuki Violin Method

Suzuki Violin Book 6 holds a pivotal role in the Suzuki Method, marking a transition to advanced repertoire. It introduces complex works like La Folia and Handel’s Sonata No. 3, challenging students technically and musically. This volume bridges foundational skills and sophisticated artistry, emphasizing nuanced phrasing, bow control, and expressive playing. By mastering these pieces, students develop the precision and musicality needed for higher-level repertoire. Book 6 aligns with Suzuki’s philosophy of nurturing talent through carefully graded materials, fostering confidence and artistry in young violinists. It remains a cornerstone in violin education, preparing students for the demands of advanced classical music.

Overview of the Content and Structure

Suzuki Violin Book 6 is structured to enhance technical proficiency and musical depth. It features renowned compositions like La Folia by Arcangelo Corelli and George Frideric Handel’s Sonata No. 3 in F Major. These pieces are complemented by exercises designed to refine intonation, bowing techniques, and articulation. The book is divided into clear sections, with each piece accompanied by detailed fingerings and bowings. The revised edition includes a violin part and piano accompaniment, ensuring comprehensive practice. This organized approach allows students to progress systematically, building upon earlier volumes and preparing them for more complex repertoire. The structure emphasizes both technical mastery and expressive interpretation, aligning with Suzuki’s holistic teaching philosophy.

Contents of Suzuki Violin Book 6

Suzuki Violin Book 6 includes La Folia by Arcangelo Corelli and Sonata No. 3 in F Major by Handel, along with exercises refining advanced techniques and musicality.

La Folia by Arcangelo Corelli

La Folia by Arcangelo Corelli is a celebrated piece in Suzuki Violin Book 6, showcasing the composer’s mastery of Baroque style. This work, originally from Corelli’s Violin Sonatas, Op. 5, features a theme that has been interpreted and varied by many composers. In the Suzuki arrangement, it challenges students with intricate fingerwork, double stops, and nuanced bowing techniques, while emphasizing musical expression and phrasing. The piece serves as a cornerstone for developing advanced technical skills and stylistic understanding, preparing students for more complex repertoire. Its inclusion in Book 6 highlights its importance in the Suzuki Method’s progression.

Sonata No. 3 in F Major, HWV 370 by George Frideric Handel

Handel’s Sonata No. 3 in F Major, HWV 370 is a cornerstone of Suzuki Violin Book 6, offering students a rich Baroque experience. This sonata, arranged by Suzuki, features three movements that showcase Handel’s melodic brilliance and rhythmic vitality. The work demands precise intonation, articulate bowing, and a strong sense of phrasing, making it an excellent piece for refining advanced techniques. Its inclusion in Book 6 reflects its importance in the Suzuki Method’s curriculum, helping students transition to more complex repertoire while fostering musicality and historical understanding. This sonata remains a beloved and challenging piece for violinists developing their artistic expression.

Other Pieces and Exercises

Alongside the major works, Suzuki Violin Book 6 includes complementary pieces and exercises designed to enhance technical proficiency and musical understanding. These selections expand the student’s repertoire, offering a mix of Baroque and classical styles. Exercises focus on refining specific skills such as finger dexterity, bow control, and intonation. The additional pieces provide opportunities to explore phrasing, dynamics, and articulation in a structured yet engaging manner. Together, they complement the larger works, ensuring a well-rounded musical education and preparation for more advanced repertoire. These elements make Book 6 a comprehensive resource for violinists aiming to master both technique and interpretation.

Structure of the Book

Suzuki Violin Book 6 is structured with a clear layout, featuring a violin part and separate piano accompaniment. The revised edition includes a detailed table of contents, organizing pieces and exercises logically for progressively advancing students.

Violin Part and Piano Accompaniment

The violin part in Suzuki Book 6 is meticulously arranged, providing clear notation for students to master advanced techniques; The piano accompaniment is equally detailed, offering harmonically rich support. Together, these parts create a balanced and engaging musical experience, essential for developing both technical skill and expressive performance. The accompaniment is designed to complement the violin melodies, enhancing the overall musicality. This structured approach ensures that both parts are accessible yet challenging, fostering a collaborative learning environment between violinists and pianists. The clarity and precision in both scores make them invaluable resources for effective practice and performance.

Revised Edition Features

The revised edition of Suzuki Violin Book 6 incorporates enhancements to improve clarity and playability. Edited by J. Berger, it features refined fingerings, bowings, and dynamic markings. The notation is clean and precise, ensuring ease of reading for both students and teachers. Additionally, the revised version includes updated piano accompaniments, providing richer harmonic support. These adjustments maintain the integrity of the original compositions while offering a more polished learning experience. The revised edition is widely regarded for its attention to detail, making it a valuable resource for advancing violinists seeking to refine their technique and musical interpretation.

Downloading Suzuki Violin Book 6 PDF

Suzuki Violin Book 6 is available in PDF format for convenient access. The file includes the violin part and piano accompaniment, ensuring comprehensive practice material. It can be downloaded legally from reputable sources like music education websites or authorized Suzuki Method platforms, ensuring copyright compliance and quality.

Availability of PDF Versions

Suzuki Violin Book 6 is widely available in PDF format, offering both the violin part and piano accompaniment. The PDF includes the revised edition, featuring La Folia and Handel’s sonata. It can be downloaded from various platforms, including music education websites and cloud storage services. The file size is typically around 1MB, making it easy to access and store. Many sources provide free downloads, but ensuring the file is obtained from a reliable and legal source is essential to maintain quality and support copyright compliance. This format is ideal for convenient practice and performance preparation.

Legal and Reliable Sources for Download

Obtaining Suzuki Violin Book 6 in PDF format legally is crucial to support copyright holders and ensure quality. Authorized music publishers and retailers offer digital versions for purchase or download. Platforms like music education websites and trusted online stores provide legitimate access. Some libraries and educational institutions also offer access through subscriptions. Avoid unauthorized sources to maintain the integrity of the material and support the creators. Purchasing or downloading from reputable sources guarantees accurate and complete content, essential for proper learning and performance. Always verify the source’s legitimacy to ensure compliance with copyright laws and receive the highest quality materials.

Importance of Book 6 in Violin Training

Book 6 is a cornerstone in the Suzuki Method, advancing students’ technical and musical skills. It bridges intermediate and advanced repertoire, preparing them for complex pieces and refining artistry.

Technical Challenges and Musicality Development

Suzuki Book 6 presents advanced technical challenges, such as intricate fingerwork, double stops, and nuanced bow control, refining the student’s precision and dexterity. Pieces like La Folia and Handel’s Sonata demand rhythmic accuracy and dynamic contrast, fostering musicality. The repertoire introduces complex ornaments and phrasing, enhancing the student’s ability to interpret Baroque styles. These pieces also require sustained tones and expressive vibrato, deepening the student’s understanding of musical expression. By mastering these challenges, students develop a higher level of technical proficiency and artistic interpretation, preparing them for more advanced repertoire and fostering a deeper connection to the music.

Preparation for Advanced Repertoire

Suzuki Book 6 serves as a bridge to advanced violin repertoire by refining techniques and expanding musical understanding. The intricate works, such as La Folia and Handel’s Sonata, introduce complex rhythms, ornamentation, and phrasing. These pieces enhance the student’s ability to handle multi-movement structures and stylistically varied compositions. By mastering these works, students develop the foundational skills necessary for tackling Bach’s partitas, Mozart’s concertos, and other advanced repertoire. The book’s focus on precision, tone production, and interpretative nuance prepares learners for the demands of more sophisticated music, ensuring a smooth transition to higher-level violin studies.

About the Suzuki Method

The Suzuki Method, developed by Shinichi Suzuki, emphasizes ear training, parent involvement, and step-by-step learning. It fosters musical excellence and character development in students worldwide through nurturing instruction.

Philosophy and History

Philosophy and History

The Suzuki Method, founded by Japanese violinist Shinichi Suzuki, is rooted in the belief that every child can learn. Its philosophy emphasizes ear training, parental involvement, and nurturing instruction. The method grew from Suzuki’s observation that children learn language through immersion, applying this concept to music education. He developed this approach in the mid-20th century, blending technical skill development with musical expression. The method has since become a global standard, fostering not only musical excellence but also character development. Book 6, as part of this system, reflects Suzuki’s vision of creating a musically enriched society through accessible and joyful learning.

Role of Book 6 in the Method

Book 6 plays a crucial role in the Suzuki Method, marking a transition to advanced repertoire. It bridges intermediate and advanced levels, refining technical skills and deepening musical understanding. Pieces like La Folia and Handel’s Sonata No. 3 challenge students to master complex techniques while fostering expressive performance. This book solidifies the method’s philosophy of nurturing talent through carefully sequenced learning, preparing students for more demanding works ahead. It represents a milestone in the Suzuki journey, encapsulating the method’s emphasis on gradual mastery and artistic development.

Suzuki Violin Book 6 is a cornerstone in advanced training, refining technique and artistry. It culminates the method’s philosophy, preparing students for mastery and lifelong musical growth.

Final Thoughts on Suzuki Violin Book 6

Suzuki Violin Book 6 represents the pinnacle of the Suzuki Method, offering a rich and challenging repertoire. It includes masterpieces such as La Folia by Arcangelo Corelli and George Frideric Handel’s Sonata No. 3 in F Major, which are essential for advancing violinists. The book is structured to enhance both technical proficiency and musical expression, making it a vital resource for students nearing the completion of their Suzuki training. The availability of PDF versions provides convenient access for modern learners. This volume not only solidifies skills but also prepares students for more complex repertoire, embodying the Suzuki Method’s emphasis on nurturing talent and passion for music.

printable free wood carving patterns pdf

Discover a variety of printable free wood carving patterns PDF designed for beginners and experienced carvers. These templates offer easy-to-follow designs, from simple to intricate, helping you create beautiful projects with precision. Perfect for practicing techniques, these patterns are readily available online, ensuring you can start carving immediately. They provide a great way to explore your creativity and refine your skills in wood carving.

Overview of Wood Carving as a Hobby

Wood carving is a timeless and rewarding hobby that allows individuals to express creativity while working with natural materials. It involves shaping wood into decorative or functional items, offering a sense of accomplishment and relaxation. Beginners can start with simple projects, such as carving small figurines or patterns, while more experienced carvers can tackle intricate designs. The hobby requires patience, attention to detail, and practice to master various techniques. With the availability of printable free wood carving patterns PDF, newcomers can easily access guides to help them get started. These patterns provide clear designs and instructions, making the learning process enjoyable and accessible for all skill levels.

Importance of Using Patterns for Beginners

Using printable free wood carving patterns PDF is essential for beginners, as they provide clear guidance and structure. These patterns help reduce errors and build confidence by offering step-by-step instructions. They allow newcomers to focus on technique without worrying about design creation. Patterns also simplify the learning process, making complex designs more approachable. By following these templates, beginners can practice fundamental skills, such as tool control and material understanding. Additionally, patterns ensure projects are proportionate and visually appealing, helping to avoid common mistakes. This structured approach enables novices to progress steadily, mastering the basics before moving to more intricate designs.

Printable Wood Carving Patterns for Beginners

Printable free wood carving patterns PDF offer simple, clear designs ideal for newcomers. These templates provide easy-to-follow guidance, making it easier to start carving with confidence and precision.

Basic Wood Carving Tools and Materials

Starting with wood carving requires essential tools like gouges, chisels, mallets, and whittling knives. These tools help shape and detail your designs. For materials, basswood, pine, and birch are popular choices due to their soft, even grain. Always use sharp tools for precise cuts and safety. Sandpaper is also crucial for smoothing surfaces before finishing. Protective gear like gloves and safety glasses is a must. Printable patterns often specify recommended tools and wood types, ensuring beginners can prepare properly. Proper setup and material selection are key to achieving professional-looking results. Start with softwoods and basic tools to build confidence and skills in your carving journey.

How to Print and Prepare Patterns for Carving

To begin, download and print your chosen wood carving pattern PDF on standard paper or tracing paper. Ensure the design is scaled to fit your wood piece using photocopy settings or graphic software. Once printed, carefully cut out the pattern with scissors or a craft knife. For transferring, place the pattern on the wood and trace using a pencil or tracing tool. Secure the paper with tape to prevent shifting. If using tracing paper, flip and redraw the design on the reverse side for clearer lines. This method ensures precise placement and alignment, making it easier to carve accurately. Proper preparation is key to achieving a polished final result.

Popular Sources for Free Wood Carving Patterns PDF

Explore free wood carving patterns PDF from well-known websites, crafting communities, and educational resources. These platforms offer a wide range of designs for all skill levels.

Websites Offering Free Downloads

Several websites provide free wood carving patterns PDF for download, catering to both beginners and experienced carvers. These platforms offer a variety of designs, from simple shapes to intricate details. You can find patterns for projects like animals, decorative motifs, and functional items. Many websites also include tutorials and step-by-step guides to help you get started. Some popular sites offer printable templates specifically designed for wood carving, ensuring accuracy and ease of use. Additionally, certain communities and crafting forums share free PDF patterns created by experienced carvers. These resources are a great way to explore different styles and techniques without cost.

Books and Resources by Lora Irish

Lora Irish, a renowned author and wood carving expert, offers invaluable resources for carvers. Her books, such as Relief Carving the Wood Spirit, provide detailed patterns and techniques for creating intricate designs. Many of her resources are available as free PDF downloads, making them accessible to everyone. These patterns are ideal for both beginners and advanced carvers, covering a wide range of styles and projects. Lora’s work emphasizes step-by-step instructions, ensuring learners can follow along with ease. Her free wood carving patterns are perfect for practicing various techniques, from basic shapes to complex designs, and can be printed for immediate use in your carving projects.

Wood Carving Projects for All Skill Levels

Explore a wide range of wood carving projects suitable for all skill levels. From simple designs to intricate patterns, these projects cater to both beginners and experienced carvers, offering diverse themes and styles to enhance your creativity and skill development.

Simple Designs for Beginners

Start your wood carving journey with simple designs tailored for beginners. These patterns include basic shapes, such as leaves, flowers, and small animals, requiring minimal tools and techniques. Free PDF templates offer clear instructions, ensuring easy tracing and carving. Projects like basic figurines or geometric patterns help build confidence and skill. Many resources, like Lora Irish’s guides, provide step-by-step tutorials for these designs. These simple patterns are perfect for practicing fundamental carving techniques and mastering tool control. They allow you to create beautiful pieces while learning the basics of wood carving, making them an ideal starting point for newcomers to the craft.

Intermediate and Advanced Patterns

For those with more experience, intermediate and advanced patterns offer intricate designs that challenge and refine skills. These include detailed wildlife carvings, ornate floral designs, and complex geometric shapes. Free PDF templates provide precise outlines, enabling carvers to tackle sophisticated projects. Patterns often feature layered designs, requiring advanced techniques like relief carving or deep detailing. Resources like Lora Irish’s guides offer tutorials for these intricate designs. These patterns are ideal for carvers looking to push their creativity and mastery, offering a pathway to creating stunning, professional-grade pieces. They cater to those seeking to elevate their craft beyond basic projects.

Tutorials and Videos to Guide Your Carving Journey

Enhance your carving skills with online tutorials and video guides that provide step-by-step instructions for various patterns. These resources offer demonstrations of techniques, tools, and project execution, ensuring mastery.

Step-by-Step Instructions for Common Patterns

Many printable free wood carving patterns PDF come with step-by-step instructions, making it easier for beginners to follow along. These guides often include detailed diagrams, tool recommendations, and tips for mastering specific techniques. Whether you’re carving simple shapes or intricate designs, the instructions break down each process into manageable steps. Some patterns even include video tutorials or photos to illustrate key stages. This approach ensures that carvers of all skill levels can achieve professional-looking results. By following these guides, you can improve your skills and gain confidence in tackling more complex projects over time.

Videos Demonstrating Carving Techniques

Many websites offering printable free wood carving patterns PDF also provide accompanying video tutorials to guide learners. These videos demonstrate essential carving techniques, such as tool handling, cutting methods, and safety tips. They often feature step-by-step instructions for popular patterns, making it easier for beginners to follow along. Experienced carvers also benefit from advanced tutorials that showcase intricate designs and specialized skills. Platforms like YouTube and crafting sites host these videos, ensuring accessibility for everyone. By combining visual guidance with downloadable patterns, these resources create a comprehensive learning experience, helping carvers of all levels to refine their skills and complete projects successfully.

Thank you for exploring printable free wood carving patterns PDF. These resources make carving accessible to all skill levels, helping you refine your skills and create beautiful projects. Happy carving!

Final Tips for Using Printable Patterns

When using printable free wood carving patterns PDF, ensure the design fits your skill level and project goals. Print patterns on sturdy paper for clarity and durability. Use graphite paper to transfer designs accurately onto wood. Start with simple patterns to build confidence and gradually move to complex designs. Always use sharp tools and follow safety guidelines to avoid accidents. Practice on scrap wood before carving your final piece. Take advantage of tutorials and videos for guidance. Be patient and enjoy the creative process. These patterns are a great way to refine your skills and bring your woodworking ideas to life.

Encouragement to Explore and Create

Embrace the world of wood carving with printable free wood carving patterns PDF as your guide. These templates are designed to inspire creativity and help you grow as an artist. Whether you’re a beginner or an experienced carver, there’s always something new to learn. Explore various styles, from simple designs to intricate details, and let your imagination flourish. Don’t hesitate to experiment with different techniques and materials. Remember, every project is a step forward in your carving journey. Share your creations and connect with other enthusiasts to gain inspiration and motivation. Let these patterns be the starting point for your artistic exploration and enjoyment of wood carving.