jcb 509-42 specs pdf

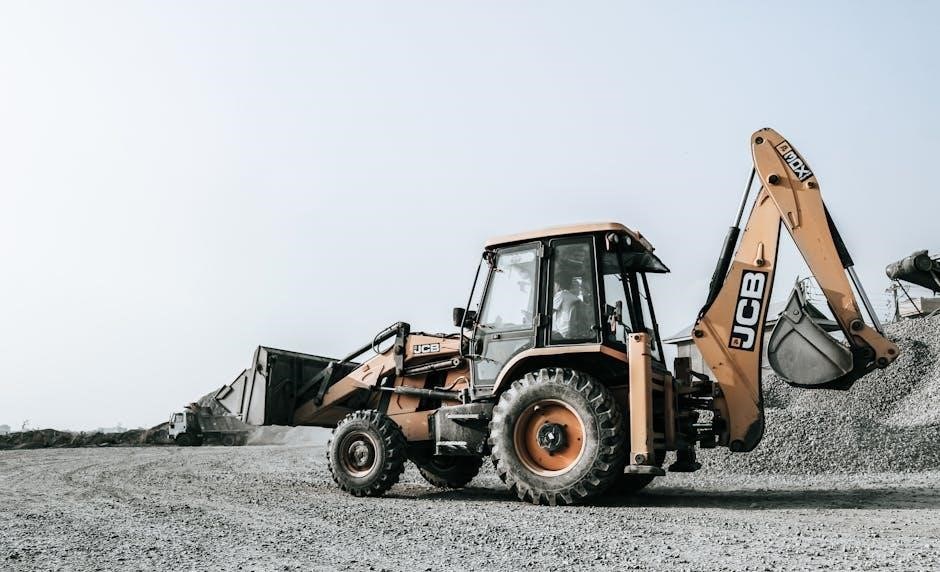
Overview of the JCB 509-42 Telehandler

The JCB 509-42 telehandler offers exceptional versatility and reliability, designed for heavy-duty applications. With a 9,000-pound lift capacity and 42-foot reach, it excels in construction and rental environments, providing operator-friendly features.

1.1 Key Features and Applications

The JCB 509-42 telehandler features a 9,000-pound lift capacity and 42-foot lift height, making it ideal for masonry, framing, and heavy lifting tasks. Its low-effort servo controls, three steering modes, and robust design ensure versatility and reliability. Perfect for construction and rental fleets, this telehandler excels in demanding environments, offering a balance of strength and precision for a variety of applications, from construction sites to industrial settings.

1.2 Lift Capacity and Performance Capabilities

The JCB 509-42 telehandler delivers a maximum lift capacity of 9,000 pounds and reaches 42 feet, ensuring superior performance in heavy-duty tasks. Its robust design and precise controls enable efficient handling of large loads, while the high boom structure enhances operational reach and stability. This telehandler is engineered to consistently deliver reliable performance across diverse applications, making it a valuable asset for industries requiring strong and dependable lifting solutions.

Technical Specifications of the JCB 509-42

The JCB 509-42 features a robust 74hp/55kW engine, permanent 4-wheel drive, and a maximum lift capacity of 9,000 lbs with a 42-foot reach, weighing 22,430 lbs.

2.1 Engine Power and Transmission Details

The JCB 509-42 is powered by a 74hp/55kW diesel engine, offering reliable performance. It features a 4-wheel drive system with epicyclic hub reduction axles and Max-Trac torque proportioning differentials for enhanced traction. The transmission provides smooth power delivery, while the servo-assisted, oil-immersed multi-disc brakes ensure safe operation. This combination ensures optimal efficiency and control, making it suitable for demanding construction environments. The engine’s robust design supports heavy-duty tasks with ease.

2.2 Dimensions and Weight Parameters

The JCB 509-42 has an operating weight of 10,200 kg (22,430 lbs) and a compact design for maneuverability. It features a height of 8 ft 3 in (2.51 m) and a wheelbase of 9 ft 2 in (2.82 m). These dimensions ensure stability while handling heavy loads, making it ideal for construction sites. The machine’s weight distribution enhances its performance, providing a balance between power and agility for various applications.

Safety and Maintenance Features

The JCB 509-42 features pulse radar systems for enhanced safety and gas-assisted hood for easy maintenance access. Daily checks are conveniently accessible at ground level, ensuring efficiency.

3.1 Advanced Safety Systems

The JCB 509-42 is equipped with pulse radar systems to enhance job site safety by preventing accidents. Operators benefit from a 360-degree view, improving awareness and reducing hazards. Additionally, features like standard fit JCB fenders and reverse alarms ensure protection and visibility. The machine’s design prioritizes safety, making it a reliable choice for demanding construction environments. These systems work together to create a secure operating experience.

3.2 Service Intervals and Maintenance Access

The JCB 509-42 features extended 500-hour service intervals, reducing downtime and maintenance costs. Ground-level access to daily checks and greasing simplifies routine maintenance, while the side-mounted engine design allows easy component access. This ensures faster servicing and lower ownership costs compared to competitive models. The extended service intervals make it ideal for busy construction and rental fleets, providing a practical and cost-effective solution for long-term operations.

Operational Performance

The JCB 509-42 excels in maneuverability with a 2.7m turning radius and three steering modes, ensuring precise control and excellent visibility for safe, efficient operation.

4.1 Maneuverability and Steering Modes

The JCB 509-42 offers exceptional maneuverability with a turning radius of 2.7 meters. It features three selectable steering modes: two-wheel, four-wheel, and crab steering. These modes enhance flexibility across various terrains and tight spaces, making it ideal for construction sites. The intuitive controls and responsive handling ensure precise operation, while the advanced steering system adapts to different work environments, optimizing productivity and ease of use.

4.2 Visibility and Operator Comfort

The JCB 509-42 telehandler provides excellent visibility with a 360-degree view, ensuring operators can monitor their surroundings effectively. It is equipped with low-effort servo controls that reduce operator fatigue, and a spacious, ergonomic cab designed for comfort during long work hours. These features enhance productivity and safety, making it an ideal choice for demanding construction tasks.

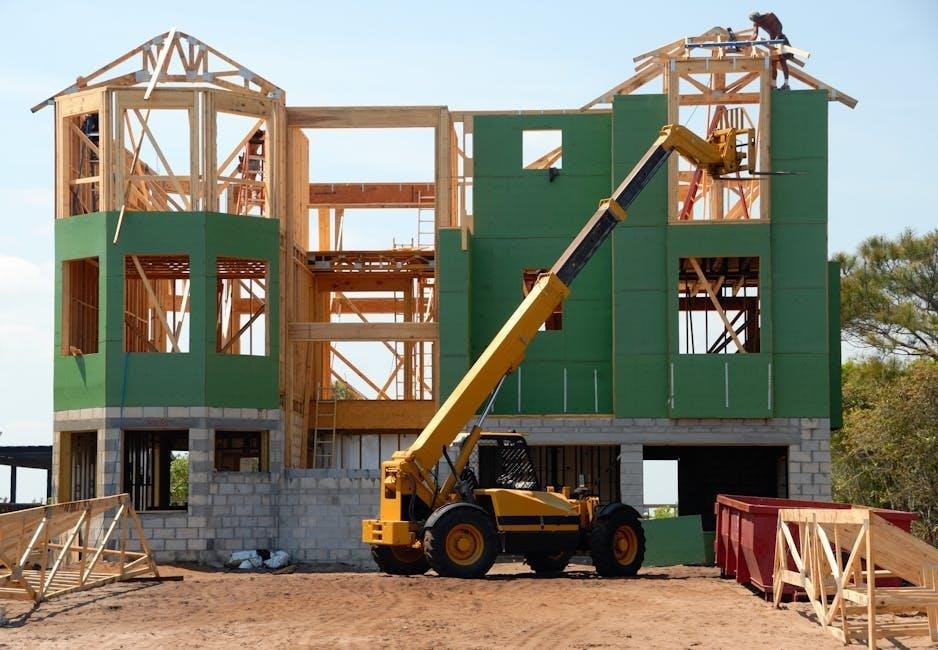
Applications and Industry Use Cases

The JCB 509-42 excels in construction, rental fleets, masonry, and framing. Its robust design and high lift capacity make it ideal for heavy-duty tasks and versatile applications.

5.1 Construction and Rental Fleets

The JCB 509-42 is a cornerstone in construction and rental operations, offering unmatched versatility. Its 9,000-pound lift capacity and 42-foot reach enable efficient material handling on demanding sites. Rental fleets favor its durability and operator-friendly controls, ensuring high utilization rates. With three steering modes and robust engine power, it navigates challenging terrains effortlessly, making it a top choice for construction projects requiring strength and precision.

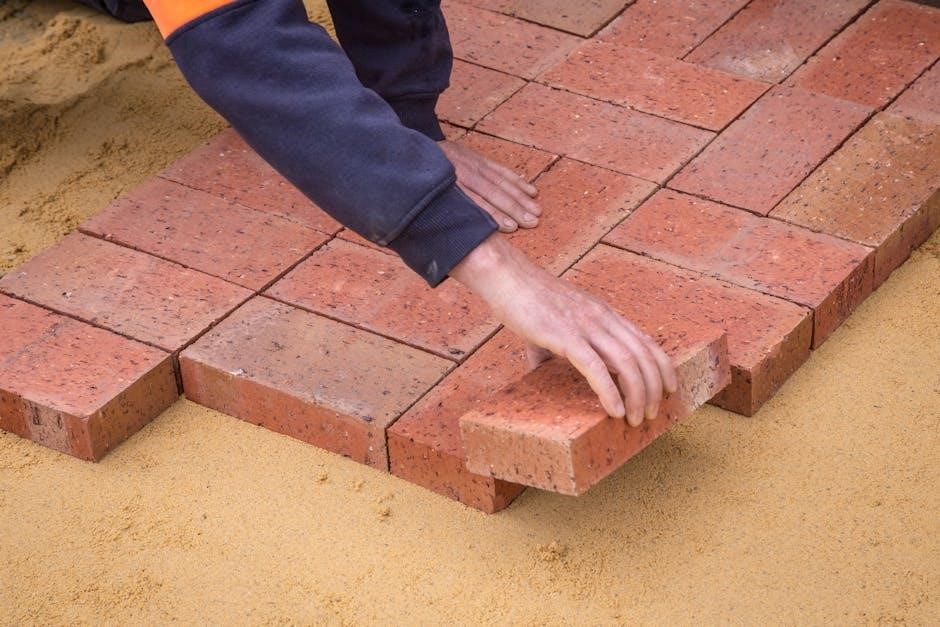
5.2 Masonry and Framing Applications

The JCB 509-42 excels in masonry and framing tasks, offering a 9,000-pound lift capacity and 42-foot reach for precise material placement. Its robust design and maneuverability allow easy handling of heavy bricks, blocks, and framing materials. The telehandler’s high boom design and intuitive controls ensure efficient operation, making it ideal for construction sites requiring quick and accurate placement of structural components. This machine is a reliable solution for demanding masonry and framing projects.

Comparison with Other JCB Models

The JCB 509-42 stands out for its higher lift capacity and maneuverability compared to other models, making it ideal for demanding applications requiring strength and precision.

6.1 JCB 509-42 vs. JCB 508-42

The JCB 509-42 surpasses the JCB 508-42 with a 9,000-pound lift capacity versus 8,000 pounds and a larger turning radius of 2.7 meters compared to 2.5 meters. It offers enhanced maneuverability with three selectable steer modes, making it more versatile for heavy-duty tasks. The 509-42 also features a higher engine power of 74 hp, whereas the 508-42 has 68 hp, ensuring superior performance in demanding applications.

Attachments and Accessories

The JCB 509-42 supports a wide range of attachments, including pallet forks, jibs, and buckets, enhancing versatility across construction and masonry applications with optional accessories.

7.1 Compatible Attachments

The JCB 509-42 telehandler is compatible with various attachments, including pallet forks, crane jibs, and material buckets. These options enhance versatility for construction and masonry tasks. The pallet forks are ideal for handling materials, while the crane jib offers precision for lifting. Material buckets are perfect for earthmoving projects, making the 509-42 adaptable for diverse job site requirements, ensuring efficiency and productivity.

7.2 Optional Features

Optional features for the JCB 509-42 include a self-levelling carriage, pulse radar systems, and a full road lighting package. These upgrades enhance safety, productivity, and machine adaptability. The self-levelling carriage ensures stable loads, while pulse radar improves job site safety. Additional options like single-lever controls and front axle brakes can be tailored to specific operational needs, offering users a customized solution to optimize performance and efficiency in various applications.

Pricing and Cost Considerations

The JCB 509-42 is priced at $131,500 new, with used models ranging from $59,500 to $97,395. Hourly fuel costs average $25, and maintenance is required every 500 hours.

8.1 New and Used Prices

A new JCB 509-42 telehandler is priced at $131,500, offering great value for its performance and features. Used models are available between $59,500 and $97,395, depending on condition and age. These prices make it accessible for both construction fleets and rental businesses, ensuring affordability without compromising on quality and reliability.

8.2 Fuel and Maintenance Costs

The JCB 509-42 has an estimated hourly fuel cost of $25, supporting cost-effective operation. Maintenance costs are minimized with 500-hour service intervals, reducing downtime. Ground-level access to daily checks and greasing simplifies upkeep, ensuring efficiency and lowering ownership expenses over time.

Combining robust performance, reliability, and versatility, the JCB 509-42 excels in construction and rental applications, offering a cost-effective solution with efficient maintenance and operation.

9.1 Summary of Key Benefits

The JCB 509-42 telehandler delivers exceptional performance with a 9,000-pound lift capacity and 42-foot reach, ideal for heavy-duty tasks. Its advanced safety features, including pulse radar systems, enhance job site security. The machine’s maneuverability, with three selectable steer modes, and low-effort servo controls, ensure precise operation. Additionally, ground-level maintenance access and 500-hour service intervals minimize downtime, making it a cost-effective choice for construction and rental fleets.

revelation pdf

The Book of Revelation, written by John, is the New Testament’s final book, featuring prophetic visions and letters to churches. PDFs provide annotated guides for study.

Overview of the Book of Revelation

The Book of Revelation, authored by John, is the New Testament’s final book, offering prophetic visions and letters to early churches. It includes apocalyptic imagery, divine judgments, and ultimate redemption. PDF versions, such as Clarence Larkin’s annotated guide, provide detailed analyses, while free downloads like the New Jerusalem Bible edition offer accessible reading. The text is divided into 22 chapters, beginning with Jesus’ messages to churches and unfolding into visions of heavenly realms and earthly tribulations. Study tools, including note-taking areas in PDFs, enhance comprehension. This book is a cornerstone of Christian eschatology, blending symbolism and moral teachings to inspire reflection and preparation for the future.

Historical Context and Authorship

The Book of Revelation, traditionally attributed to John the Apostle, was written during the late 1st century AD. Exiled to Patmos, John received visions from God, which he recorded. The text reflects the persecution of early Christians under Roman rule, offering hope and encouragement. PDF editions, like Clarence Larkin’s commentary, explore John’s authorship and historical setting. The book’s apocalyptic style aligns with Jewish prophetic traditions, blending symbolism and literal prophecy. Its composition likely occurred around 95 AD, making it a significant text for understanding early Christian theology and eschatology. Digital resources provide historical insights, aiding modern readers in grasping its context and relevance.

Key Themes and Symbols in the Book of Revelation

The Book of Revelation explores themes of divine judgment, redemption, and the ultimate triumph of God. Symbols like the Lamb, 144,000 saints, and the New Jerusalem emphasize eschatological hope.

Apocalyptic Imagery and Visions

The Book of Revelation is renowned for its vivid apocalyptic imagery, including the Four Horsemen, the Beast, and the fall of Babylon. These visions, often symbolic, convey divine judgment and redemption. Clarence Larkin’s guide provides detailed charts and annotations, aiding in understanding these complex scenes. The imagery serves to inspire awe and reflection, highlighting the ultimate triumph of God. PDF resources like Larkin’s work offer deeper insights, making the eschatological visions more accessible for study and reflection.

Moral and Eschatological Teachings

The Book of Revelation emphasizes moral accountability and the ultimate triumph of righteousness. Its eschatological teachings outline divine judgment, urging believers to remain faithful and righteous. PDF guides, such as Clarence Larkin’s, explore these themes, providing annotated insights into the moral lessons embedded in John’s visions. The text underscores the importance of perseverance, warning against spiritual complacency and encouraging believers to align with divine will. These teachings remain central to Christian eschatology, offering both caution and hope as they illuminate humanity’s final destiny and the eternal reign of God.

PDF Resources and Downloads

Popular PDF versions of the Book of Revelation include Clarence Larkin’s annotated guides and the New Jerusalem Bible edition. Tools like LitRes offer easy digital access for deeper study.

Popular PDF Versions of the Book of Revelation

The Book of Revelation is widely available in PDF formats, with notable versions including Clarence Larkin’s annotated guide and the New Jerusalem Bible edition. These PDFs often feature detailed commentary, study notes, and structured outlines to enhance understanding. Many versions are free to download, such as the Rev. Clarence Larkin’s comprehensive analysis, which breaks down the book’s 22 chapters. Additionally, resources like LitRes offer digital access to Revelation in multiple formats, including PDF, epub, and Kindle. These versions cater to both personal study and group discussions, providing a convenient way to explore the apocalyptic visions and moral teachings of the text.

Tools for Studying the Book of Revelation Digitally

Digital tools enhance the study of Revelation, offering annotated PDFs, interactive guides, and mobile apps. PDFs with notes areas allow readers to jot down insights. E-book platforms like LitRes provide access to Revelation in various formats, ensuring convenience. Additionally, video introductions and summaries available online offer quick overviews. These tools facilitate deeper engagement with the text’s apocalyptic imagery and moral teachings, making study accessible anytime, anywhere. They cater to both individual and group settings, enriching the understanding of this complex yet profound book. Digital resources thus play a vital role in modern biblical scholarship and personal devotion.

Modern Interpretations and Relevance

Modern scholars interpret Revelation through cultural and historical lenses, emphasizing its relevance in inspiring personal reflection and offering insights into faith and culture.

Contemporary Perspectives on the Book of Revelation

Modern interpretations of the Book of Revelation emphasize its cultural and historical relevance, offering fresh insights into faith, morality, and societal challenges. Scholars and readers alike explore its apocalyptic imagery through digital tools, such as annotated PDFs and study guides, which enhance understanding. Clarence Larkin’s works remain popular for their detailed analysis, while digital platforms provide accessible resources for deeper engagement. The book’s themes of justice, hope, and transformation resonate in today’s world, inspiring personal reflection and communal dialogue. Its influence extends beyond theology, impacting art, literature, and popular culture, as seen in films and books that draw on its symbolic richness. This versatility ensures the Book of Revelation remains a vital text for modern audiences.

The Book of Revelation in Popular Culture

The Book of Revelation’s vivid imagery and apocalyptic themes have profoundly influenced popular culture. Films, literature, and music often draw inspiration from its symbols, such as the Four Horsemen and the Beast. PDF resources and digital guides analyze these references, offering insights into how Revelation’s themes resonate in modern media. For instance, movies like The Seventh Seal and Mad Max reflect its eschatological motifs. Musicians also incorporate its imagery in lyrics and album art. Additionally, books like The Revelation Space Collection by Alastair Reynolds explore similar cosmic and existential themes. These cultural adaptations highlight Revelation’s enduring impact beyond religious contexts, making it a rich source for creative expression and storytelling across genres. Its influence continues to evolve, ensuring its relevance in contemporary society.

Using Digital Tools for deeper understanding

Digital tools enhance Revelation study through PDF annotations, study software, and online platforms, offering deeper insights and accessible resources for modern learners and scholars alike.

PDF Annotated Versions and Study Guides

PDF annotated versions of the Book of Revelation offer in-depth analysis and commentary, enhancing understanding of its complex symbolism and themes. These resources often include detailed explanations, historical context, and theological insights, making them invaluable for both personal and group study. Study guides complement these PDFs by providing structured frameworks for exploring the text, with features like verse-by-verse breakdowns, discussion questions, and reflective exercises. Many versions, such as Clarence Larkin’s guide, incorporate visual aids like charts and diagrams to clarify apocalyptic imagery. Additionally, digital tools like e-Sword and Logos allow users to annotate and cross-reference scriptures, fostering a richer engagement with the text. These resources cater to diverse learning styles, ensuring accessibility for scholars and casual readers alike.

Future Trends in Digital Scholarship

Future trends in digital scholarship for studying the Book of Revelation include advanced AI-driven tools for textual analysis and machine learning algorithms to uncover hidden patterns; Virtual and augmented reality will create immersive experiences, bringing apocalyptic imagery to life. Blockchain technology may be used to authenticate and preserve digital manuscripts. Crowdsourcing platforms will enable global collaboration, allowing scholars to contribute annotations and interpretations in real time. Additionally, big data analytics will help researchers identify recurring themes and connections across religious texts. These innovations promise to deepen understanding and accessibility of Revelation’s complex symbolism, fostering a new era of interdisciplinary study and engagement with the scripture.

irobot braava jet 240 manual

The iRobot Braava Jet 240 is a versatile mopping robot designed for efficient floor cleaning. It offers both wet and dry cleaning modes, advanced navigation, and ease of use.

1.1 Overview of the iRobot Braava Jet 240

The iRobot Braava Jet 240 is a compact and efficient mopping robot designed for hard floors. It features wet and dry cleaning modes, advanced navigation, and a user-friendly design. The device comes with a charging base and is suitable for various floor types. Regular maintenance, such as cleaning sensors and wheels, ensures optimal performance. The robot can be controlled via the iRobot Home app, offering convenience and customization.

1.2 Importance of the User Manual

The user manual is essential for understanding the iRobot Braava Jet 240’s features, setup, and operation. It provides critical safety guidelines, charging instructions, and maintenance tips. Reading the manual ensures proper use, prevents damage, and helps users troubleshoot common issues. It also guides users on how to customize settings and optimize the robot’s performance for different cleaning needs and floor types.

Key Features of the iRobot Braava Jet 240

The Braava Jet 240 offers advanced navigation, wet and dry cleaning modes, and a compact design for efficient cleaning. It adapts to various floor types seamlessly.

2.1 Navigation and Cleaning Capabilities

The Braava Jet 240 features an advanced navigation system with cliff sensors to avoid stairs and obstacles. It efficiently cleans hard floors using wet or dry modes, adapting to different surfaces. The robot’s compact design allows it to reach tight spaces, ensuring thorough coverage. Regular maintenance, like cleaning sensors and wheels, optimizes its performance and extends longevity.

2.2 Wet and Dry Cleaning Modes

The Braava Jet 240 offers two cleaning modes: wet mopping for deep cleaning and dry sweeping for daily maintenance. Wet mode uses a damp cleaning pad to tackle dirt and stains, while dry mode effectively sweeps floors. Both modes are suitable for hard surfaces, ensuring versatile cleaning options. Regularly replacing pads and maintaining the device ensures optimal performance in both settings.

Safety Precautions and Warnings

Always inspect the battery for damage before use and avoid charging a damaged device. Keep children and pets away while the robot is operating. Ensure the area is clear of obstacles to prevent accidents and maintain the device’s functionality.

3.1 General Safety Guidelines

Always follow safety guidelines when using the iRobot Braava Jet 240. Inspect the battery for damage before each use and avoid charging a damaged device. Keep children and pets away while the robot operates. Ensure the cleaning area is free from obstacles to prevent accidents. Regularly clean the robot’s sensors and wheels for optimal performance. Adhere to all instructions in the manual to ensure safe and effective operation.

3.2 Battery Safety and Charging Instructions

Inspect the battery for damage or leaks before each use. Avoid charging a damaged battery. Use only the provided charger to prevent malfunctions. Keep the charging area dry and away from flammable materials. Monitor charge levels and store the battery in a cool, dry place when not in use. Refer to the manual for detailed charging guidelines to ensure safe and optimal performance.

Setting Up and Activating the Braava Jet 240

Unbox and charge the device fully before first use. Follow the manual for initial setup, ensuring proper activation and preparation for efficient cleaning operations.

4.1 Unboxing and First Impressions

Upon unboxing the Braava Jet 240, you’ll find the robot, a charging base, and necessary accessories. Its compact design and lightweight structure make it easy to handle. The device exudes a modern aesthetic, with intuitive controls that promise simplicity. First impressions highlight its user-friendly nature, designed to streamline floor cleaning tasks efficiently.

4.2 Charging the Device and Initial Setup

The Braava Jet 240 comes with a charging base for convenient power replenishment; Before first use, ensure the battery is fully charged. Carefully remove any packaging materials and place the robot on the charging base. The device will indicate charging via LED lights. Once charged, refer to the manual for pairing and initial setup instructions to prepare the robot for its first cleaning task.

Understanding the Components of the Braava Jet 240

The Braava Jet 240 comprises essential components such as the charging base, navigation system, and cleaning pads, designed to facilitate efficient and adaptive cleaning.

5.1 Main Parts and Accessories

The Braava Jet 240 includes a charging base, cliff sensors, wheels, and cleaning pads. Accessories like wet mopping pads and dry sweeping pads enhance its versatility for different cleaning tasks.

5.2 Cliff Sensors and Navigation System

The Braava Jet 240 features cliff sensors to prevent falls and advanced navigation for mapping spaces. These sensors use infrared technology to detect stairs and ledges, ensuring safe operation. The navigation system adapts to room layouts, optimizing cleaning paths and avoiding obstacles effectively.

Operating Modes and Custom Settings

The Braava Jet 240 offers wet mopping and dry sweeping modes. Users can customize cleaning paths, schedules, and settings for tailored cleaning experiences effortlessly, ensuring efficiency.

6.1 Wet Mopping and Dry Sweeping Modes

The Braava Jet 240 features two primary cleaning modes: wet mopping and dry sweeping. Wet mopping uses a damp cleaning pad for thorough hard floor cleaning, while dry sweeping is ideal for daily maintenance without moisture. Users can easily switch between modes by changing the cleaning pad. This dual functionality ensures versatile cleaning options, catering to different floor types and maintenance needs with minimal effort required.

6.2 Customizing Cleaning Paths and Schedules

The Braava Jet 240 allows users to customize cleaning paths and schedules for tailored cleaning sessions. Using the iRobot app or manual controls, you can define specific areas for cleaning and set daily or weekly schedules. This feature ensures efficient cleaning routines, adapting to your lifestyle and space. Customization enhances productivity, letting you optimize cleaning routes and reduce unnecessary cycles, ensuring a thorough and timely cleaning experience every time.

Maintenance and Care Tips

Regularly clean the device, replace filters, and check brushes to maintain performance. Proper upkeep ensures longevity and optimal cleaning results for your iRobot Braava Jet 240.

7.1 Cleaning the Device and Accessories

Regularly clean the Braava Jet 240 to maintain performance. Wipe the cliff sensors, wheels, and body with a soft cloth. Remove and rinse the water tank and mop pads. Check for debris in the brush or sensors. Avoid using harsh chemicals, as they may damage components. Dry the robot thoroughly after cleaning to prevent moisture buildup. Proper maintenance ensures effective cleaning and extends the device’s lifespan;

7.2 Replacing Filters and Brushes

Regular replacement of filters and brushes ensures optimal cleaning performance. Check and replace the filter every 1-2 months or as needed. Remove the brush compartment, lift out the old brush, and install the new one. Use genuine iRobot parts for compatibility. Properly dispose of old filters and brushes. Refer to the manual for detailed steps and guidelines to maintain your Braava Jet 240’s efficiency and longevity.

Troubleshooting Common Issues

Identify and resolve common issues such as navigation problems or charging errors. Ensure cliff sensors and wheels are clean, check battery health, and restart the device if it stops operating.

8.1 Resolving Navigation Problems

Navigate issues by ensuring cliff sensors and wheels are clean. Restart the device, clear obstacles, and check for software updates. Ensure the robot is placed on a flat surface and avoid blocking its path. If mapping issues occur, reset the device or refer to the manual for advanced troubleshooting steps to restore optimal navigation performance. Regular maintenance can prevent recurring problems. Always follow safety guidelines during troubleshooting.

8.2 Addressing Battery and Charging Issues

Inspect the battery for damage or electrolyte leakage before each use. Avoid charging a damaged battery. Use the provided charging base to ensure proper charging. Clean the charging contacts on both the robot and base. If issues persist, reset the device or consult the manual for troubleshooting. Replace the battery if it no longer holds a charge. Always follow safety guidelines to maintain battery health and performance.

Tips for Optimal Performance

Regularly clean cliff sensors and wheels to ensure smooth navigation. Check for software updates and maintain a stable internet connection. Avoid blocking the robot’s path for uninterrupted cleaning. Clean the water tank and brushes after each use to prevent debris buildup. Refer to the manual for detailed maintenance guidelines to maximize efficiency and longevity.

9.1 Enhancing Cleaning Efficiency

To boost efficiency, clean cliff sensors and wheels regularly to ensure accurate navigation. Use the correct cleaning mode for your floor type and maintain a clutter-free space. Empty the water tank after each use and replace brushes when worn. Keep the robot charged to avoid mid-task interruptions. Refer to the manual for mode-specific tips and maintenance schedules to optimize performance.

9.2 Regular Maintenance for Longevity

Regular maintenance ensures the Braava Jet 240 operates optimally. Clean the cliff sensors, wheels, and brushes frequently to prevent debris buildup. Inspect and replace worn brushes and filters as recommended. Empty the water tank after use and avoid leaving it damp. Check the battery for damage and store it properly when not in use. Follow the manual’s maintenance schedule to extend the product’s lifespan.

The iRobot Braava Jet 240 is a valuable investment for efficient cleaning. Its wet and dry modes, paired with user-friendly design, make it perfect for various floor types. Regular maintenance ensures longevity, providing years of reliable service and satisfaction for users seeking a hassle-free cleaning experience.

10.1 Summary of Key Points

The iRobot Braava Jet 240 is a versatile mopping robot offering wet and dry cleaning modes, advanced navigation, and ease of use. It ensures efficient floor cleaning with minimal effort. Regular maintenance, such as cleaning sensors and replacing brushes, is essential for optimal performance. The user manual provides detailed guidance on setup, safety, and troubleshooting, making it a crucial resource for maximizing the device’s longevity and effectiveness.

10.2 Final Recommendations for Users

For optimal performance, regularly clean the cliff sensors and wheels, and replace brushes as needed. Always follow the user manual’s safety guidelines and charging instructions. Schedule routine maintenance to extend the device’s lifespan. Utilize both wet and dry modes for thorough cleaning. Troubleshoot issues promptly using the manual’s guidance. By adhering to these recommendations, users can enjoy efficient, hassle-free cleaning with their iRobot Braava Jet 240.

paranoia rpg pdf

Paranoia RPG is a iconic tabletop role-playing game set in a dystopian future, where players take on the roles of Troubleshooters in the oppressive Alpha Complex․ The PDF format enhances accessibility, offering a convenient way to explore its dark humor, intricate gameplay, and extensive character development․ With editions like Paranoia XP and the 5th Edition available digitally, the game remains a cult classic, blending satire and strategy in a unique gaming experience․

Overview of the Game and Its Popularity

Paranoia RPG is a cult classic tabletop role-playing game set in a dystopian future within the oppressive Alpha Complex․ Players embody Troubleshooters, tasked with uncovering threats to the Complex while navigating its paranoid bureaucracy․ The game’s dark humor, satirical themes, and unique gameplay mechanics have made it a favorite among RPG enthusiasts․ Its popularity stems from its blend of strategy, storytelling, and player interaction, fostering a tense yet comedic atmosphere․ The PDF format has further expanded its reach, allowing easy access to rulebooks, character sheets, and expansions․ With multiple editions and supplements available digitally, Paranoia RPG continues to attract new players while maintaining its dedicated fan base․

Importance of the PDF Format for Paranoia RPG

The PDF format has significantly enhanced the accessibility and convenience of Paranoia RPG, allowing players and Game Masters to easily access rulebooks, character sheets, and supplements․ Digital versions enable instant downloads, reducing the need for physical storage and making the game more portable․ PDFs also facilitate quick searches, bookmarking, and sharing among players․ Additionally, the format ensures that content remains up-to-date, with updates and expansions readily available․ The rise of digital platforms has introduced Paranoia RPG to a new generation of players, while retaining its nostalgic appeal for long-time fans․ This digital evolution has been instrumental in keeping the game vibrant and accessible in the modern gaming landscape․

Editions of Paranoia RPG Available in PDF

Editions of Paranoia RPG Available in PDF

Popular editions like Paranoia XP, 2nd Edition, and 5th Edition are widely available in PDF format, ensuring accessibility for new and veteran players alike․ The upcoming Perfect Edition further expands this digital offerings․

Paranoia XP Edition

Paranoia XP Edition is a popular version of the game, offering a refined ruleset and enhanced gameplay mechanics․ Available as a PDF, it includes a character sheet for easy reference and features expansions like Robots of Unusual Size and Trouble by the Boxload․ This edition emphasizes the game’s signature blend of dark humor and paranoia, with players navigating a dystopian world filled with mutants, conspiracies, and deadly missions․ The XP Edition is widely praised for its accessibility and depth, making it a favorite among both new and veteran players․ Its digital format ensures convenience, allowing players to access rules, supplements, and adventures effortlessly․ This edition remains a cornerstone of the Paranoia RPG experience, delivering endless hours of thrilling and unpredictable gameplay․

Paranoia 5th Edition

Paranoia 5th Edition is the latest iteration of the beloved RPG, offering a fresh take on the classic gameplay․ Set for release in September 2023, this edition promises enhanced mechanics and new features while maintaining the game’s signature dark humor and paranoia․ Priced at $17․99 for the PDF, it provides an accessible entry point for new players and veterans alike․ The 5th Edition introduces streamlined rules, updated character creation, and exciting new scenarios, ensuring a thrilling experience in the dystopian world of Alpha Complex․ With a focus on player agency and comedic chaos, this edition aims to redefine the Paranoia RPG experience for modern audiences, delivering endless hours of fun and unpredictability in a sleek digital format․

Paranoia 2nd Edition

Paranoia 2nd Edition is a faithful recreation of the original 1980s RPG classic, offering a nostalgic yet engaging experience for both new and veteran players․ Available as a PDF, this edition retains the core gameplay mechanics and dark humor that defined the series․ Players navigate the oppressive world of Alpha Complex, dealing with mutants, traitors, and the ever-watchful Computer․ The PDF format ensures easy access and portability, making it a convenient option for modern gamers․ With its retro charm and timeless themes, Paranoia 2nd Edition remains a beloved choice for those seeking a unique blend of satire and strategy in their tabletop adventures․ Its enduring popularity is a testament to the game’s ability to deliver unforgettable experiences, even decades after its initial release․

Key Features of Paranoia RPG PDF

Paranoia RPG PDF offers detailed character creation, engaging gameplay mechanics, and immersive storytelling․ The digital format enhances accessibility, allowing players to easily reference rules and expansions․ It combines dark humor with strategic gameplay, making it a unique tabletop experience․ The PDF also includes supplements and community mods, enriching the game’s depth and replayability․ Its portability ensures seamless gameplay, whether at home or online, making it a versatile choice for modern gamers․ The Paranoia RPG PDF is a must-have for fans of dystopian adventures and tactical role-playing games․

Character Creation and Development

Character creation in Paranoia RPG PDF is a detailed and engaging process, allowing players to craft unique Troubleshooters with distinct skills and traits․ The system emphasizes player choice, enabling the customization of characters to fit various playstyles․ Characters can earn experience points (XP) to upgrade skills, making them more effective in missions․ The PDF format provides easy access to character sheets and development guides, streamlining the process․ Mutations and secret societies add depth, allowing players to create complex, memorable characters․ The game’s design ensures that each character’s journey is unique, blending humor and strategy․ This system fosters creativity and immersion, making character development a core aspect of the game’s appeal․

Gameplay Mechanics and Rules

Paranoia RPG PDF features a unique blend of dark humor and strategic gameplay, set in the dystopian Alpha Complex․ Players take on the roles of Troubleshooters, tasked with eliminating threats while navigating a web of paranoia and betrayal․ The game mechanics emphasize simple, intuitive rules, with a focus on task resolution and skill checks․ Combat is fast-paced and deadly, while mutations and secret societies add layers of complexity․ The PDF format ensures easy access to rules and references, enhancing gameplay flow․ The Computer, a central AI, dictates the environment, making every mission unpredictable․ This mix of strategy, humor, and intrigue creates a distinctive gaming experience, where trust is scarce and survival is key․

Resources and Supplements for Paranoia RPG

Official PDF releases include character sheets, adventures, and expansions like Paranoia XP and The Perfect Edition․ Community-created mods and supplements further enhance gameplay and customization options․

Official PDF Releases and Expansions

Official PDF releases for Paranoia RPG include core rulebooks like Paranoia XP and the 5th Edition, offering detailed gameplay mechanics and character creation․ Expansions such as Trouble by the Boxload and Robots of Unusual Size provide additional adventures and scenarios, enhancing the game’s depth․ The Perfect Edition, released in 2023, features updated rules and content․ Character sheets and mission briefs are also available in PDF format, aiding players and Game Masters alike․ These official releases ensure a seamless and immersive experience, allowing fans to explore the dystopian world of Alpha Complex with convenience and clarity․ The digital format makes it easy to access and share these resources, keeping the game fresh and engaging for both new and veteran players․

Community-Created Content and Mods

The Paranoia RPG community thrives on creativity, producing a wealth of fan-made content and mods available in PDF format․ Players and enthusiasts create custom character sheets, missions, and rules expansions, sharing them online for free or small fees․ Sites like the-eye․eu host a variety of user-generated PDFs, including adventures and tweaks to existing gameplay mechanics․ These mods often blend humor and complexity, staying true to the game’s dystopian theme․ Community-driven projects like My Life With Master and Simple World inspire new ideas, while forums and social media groups serve as hubs for collaboration․ This vibrant community ensures Paranoia remains dynamic, offering endless possibilities for unique gaming experiences․

Paranoia RPG PDF remains a timeless classic, offering dark humor, engaging gameplay, and endless replayability․ Its PDF format ensures accessibility, making it a staple for both new and veteran players․

Final Thoughts on Paranoia RPG PDF

Paranoia RPG PDF stands out as a masterclass in blending dark humor with strategic gameplay․ Its PDF format ensures accessibility, allowing players to delve into the dystopian world of Alpha Complex effortlessly․ With its rich lore and evolving character dynamics, the game offers unparalleled replayability․ The availability of multiple editions, such as Paranoia XP and the 5th Edition, caters to both nostalgic fans and newcomers․ The digital format also supports community engagement, fostering a vibrant ecosystem of official expansions and fan-created content․ As a cult classic, Paranoia RPG PDF continues to captivate audiences, ensuring its legacy as a cornerstone of tabletop gaming․

rth221b installation manual

The Honeywell RTH221B is a 1-week programmable thermostat designed for easy installation and energy efficiency. It offers compatibility with various HVAC systems, ensuring reliable performance. Manufactured by Resideo Technologies, it comes with a 1-year limited warranty.

1.1 Overview of the RTH221B Thermostat

The Honeywell RTH221B is a 1-week programmable thermostat designed to provide precise temperature control and energy efficiency. It features a straightforward interface with a backlit display, making it easy to navigate and adjust settings. The thermostat is compatible with gas, oil, and electric HVAC systems, ensuring versatility for various home setups. It offers programmable scheduling, allowing users to set different temperatures for different days and times, optimizing energy usage. The RTH221B is pre-programmed for convenience but can be customized to meet specific comfort and energy-saving needs. Its compact design and user-friendly controls make it a practical solution for homeowners seeking reliable temperature management. The thermostat also includes features like a battery-operated design with low-battery alerts, ensuring uninterrupted performance. With its durable construction and advanced functionality, the RTH221B is a popular choice for those looking to upgrade their home’s climate control system.

1.2 Compatibility and System Requirements

The Honeywell RTH221B thermostat is compatible with a wide range of heating, ventilation, and air conditioning (HVAC) systems, including gas, oil, and electric setups. It supports both conventional and heat pump systems, though it is not suitable for heat pumps with auxiliary or backup heat. The thermostat requires a 24V AC power supply and is compatible with systems that use two or more wires. For proper functionality, it must be connected to the correct terminals, such as R, W, Y, G, and C, depending on the system configuration. The RTH221B is designed for residential use and works efficiently with single-stage HVAC systems. It is not compatible with millivolt or high-voltage systems, so users must ensure their HVAC system meets these requirements before installation. Additionally, the thermostat is battery-operated, requiring two AAA alkaline batteries for operation, which should be installed correctly to avoid any malfunctions.

1;3 Safety Precautions and Warranty Information

Before installing the Honeywell RTH221B thermostat, ensure all safety precautions are followed. Turn off power to the HVAC system at the circuit breaker to avoid electrical hazards. Proper wiring is essential to prevent malfunctions or damage. If unsure about connections, consult a licensed electrician. The thermostat is not compatible with heat pumps that have auxiliary or backup heat, so verify system compatibility beforehand. Honeywell offers a one-year limited warranty covering defects in materials and workmanship. If issues arise within this period, the product may be repaired or replaced. The warranty excludes battery-related issues. Manufactured by Resideo Technologies, Inc., the RTH221B is backed by Honeywell’s reputation for reliability. Always follow the user manual’s guidelines for installation and operation to ensure optimal performance and safety.

Installation Steps for the RTH221B Thermostat

Begin by turning off power to the HVAC system. Prepare tools like a screwdriver and wire strippers. Follow wiring instructions, ensuring proper connections to terminals. Mount the thermostat level for aesthetics. Finalize by tightening screws and restoring power.

2.1 Preparing for Installation: Tools and Materials Needed

Before installing the Honeywell RTH221B thermostat, gather essential tools and materials; You will need a screwdriver for removing the old thermostat and mounting the new one, as well as wire strippers for preparing wires. Ensure you have wall anchors or screws for securing the thermostat to the wall. Additionally, check for a level to ensure proper alignment, though leveling is primarily for aesthetics and does not affect functionality. Make sure to have fresh AAA alkaline batteries on hand, as they are required for operation. Refer to the RTH221B installation manual for specific wiring diagrams and instructions. Always turn off power to the HVAC system at the circuit breaker before starting the installation process to avoid electrical hazards. Having all materials ready will streamline the installation and minimize downtime.

2.2 Wiring and Terminal Connections: A Step-by-Step Guide

For the Honeywell RTH221B thermostat, proper wiring is crucial. Begin by turning off the power to your HVAC system at the circuit breaker. Remove the old thermostat and identify the wires by their labels (R, W, Y, G, C, etc.). If labels are missing, consult the wiring diagram in the RTH221B manual. Loosen the terminal screws on the new thermostat and insert the wires, matching them to the corresponding terminals. Secure the wires firmly. If your system uses a jumper between R and Rc, ensure it is removed if connecting to both terminals. For heat pumps, connect O or B, not both. Wrap any unused wires with electrical tape to prevent short circuits. After wiring, double-check all connections to ensure they are correct and secure. Proper wiring ensures safe and efficient operation of your thermostat. Refer to the installation guide for specific instructions tailored to your system type.

2.3 Mounting the Thermostat and Finalizing Connections

Once the wiring is complete, carefully remove the faceplate from the Honeywell RTH221B thermostat. Mount the base plate to the wall using the provided screws or wall anchors, ensuring it is level for proper appearance. If necessary, drill holes in the wall and insert the anchors. Tighten the screws firmly to secure the base plate. Reattach the faceplate by aligning it with the base and snapping it into place. Verify that all wires are securely connected to their respective terminals and not loose. Double-check the wiring configuration against the wiring diagram in the installation manual to ensure accuracy. Finally, turn the power to your HVAC system back on at the circuit breaker and test the thermostat to confirm it is functioning correctly. If issues arise, consult the troubleshooting section of the RTH221B manual for guidance.

Post-Installation Setup and Configuration

After installation, set the clock and day by pressing the SET button and using the up/down arrows. Program your schedule by selecting the desired temperature settings for each day. Test the system to ensure proper operation and address any issues promptly to ensure optimal performance.

3.1 Setting the Clock and Day

Setting the clock and day on your Honeywell RTH221B thermostat is essential for proper operation. Start by pressing the SET button located on the thermostat. Use the up or down arrows to adjust the time to the current hour and minutes. Once the time is set, press SET again to confirm. Next, set the day by pressing the DAY button and selecting the correct day using the arrows. Ensure the time and date are accurate to maintain your programmed schedules effectively. This step ensures your thermostat operates according to your preferences and maintains energy efficiency. Properly setting the clock and day is crucial for all scheduling functions to work correctly. Refer to the user manual for detailed instructions if needed.

3.2 Programming the Thermostat Schedule

Programming the Honeywell RTH221B thermostat allows you to customize temperature settings for different times of the day. Start by pressing the SET button to access the scheduling menu. Use the up and down arrows to adjust the desired temperature for each period. You can set temperatures for wake, leave, return, and sleep times. The thermostat is pre-programmed with default settings, but you can modify them to suit your preferences. Press HOLD to override the schedule temporarily or RUN to resume programmed settings. Ensure the clock and day are correctly set before programming. After configuring your schedule, press DONE to save changes. This feature helps optimize energy usage and maintain comfort throughout the day. Refer to the user manual for detailed step-by-step guidance on programming your thermostat effectively.

3.3 Testing the System and Troubleshooting Common Issues

After installation and setup, test the Honeywell RTH221B thermostat by ensuring it responds to temperature adjustments. If the system does not turn on, verify the wiring connections and check that the system switch is set to the correct mode (Heat/Cool). Common issues include incorrect wiring, which can be resolved by matching labels to terminal letters or consulting the alternate wiring section. If the display is blank, ensure fresh AAA alkaline batteries are installed correctly. For heating or cooling systems that do not respond, check the system switch and ensure it is set to the appropriate mode. Refer to the user manual for troubleshooting tips or visit Honeywell Home Support for additional assistance. If issues persist, contact Honeywell’s customer service at 1-800-468-1502 for further guidance.

crypto cheat guide

Essential Concepts in Cryptocurrency

Cryptocurrency is a digital currency using blockchain technology for secure transactions. Blockchain is a decentralized ledger‚ while mining verifies transactions. Understand wallets and exchanges for safe trading.

1.1 Key Terminology Every Crypto Beginner Should Know

Understanding cryptocurrency starts with key terms. Blockchain is a decentralized ledger recording transactions. Bitcoin is the first cryptocurrency‚ while altcoins are alternatives like Ethereum. Tokens represent assets on a blockchain. A wallet stores crypto‚ with private keys needed to access funds. Mining verifies transactions using powerful computers. Nodes validate the blockchain. Smart contracts are self-executing agreements. DeFi refers to decentralized finance. NFTs are unique digital assets. Gas fees are transaction costs on Ethereum. Forks are updates changing the blockchain rules. Grasping these terms is essential for navigating the crypto world effectively.

1.2 Understanding Blockchain and Its Role in Cryptocurrency

Blockchain is a decentralized‚ digital ledger technology that records transactions securely. It operates through a network of nodes‚ ensuring data integrity without a central authority; Each transaction is stored in a block‚ linked to previous blocks via hashes‚ creating a tamper-proof chain. Cryptography protects data‚ making transactions immutable. Consensus mechanisms‚ like Proof of Work or Proof of Stake‚ validate transactions‚ ensuring network agreement. Blockchain enables transparency‚ security‚ and efficiency‚ forming the backbone of cryptocurrency. It powers decentralized systems‚ including smart contracts and DeFi‚ revolutionizing finance and beyond. Understanding blockchain is crucial for grasping how cryptocurrencies function and their potential to transform industries.

Getting Started with Crypto Trading

Start by selecting a reputable exchange and creating a secure wallet. Set up two-factor authentication for added protection. Purchase your first cryptocurrency‚ then explore trading strategies and tools.

2.1 Choosing the Right Crypto Exchange and Wallet

Selecting a reputable crypto exchange is crucial for secure trading. Look for platforms with strong security measures‚ low fees‚ and a user-friendly interface. Hardware wallets are the safest for storing large amounts‚ while software wallets offer convenience for daily transactions. Exchange wallets are handy but less secure. Always enable two-factor authentication (2FA) for added protection. Compare features like supported cryptocurrencies‚ payment methods‚ and customer support before choosing. For beginners‚ platforms like Coinbase or Binance are recommended due to their simplicity and robust security. Ensure your wallet supports your chosen cryptocurrency and aligns with your trading goals. Educate yourself using crypto cheat sheets and guides to make informed decisions and avoid common pitfalls.

2.2 Buying Your First Cryptocurrency: A Step-by-Step Guide

Purchasing cryptocurrency is straightforward with the right guidance. Start by creating an account on a reputable exchange‚ verifying your identity‚ and enabling two-factor authentication (2FA). Deposit funds using a payment method like a bank transfer or credit card. Navigate to the trading section‚ select the cryptocurrency you wish to buy‚ and enter the amount. Review the transaction details‚ including fees‚ before confirming. Once complete‚ transfer your assets to a secure wallet for safekeeping. Always keep your private keys confidential and avoid sharing sensitive information. Use crypto cheat sheets for tips on minimizing fees and maximizing security. Beginner-friendly exchanges like Coinbase or Binance offer intuitive interfaces for seamless transactions. Remember to stay updated on market trends and risks before investing.

Crypto Trading Strategies for Beginners

Explore strategies like support/resistance‚ trend lines‚ and RSI analysis. Use cheat sheets for patterns and risk management. Start with small investments and stay patient for consistent growth.

3.1 Fundamental Analysis: Evaluating Cryptocurrency Projects

Conducting fundamental analysis involves assessing a cryptocurrency’s underlying value. Start by evaluating the project’s use case and market demand. Review the whitepaper to understand the technology and goals. Check the development team’s credibility and track record. Analyze the tokenomics‚ including supply distribution and coin utility. Research the community support and partnerships‚ as these indicate project viability. Use tools like GitHub repositories to gauge developer activity. Assess regulatory risks and adoption potential. Finally‚ compare the project with its competitors to identify unique strengths. This comprehensive approach helps investors make informed decisions and avoid risky or fraudulent projects.

3.2 Technical Analysis: Reading Charts and Identifying Patterns

Technical analysis involves studying price charts to predict future market movements. Start by analyzing time frames (e.g.‚ 1D‚ 4H‚ or 1H charts) to identify trends. Use indicators like RSI (Relative Strength Index) to spot overbought/oversold conditions‚ MACD for trend strength‚ and Bollinger Bands to gauge volatility; Recognize common patterns such as head and shoulders‚ triangles‚ and wedges‚ which signal potential reversals or breakouts. Pay attention to candlestick patterns like hammer‚ engulfing‚ or Doji candles‚ as they indicate sentiment shifts. Identify support and resistance levels to anticipate price reactions. Combine these tools with volume analysis to confirm the strength of trends. By mastering these techniques‚ traders can make data-driven decisions and improve their market timing.

Security Best Practices

Secure your crypto assets by enabling two-factor authentication (2FA) and safeguarding private keys. Avoid sharing sensitive information and use reputable hardware wallets for added protection.

4.1 Securing Your Wallet: Tips for Protecting Your Assets

To safeguard your cryptocurrency‚ enable two-factor authentication (2FA) and store private keys offline. Use hardware wallets for enhanced security and avoid sharing sensitive information. Regularly update wallet software and avoid suspicious links to prevent phishing. Never disclose your seed phrase to anyone and consider using biometric authentication for an extra layer of protection. Always verify wallet addresses before transactions and use encrypted communication channels. Backup your wallet securely and keep it offline to minimize hacking risks; By following these steps‚ you can ensure your crypto assets remain safe and secure.

4;2 Understanding Two-Factor Authentication (2FA)

Two-Factor Authentication (2FA) adds an extra layer of security to your crypto accounts. It requires a second form of verification‚ such as a code from an authenticator app or a physical token‚ in addition to your password. This makes it harder for hackers to gain unauthorized access. Common methods include Time-based One-Time Passwords (TOTP) and HMAC-based One-Time Passwords (HOTP). Enable 2FA on your exchange and wallet accounts to protect your assets. Always keep your backup codes safe and never share them. If you lose access to your 2FA‚ recovery codes can help restore access. Be cautious of phishing attempts asking for your 2FA codes‚ as legitimate platforms will never request them. Using 2FA significantly reduces the risk of account compromise and is a critical step in securing your crypto assets.

Advanced Topics in Cryptocurrency

Delving into DeFi‚ mining‚ and smart contracts‚ explore how these innovations shape the crypto ecosystem. Discover advanced strategies for maximizing returns and understanding complex blockchain technologies.

5.1 Cryptocurrency Mining: How It Works and Its Importance

Cryptocurrency mining is the process of verifying transactions on a blockchain network. Miners use powerful computers to solve complex mathematical puzzles‚ ensuring transaction security and creating new coins. This process is essential for maintaining the integrity of decentralized networks like Bitcoin and Ethereum. Mining requires significant computational power and energy‚ making it a competitive field. The reward for successful mining includes transaction fees and newly minted coins‚ incentivizing participants. Understanding mining is crucial for grasping how cryptocurrencies operate and their underlying security mechanisms. It plays a vital role in the ecosystem‚ enabling trustless transactions and network consensus without central authority.

5.2 Decentralized Finance (DeFi) and Its Implications

Decentralized Finance (DeFi) revolutionizes traditional financial systems by eliminating intermediaries‚ enabling direct peer-to-peer transactions through blockchain technology. Built on smart contracts‚ DeFi platforms offer services like lending‚ borrowing‚ and trading without centralized control. This shift promotes financial inclusion‚ transparency‚ and reduced fees. Key DeFi components include decentralized exchanges (DEXs)‚ stablecoins‚ and yield farming. While DeFi offers opportunities for passive income and innovation‚ it also introduces risks such as smart contract vulnerabilities‚ market volatility‚ and regulatory challenges. Understanding DeFi is crucial for navigating the evolving crypto landscape and harnessing its transformative potential.

a frame house plans free pdf

A-Frame house plans are popular for their simplicity, durability, and cost-effectiveness. These designs are ideal for cabins, tiny homes, and natural settings. Free PDF plans make them accessible to everyone, offering a perfect solution for affordable and eco-friendly living.

1.1 What Are A-Frame Houses?

A-Frame houses are triangular structures with sloping roofs and angled walls, offering a unique, modern aesthetic. They are known for their simplicity, durability, and cost-effectiveness, making them ideal for cabins, tiny homes, or vacation retreats. These designs often feature open interiors, large windows, and a minimalist charm, perfect for natural settings and eco-friendly living.

1.2 Benefits of A-Frame Houses

A-Frame houses offer affordability, ease of construction, and energy efficiency. Their triangular design provides excellent structural stability and requires minimal materials. Ideal for natural settings, these homes are perfect for cabins, tiny homes, or vacation retreats. Their simplicity and practicality make them a popular choice for those seeking a cost-effective and sustainable living solution.

1.3 Why Choose Free PDF Plans?

Free PDF plans provide cost-effective and accessible designs for building A-Frame houses. They often include detailed floor plans, materials lists, and construction guides, saving you money on architect fees. Printable and customizable, these plans allow you to start your project quickly and efficiently, making them ideal for DIY enthusiasts and budget-conscious builders.

Types of A-Frame House Plans

A-Frame house plans offer versatile designs, ranging from tiny homes to spacious cabins and modern designs. They cater to various needs, ensuring functionality and aesthetics in every layout.

2.1 Tiny A-Frame House Plans

Tiny A-Frame house plans are perfect for minimalists, offering compact yet functional designs. Ideal for small spaces, these plans include layouts like 14×14 and 16×16 designs. They are affordable, easy to build, and suitable for backyard retreats or tiny home offices. Free PDF plans provide detailed materials lists and cost breakdowns, making DIY projects accessible and stress-free.

2.2 A-Frame Cabin Plans

A-Frame cabin plans are ideal for natural retreats, offering cozy and practical designs. Available in sizes like 24×36 feet, these plans include detailed blueprints, materials lists, and construction guides. Perfect for weekend getaways or permanent residences, they emphasize simplicity and functionality. Free PDF templates allow customization, making them a cost-effective option for outdoor enthusiasts seeking a peaceful, rustic lifestyle.

2.3 Modern A-Frame House Designs

Modern A-Frame house designs combine traditional charm with contemporary aesthetics. Featuring open layouts, large windows, and sleek finishes, these plans cater to modern living needs. Double-height ceilings and minimalist interiors add a touch of sophistication. Available in free PDF formats, these designs allow customization, blending functionality with style for a unique, energy-efficient home that stands out in any setting.

Where to Find Free A-Frame House Plans in PDF

Discover free A-Frame house plans in PDF through various websites and marketplaces. Platforms like Etsy and specialized architectural sites offer detailed designs, from tiny homes to modern cabins, ensuring easy access for DIY enthusiasts and builders. These plans often include customizable layouts, materials lists, and structural details for seamless construction.

3.1 Websites Offering Free A-Frame Plans

Explore websites like Etsy, Pinterest, and specialized architectural platforms for free A-Frame house plans in PDF. These sites offer a variety of designs, from tiny homes to modern cabins, with detailed floor layouts, materials lists, and construction guides. Many plans are customizable, catering to different budgets and preferences, making it easy to find the perfect design for your project.

3.2 DIY A-Frame Cabin Plans

DIY A-Frame cabin plans provide detailed instructions for building your own retreat. These plans include materials lists, cost breakdowns, and step-by-step guides. Perfect for beginners, they offer customizable designs, such as a 14×14 tiny A-Frame or a 16×16 layout. Printable PDF templates make it easy to construct a cozy cabin, backyard office, or accessory dwelling unit, saving on architect fees.

3.3 Printable PDF Templates

Printable PDF templates for A-Frame house plans offer ready-to-use designs with 2D and 3D layouts. These templates include scaled drawings, materials lists, and customizable options. Ideal for tiny homes or backyard cabins, they provide a cost-effective way to visualize and construct your project. Affordable and easy to print, they cater to various needs, from simple retreats to functional living spaces.

What’s Included in a Free A-Frame House Plan PDF?

A free A-Frame house plan PDF typically includes detailed floor plans, materials lists, structural details, and cost breakdowns. These resources provide everything needed to start construction, ensuring clarity and organization for builders of all skill levels.

4.1 Floor Plans and Layouts

Free A-Frame house plan PDFs include detailed floor plans and layouts, showcasing room arrangements and spatial organization. These plans often feature scalable designs, such as 14×14 or 16×16 layouts, suitable for tiny homes, cabins, or backyard retreats. The diagrams are printable and easy to customize, catering to various needs and preferences for natural or compact living spaces.

4.2 Materials List and Cost Breakdown

Free A-Frame house plan PDFs typically include a comprehensive materials list and cost breakdown, detailing lumber, roofing, and other essential components. This helps in budgeting and sourcing supplies efficiently. The breakdown often covers tools needed, such as saws and drills, ensuring a smooth construction process for DIY enthusiasts and professionals alike.

4.3 Structural and Framing Details

Free A-Frame house plan PDFs provide detailed structural and framing specifications, including beam spans, roof pitch, and wall framing layouts. These documents often highlight wind load resistance and timber stress calculations, ensuring stability and safety. Diagrams and blueprints guide builders through constructing the frame, making it easier to achieve a durable and structurally sound A-Frame home.

Customizing Your A-Frame House Plan

Customize your A-Frame house plan to suit your needs, whether it’s adapting to different locations, adjusting the size and budget, or adding unique features like lofts or decks.

5.1 Designing for Different Locations

A-Frame house plans can be tailored for various climates and terrains. Adjust roof pitches for snow loads, add decks for scenic views, or modify layouts to suit urban or rural settings. Incorporate local materials and design elements to ensure harmony with the environment, making your A-Frame home functional and aesthetically pleasing wherever you build.

5.2 Adjusting for Budget and Size

Customize A-Frame house plans to fit your budget and space needs. Opt for smaller designs or cost-effective materials to reduce expenses. Adjust floor plans to prioritize functionality while maintaining the A-Frame charm. Scalable designs allow you to build within your means, ensuring your project remains affordable without compromising on quality or aesthetics.

5.3 Adding Unique Features

Enhance your A-Frame house with unique features like modern interiors, large windows, or a deck. Consider energy-efficient designs, such as solar panels or recycled materials. Consider adding a loft or storage spaces to maximize functionality while maintaining the charming A-Frame structure. These customizations allow you to create a personalized, functional, and stylish home tailored to your lifestyle and preferences.

Building an A-Frame House: DIY Guide

Start with essential tools and materials, then follow a step-by-step process. Detailed instructions and diagrams ensure a smooth build, making it easy for beginners to construct their A-Frame home.

6.1 Tools and Materials Needed

Essential tools include power saws, drills, hammers, and measuring tape. Materials required are lumber, screws, nails, roofing, and insulation. A detailed list in free PDF plans ensures you’re prepared, covering everything from framing to finishing. Quality materials and proper tools are crucial for a sturdy and durable A-Frame structure.

6.2 Step-by-Step Construction Process

Start with site preparation and foundation laying. Assemble the A-Frame structure using pre-cut lumber, securing beams with screws. Install roofing materials, ensuring waterproofing. Add walls, doors, and windows according to the plan. Finish with insulation, flooring, and interior details. Free PDF plans provide detailed instructions for each step, guiding you from start to completion.

6.3 Tips for Beginners

Start by carefully reviewing the free PDF plans to understand all components. Gather all tools and materials beforehand to avoid delays. Follow the step-by-step instructions precisely, and don’t hesitate to seek professional help for complex tasks. Begin with a small A-Frame design to gain experience. Stay organized, and remember, patience and precision are key to a successful build.

Energy Efficiency in A-Frame Houses

A-Frame houses offer natural insulation and energy efficiency due to their sloped roofs. Eco-friendly materials and sustainable designs enhance energy performance and minimize environmental impact effectively.

7.1 Sustainable Design Options

A-Frame houses excel in sustainable design with eco-friendly materials and energy-efficient layouts. Passive solar design, recyclable materials, and minimal environmental impact make them ideal for green living. Optimize natural light and ventilation to reduce energy consumption, ensuring a harmonious blend of functionality and ecological responsibility in modern A-Frame constructions.

7.2 Insulation and Climate Control

Proper insulation is crucial for A-Frame houses to maintain energy efficiency. High-quality insulation materials, such as foam board or recycled denim, reduce heat loss in cold climates and keep interiors cool in warmer areas. Strategic window placement and ventilation systems enhance natural airflow, ensuring optimal climate control and comfort year-round.

7.3 Eco-Friendly Building Materials

Eco-friendly materials like reclaimed wood, bamboo, and recycled metal are ideal for A-Frame houses, offering sustainability and durability. Low-VOC paints and natural insulation options, such as wool or cork, promote healthier indoor air quality. These materials not only reduce environmental impact but also enhance energy efficiency, making A-Frame homes a greener choice for modern living.

Affordable A-Frame House Plans

Affordable A-Frame house plans are budget-friendly and easy to access. Free PDF designs reduce costs, offering cost-effective solutions for tiny homes or cabins. Save on architect fees and build efficiently with these practical, eco-friendly plans tailored for affordability without compromising on style or functionality.

8.1 Budget-Friendly Designs

A-Frame house plans offer affordable solutions for building a home or cabin. Free PDF designs provide cost-effective options, with some plans priced as low as $65, reduced from $250. These budget-friendly designs include detailed materials lists and cost breakdowns, making it easy to plan and construct without overspending. Perfect for DIY enthusiasts and those seeking economical living solutions.

8.2 Cost-Effective Materials

Free A-Frame house plans often include lists of cost-effective materials, such as sustainable timber, metal roofing, and recycled components. These materials are durable, eco-friendly, and budget-friendly, ensuring affordability without compromising quality. Detailed plans highlight materials designed to withstand wind loads and bending stress, making construction efficient and economical for DIY builders and professionals alike.

8.3 Saving Money on Architect Fees

Free A-Frame house plans in PDF format eliminate the need for costly architect fees. These detailed plans include blueprints, material lists, and customizable layouts, enabling homeowners to manage their projects independently. By downloading free PDFs, you can design and build your A-Frame home without hiring a professional architect, saving thousands of dollars in the process.

Advanced Features in A-Frame House Plans

A-Frame house plans offer advanced features like multi-bedroom designs, modern interiors, and storage solutions. These customizable options enhance functionality and aesthetic appeal, catering to diverse needs.

9.1 Multi-Bedroom A-Frame Plans

Multi-bedroom A-Frame plans cater to larger families or guests, offering spacious layouts. These designs often feature 2-3 bedrooms, ensuring comfort and functionality. Free PDF plans provide detailed blueprints, materials lists, and customizable options, making it easy to scale the project according to specific needs while maintaining the classic A-Frame charm.

9;2 Modern Interiors and Exteriors

Modern A-Frame designs blend sleek aesthetics with functional layouts. Free PDF plans often include open-concept interiors, large windows, and minimalist decor. Exteriors feature clean lines, natural materials, and eco-friendly elements. These designs cater to contemporary tastes while maintaining the timeless charm of A-Frame structures, offering a perfect balance between style and practicality for modern living.

9.3 Garage and Storage Options

Free PDF plans often include garage and storage solutions tailored to A-Frame designs. These options enhance functionality, offering space for vehicles, tools, and seasonal items. Integrated storage areas maintain the home’s aesthetic while providing practical organization, ensuring your A-Frame house remains clutter-free and efficient for modern living needs.

A-Frame houses are perfect for those seeking simplicity, affordability, and harmony with nature. Free PDF plans make designing and building your dream home accessible and straightforward, ensuring a seamless experience from planning to construction.

10.1 Final Thoughts on A-Frame House Plans

A-Frame house plans are a timeless choice, offering simplicity, affordability, and adaptability for various lifestyles. With free PDF plans readily available, homeowners and DIY enthusiasts can effortlessly bring their vision to life. These designs cater to both cozy retreats and spacious family homes, ensuring a perfect blend of functionality and charm in any setting.

10.2 Encouragement to Start Your Project

Embark on your A-Frame house journey with confidence! Free PDF plans provide a clear roadmap, making it easy to begin. Whether for a cozy cabin or a modern home, these designs are cost-effective and customizable. Start building your dream retreat today and enjoy the satisfaction of creating a space tailored to your needs and preferences.

Additional Resources

Explore recommended books, websites, and online communities for A-Frame house plans. Discover DIY guides, customizable templates, and professional architectural services to support your project journey.

11.1 Recommended Books and Websites

Check out recommended books and websites for detailed guides on A-Frame construction. Websites like Etsy offer modern cabin plans, while ArcSite provides customizable templates. Explore DIY guides and downloadable PDFs, such as the 36-foot A-Frame house plan, for inspiration and practical advice to enhance your building experience.

11.2 Online Communities and Forums

Join online communities and forums dedicated to A-Frame construction. Platforms like Reddit and Facebook Groups offer valuable resources, tips, and discussions. Share ideas, troubleshoot issues, and access free PDF plans. Engage with experienced builders and enthusiasts to gain insights and advice for your A-Frame project, ensuring a smooth and successful building process.

11.3 Professional Architectural Services

Professional architectural services offer customized A-Frame house plans tailored to your needs. Experts provide detailed blueprints, modern designs, and eco-friendly options. These services ensure your plan is functional, sustainable, and aesthetically pleasing. They also include material lists and structural details, making it easier to bring your vision to life with precision and expertise.

ten day smoothie cleanse pdf

The 10-Day Green Smoothie Cleanse is a popular detox program designed to promote weight loss‚ boost energy‚ and enhance overall health․ It involves consuming nutrient-rich green smoothies made from leafy greens‚ fruits‚ and water for ten days․ This cleanse helps eliminate processed foods‚ dairy‚ and caffeine‚ allowing your body to detoxify and burn fat efficiently․ Many participants report significant weight loss‚ improved digestion‚ and increased vitality‚ making it a great way to kickstart a healthier lifestyle․

What is the 10-Day Green Smoothie Cleanse?

The 10-Day Green Smoothie Cleanse is a structured detox program focused on consuming green smoothies made from leafy greens‚ fruits‚ and water․ Designed to last ten days‚ it aims to help participants lose weight‚ increase energy‚ and improve overall health by eliminating processed foods‚ dairy‚ and caffeine․ The cleanse involves drinking three smoothies daily‚ replacing traditional meals‚ and incorporating approved snacks like fruits‚ vegetables‚ and nuts․ It can be followed as a full cleanse‚ where only smoothies and snacks are consumed‚ or a modified version‚ allowing some flexibility for dietary needs․ The program emphasizes detoxification‚ fat burning‚ and nutrient absorption‚ with many reporting significant weight loss and improved well-being․ By focusing on whole‚ nutrient-dense ingredients‚ the cleanse supports the body’s natural detox processes and promotes a healthier lifestyle․

Benefits of the 10-Day Smoothie Cleanse

The 10-Day Green Smoothie Cleanse offers numerous health benefits‚ including significant weight loss‚ enhanced energy levels‚ and reduced cravings․ By focusing on nutrient-rich ingredients‚ the cleanse supports detoxification‚ improving digestion and boosting metabolism․ Participants often experience clearer skin‚ improved mental clarity‚ and a reduction in inflammation․ The program also helps reset eating habits‚ encouraging a healthier diet post-cleanse․ With its emphasis on whole foods‚ it promotes long-term health benefits‚ making it a popular choice for those seeking a sustainable lifestyle change․

How the Cleanse Works

The 10-Day Green Smoothie Cleanse is a structured program where participants consume green smoothies made from leafy greens‚ fruits‚ and water․ It can be done in two ways: the full cleanse‚ which involves three smoothies daily‚ or the modified cleanse‚ allowing for some solid meals․ The program eliminates processed foods‚ dairy‚ meat‚ and caffeine‚ giving the body a break and promoting detoxification․ Snacks like apples‚ vegetables‚ and unsweetened peanut butter are permitted‚ along with water and herbal teas․ The smoothies are designed to be filling and nutrient-rich‚ supporting weight loss‚ energy boosts‚ and overall health improvement․ By focusing on whole‚ natural ingredients‚ the cleanse helps reset digestion and metabolism‚ making it easier to adopt healthier habits beyond the 10 days․

Preparation for the Cleanse

Preparing for the 10-Day Green Smoothie Cleanse involves stocking up on leafy greens‚ fruits‚ and water․ Plan your shopping list‚ understand the cleanse options‚ and gather necessary supplies like a blender and storage containers․

Shopping List for the 10-Day Cleanse

A well-organized shopping list is essential for the 10-Day Green Smoothie Cleanse․ Stock up on leafy greens like spinach‚ kale‚ and collard greens‚ along with a variety of fruits such as apples‚ bananas‚ mangoes‚ and berries․ Include water‚ herbal teas‚ and optional snacks like carrots‚ celery‚ and unsweetened peanut butter․ For the full cleanse‚ focus on fresh‚ organic ingredients to maximize nutrients and detoxification․ Plan your purchases to ensure freshness throughout the ten days‚ and consider pre-washing greens for convenience․ This list will help you stay on track and make delicious‚ healthy smoothies every day of your cleanse․

Understanding the Full Cleanse vs․ Modified Cleanse

The 10-Day Green Smoothie Cleanse offers two approaches: the Full Cleanse and the Modified Cleanse․ The Full Cleanse involves drinking three green smoothies daily for breakfast‚ lunch‚ and dinner‚ with optional snacks like carrots‚ celery‚ or unsweetened peanut butter․ This method is ideal for those seeking maximum weight loss and detoxification‚ with participants often losing 10-15 pounds․ The Modified Cleanse‚ however‚ allows for one smoothie and two solid meals‚ making it more flexible for individuals with dietary restrictions or busy lifestyles․ Both plans promote improved energy and health but cater to different commitment levels․ Choose the option that best fits your goals and daily routine for a successful cleanse experience․

Snacks and Supplements Allowed During the Cleanse

During the 10-Day Green Smoothie Cleanse‚ certain snacks and supplements are permitted to support your detox journey without breaking the cleanse․ Approved snacks include fresh vegetables like carrots‚ celery‚ and broccoli‚ as well as hard-boiled eggs (up to two per day) and unsweetened peanut butter (two tablespoons daily)․ These snacks provide essential nutrients and help curb hunger between smoothies․ Additionally‚ supplements like probiotics and fiber can aid digestion and enhance the cleanse’s effectiveness․ It’s important to stick to these recommended options to maintain the integrity of the program and achieve optimal results․ Always choose organic and unsweetened varieties to avoid processed ingredients‚ ensuring your body receives only the healthiest benefits during the cleanse․

Daily Guide to the 10-Day Cleanse

The 10-Day Green Smoothie Cleanse is structured into three phases: Days 1-4 focus on introducing green smoothies‚ Days 5-7 increase nutrient intake‚ and Days 8-10 emphasize final detox and weight loss․

The first four days of the 10-Day Green Smoothie Cleanse are designed to gently introduce your body to the program․ You’ll consume three green smoothies daily‚ each made with leafy greens like spinach‚ kale‚ or spring mix‚ along with fruits and water․ These smoothies are nutrient-dense and filling‚ helping you transition from processed foods to a cleaner diet․ During this phase‚ it’s important to stay hydrated by drinking water or herbal tea between smoothies․ Your body may experience initial detox symptoms like mild headaches or fatigue‚ but these typically subside as your system adjusts․ Listen to your body and rest when needed․ The goal is to ease into the cleanse‚ allowing your digestive system to heal and your energy levels to stabilize․ By Day 4‚ many participants report feeling more vibrant and prepared for the next phase of the program․

Day 5-7: Increasing Nutrient Intake

Days 5-7 of the 10-Day Green Smoothie Cleanse focus on boosting your nutrient intake with more diverse and vibrant smoothie recipes․ You’ll continue to have three smoothies daily‚ but the ingredients will vary to ensure you’re getting a wide range of vitamins and minerals․ Expect to see recipes that combine leafy greens like spinach or kale with fruits such as apples‚ mangoes‚ and pineapples․ These combinations not only enhance flavor but also provide a broad spectrum of nutrients․ During this phase‚ your body is fully adjusted to the cleanse‚ and many people notice increased energy levels and improved digestion․ Optional snacks like apples‚ carrots‚ celery‚ or unsweetened peanut butter (in moderation) can be added if needed․ This phase is designed to maximize the detox benefits while keeping you nourished and satisfied‚ setting the stage for the final days of weight loss and renewal․

Day 8-10: Final Detox and Weight Loss Boost

Days 8-10 mark the final phase of the 10-Day Green Smoothie Cleanse‚ where the focus shifts to intensifying detox efforts and accelerating weight loss․ The smoothies during this phase are designed to be even more nutrient-dense‚ with ingredients like lemons‚ ginger‚ and celery to enhance detoxification․ Many participants experience a significant boost in energy levels and notice visible weight loss‚ with some reporting up to 10-15 pounds lost by the end of the cleanse․ This phase is crucial for resetting your metabolism and cravings‚ helping you adopt healthier eating habits post-cleanse․ By day 10‚ your body should feel lighter‚ your mind clearer‚ and your overall health improved․ The final days are a celebration of your commitment to your well-being‚ setting you up for a refreshed and revitalized start to your journey toward a healthier lifestyle․

Frequently Asked Questions

Will I Lose Weight on the Cleanse? Yes‚ most participants experience weight loss‚ typically 10-15 pounds‚ due to the detox and reduced calorie intake․ Can I Modify the Cleanse? Yes‚ adjustments can be made to suit dietary needs․ What Snacks Can I Have? Options include fruits‚ vegetables‚ and unsweetened peanut butter․

Will I Lose Weight on the Cleanse?

Losing weight on the 10-Day Green Smoothie Cleanse is a common outcome for many participants․ The program focuses on replacing processed foods with nutrient-dense smoothies‚ which naturally reduces calorie intake and promotes fat burning․ By incorporating leafy greens‚ fruits‚ and water‚ the smoothies help suppress appetite and increase metabolism․ Many users report losing between 10 to 15 pounds during the cleanse‚ with some experiencing even greater weight loss․ The cleanse also helps reduce bloating and improves digestion‚ contributing to a slimmer appearance․ However‚ individual results may vary based on starting weight‚ activity levels‚ and adherence to the program․ It’s important to note that while weight loss is a significant benefit‚ the cleanse also aims to improve overall health and energy levels‚ making it a holistic approach to wellness․

Can I Modify the Cleanse for My Dietary Needs?

Yes‚ the 10-Day Green Smoothie Cleanse can be adapted to suit various dietary preferences and needs․ For example‚ if you’re vegan or vegetarian‚ you can substitute certain ingredients in the smoothie recipes to align with your diet․ Additionally‚ if you have specific allergies or intolerances‚ such as to nuts or certain fruits‚ you can replace those ingredients with alternatives that work for you․ Many participants find success by customizing the cleanse while still following its core principles of using leafy greens‚ fruits‚ and water․ JJ Smith’s program also provides guidance for modifying the cleanse‚ ensuring it’s accessible to individuals with diverse dietary requirements․ This flexibility makes the cleanse a practical choice for those looking to improve their health without feeling restricted by rigid rules․

What Snacks Can I Have During the Cleanse?

During the 10-Day Green Smoothie Cleanse‚ snacks are optional but should align with the program’s principles․ Allowed snacks include fresh fruits like apples‚ crunchy vegetables such as carrots‚ celery‚ and broccoli‚ and up to two hard-boiled eggs per day․ Unsweetened peanut butter (up to two tablespoons daily) is also permitted․ These snacks are designed to provide satiety and nutrients without breaking the cleanse’s detoxification process․ It’s important to choose snacks that fit your version of the cleanse—full or modified․ Staying hydrated with water or herbal teas is also encouraged․ Remember‚ the focus is on whole‚ unprocessed foods to support your body’s natural detoxification․ If you opt for snacks‚ keep portions controlled and ensure they complement your smoothie-based meals for optimal results․

The 10-Day Green Smoothie Cleanse is a transformative program that offers numerous health benefits‚ including weight loss‚ increased energy‚ and improved overall well-being․ By incorporating nutrient-dense green smoothies and eliminating processed foods‚ participants can detoxify their bodies and reset their eating habits․ The cleanse is flexible‚ allowing individuals to choose between a full or modified plan‚ making it accessible to various lifestyles and dietary needs․ Many users have reported significant weight loss‚ with some shedding up to 15 pounds‚ and experienced enhanced mental clarity and reduced cravings․ The program’s emphasis on whole foods and balanced nutrition ensures that the results are sustainable beyond the ten days․ For those looking to embark on a journey toward better health‚ the 10-Day Green Smoothie Cleanse provides a practical and effective starting point․